AgX
AgX is an open-source preset-first photo editing library and command-line tool, written in Rust. It edits raw and JPEG images using portable, human-readable TOML presets — designed for batch processing, reproducible looks, and integration into automated pipelines, not as a Lightroom replacement.

Where to start
This site is organized using the Diataxis framework. Pick the section that matches what you want to do:
- Install — install the CLI and verify it works.
- Tutorials — learning-oriented walkthroughs. Start here if you are new to AgX.
- How-to guides — task-oriented recipes. Start here if you know what you want to do but not how.
- Reference — exhaustive lookup material. The CLI reference, preset format reference, and conceptual reference live here.
- Explanation — discussion-oriented background. How AgX's algorithms work and why they were designed that way.
The library API reference is rendered separately via rustdoc and lives at /api/.
Project repository
Source, issues, and contribution guide live on GitHub.
Install
AgX is published on crates.io and installs with a single cargo command.
System prerequisites
The CLI binary links against LibRaw (for raw decoding) and libheif (for HEIC/HEIF decoding). Library users who enable the raw or heic features also need the corresponding system library:
# macOS
brew install libraw libheif

# Debian/Ubuntu
sudo apt install libraw-dev libheif-dev libheif-plugin-libde265
If you skip these, cargo install agx-cli fails at link time with a missing-library error.
If you only want to build the agx-photo library without raw or HEIC support, you can opt out of those features in your Cargo.toml — see Use as a Rust library below.
Install the CLI
cargo install agx-cli
This builds the CLI and its dependencies (including the GPU render path via wgpu) and places the agx binary in ~/.cargo/bin/. Make sure that directory is on your PATH — Cargo prints a one-line warning if it is not.
The first build can take a few minutes because the GPU stack is large. Build caches help on subsequent installs.
Verify the install
agx --help
Expected output: a usage banner that lists the apply, edit, batch-apply, batch-edit, and multi-apply subcommands.
If cargo install succeeds but agx --help says "command not found", your shell hasn't picked up ~/.cargo/bin/. Add it to your PATH (in ~/.bashrc or ~/.zshrc) and start a new shell.
Use as a Rust library
AgX is also published as a library crate, under the name agx-photo on crates.io (the bare agx name is taken by an unrelated crate). The Rust crate name remains agx, so existing use agx::... imports work unchanged.
Add it to your Cargo.toml:
[dependencies]
agx-photo = "0.1"
With raw format support:
[dependencies]
agx-photo = { version = "0.1", features = ["raw"] }
With HEIC/HEIF format support:
[dependencies]
agx-photo = { version = "0.1", features = ["heic"] }
To enable both, list them together: features = ["raw", "heic"].
Library API documentation is at docs.rs/agx-photo.
Next steps
- Getting Started tutorial — edit your first photo with AgX in under 10 minutes.
- CLI reference — every subcommand and flag.
Getting started with AgX
Assumes AgX is installed — see Install.
In ten minutes, you'll edit your first photo two ways: by applying a preset (one command, full look) and by tweaking inline parameters (the slider model underneath). Both produce a real PNG on disk.
This tutorial uses a sample image and preset bundled in the AgX repository. If you cloned the repo, run the commands from its root. If you installed via cargo install agx-cli only, download the example/ directory or swap the paths for your own image and preset.
Apply a preset
Run:
agx apply \
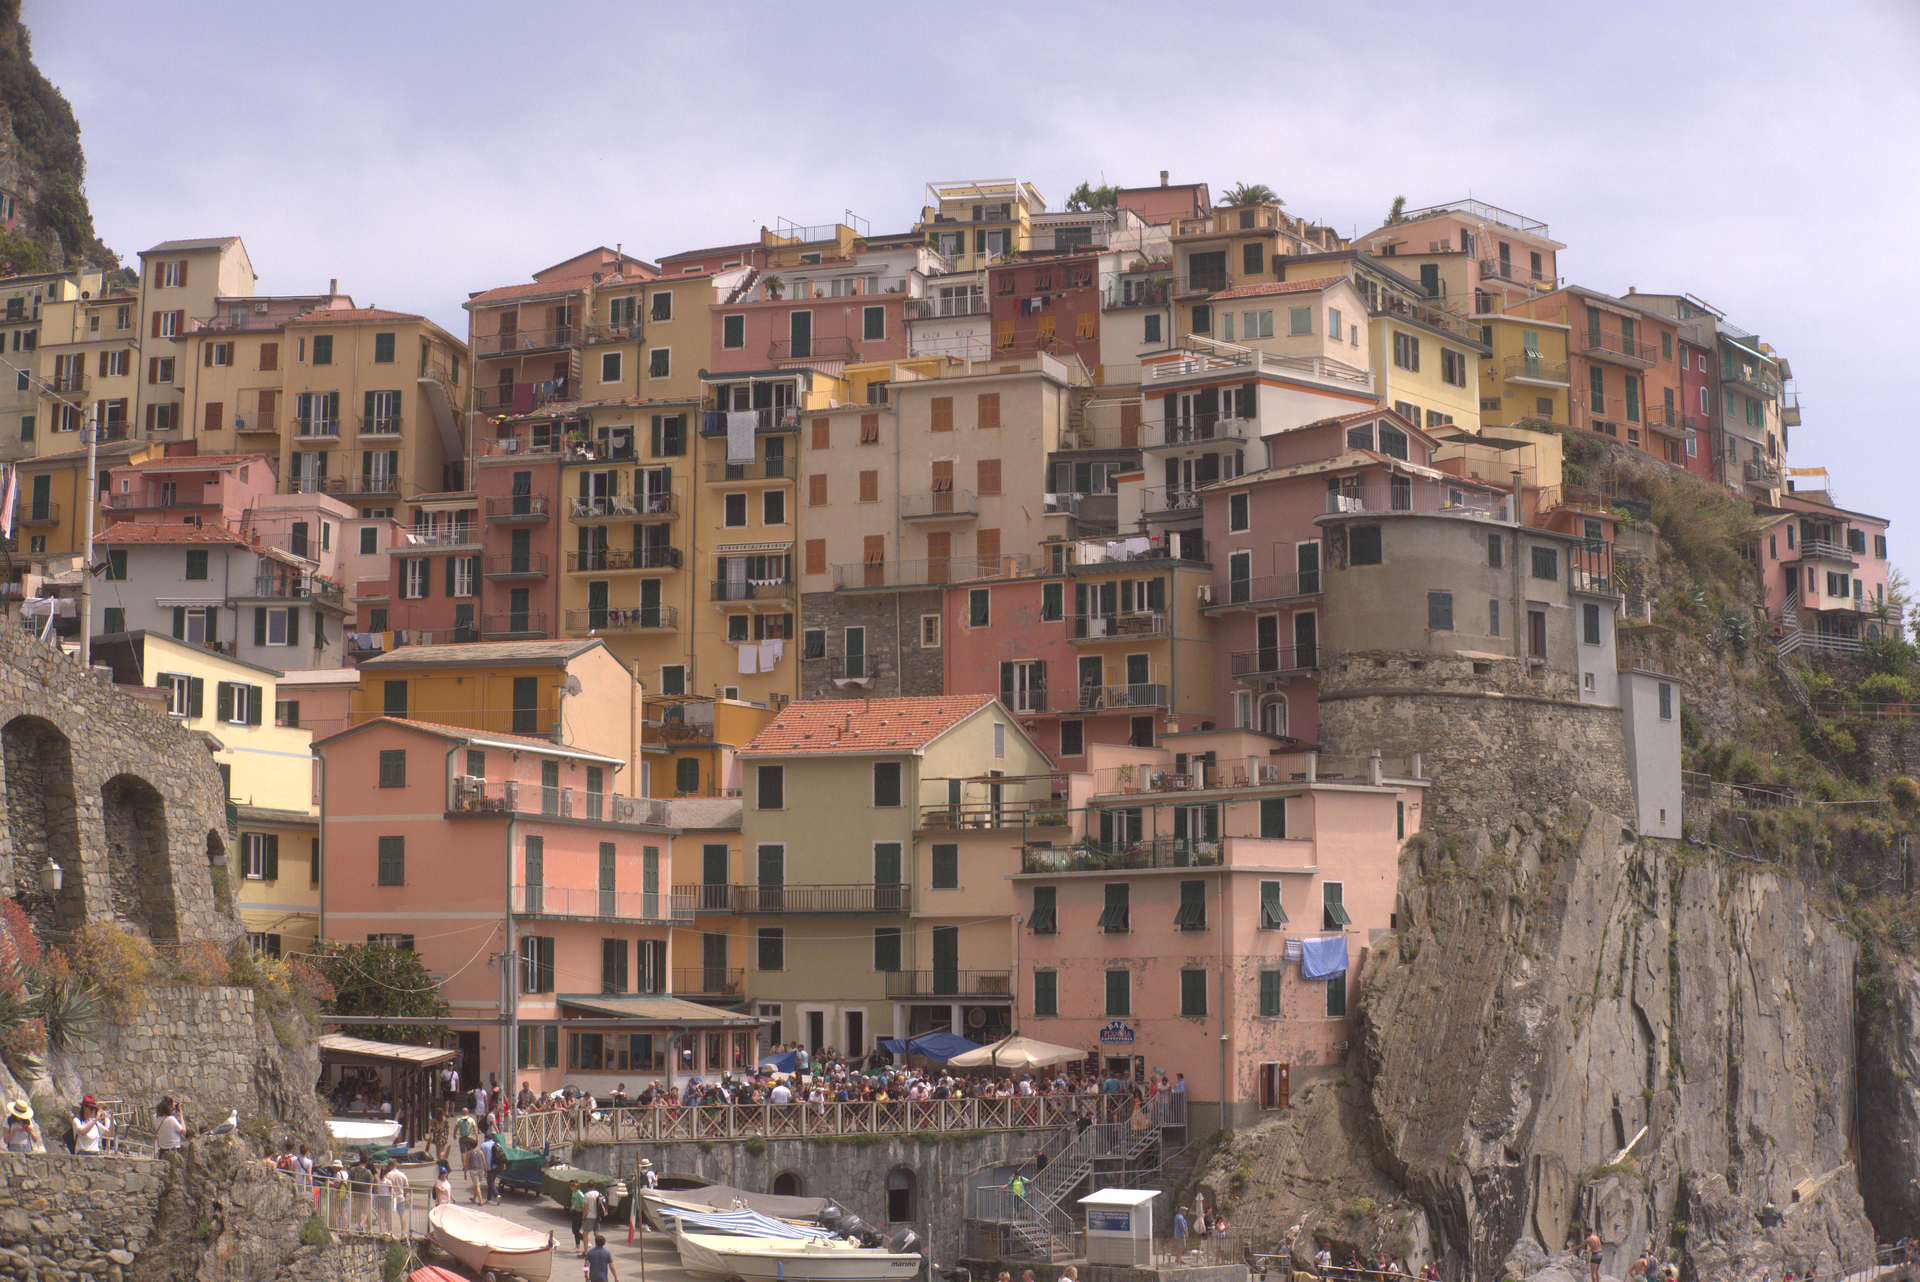
-i example/images/cinque_terre_window.jpg \
-p example/presets/golden-hour.toml \
-o golden-hour.png
AgX decodes the source, renders it through every adjustment in the preset (tone, white balance, HSL, optional LUT — see the preset model), and writes a new PNG.
Open golden-hour.png in your image viewer. The result should be warmer, with lifted shadows and pulled-back highlights — a late-afternoon feel.
Try a different preset by swapping -p:
agx apply \
  -i example/images/cinque_terre_window.jpg \
  -p example/presets/moody-dark.toml \
  -o moody-dark.png
Each .toml file in example/presets/ is a complete editing recipe. Presets are plain text — open one in your editor to see what's inside.
Tweak the result with edit
A preset is just a saved bundle of parameters. To see the parameters themselves, use edit instead of apply:
agx edit \
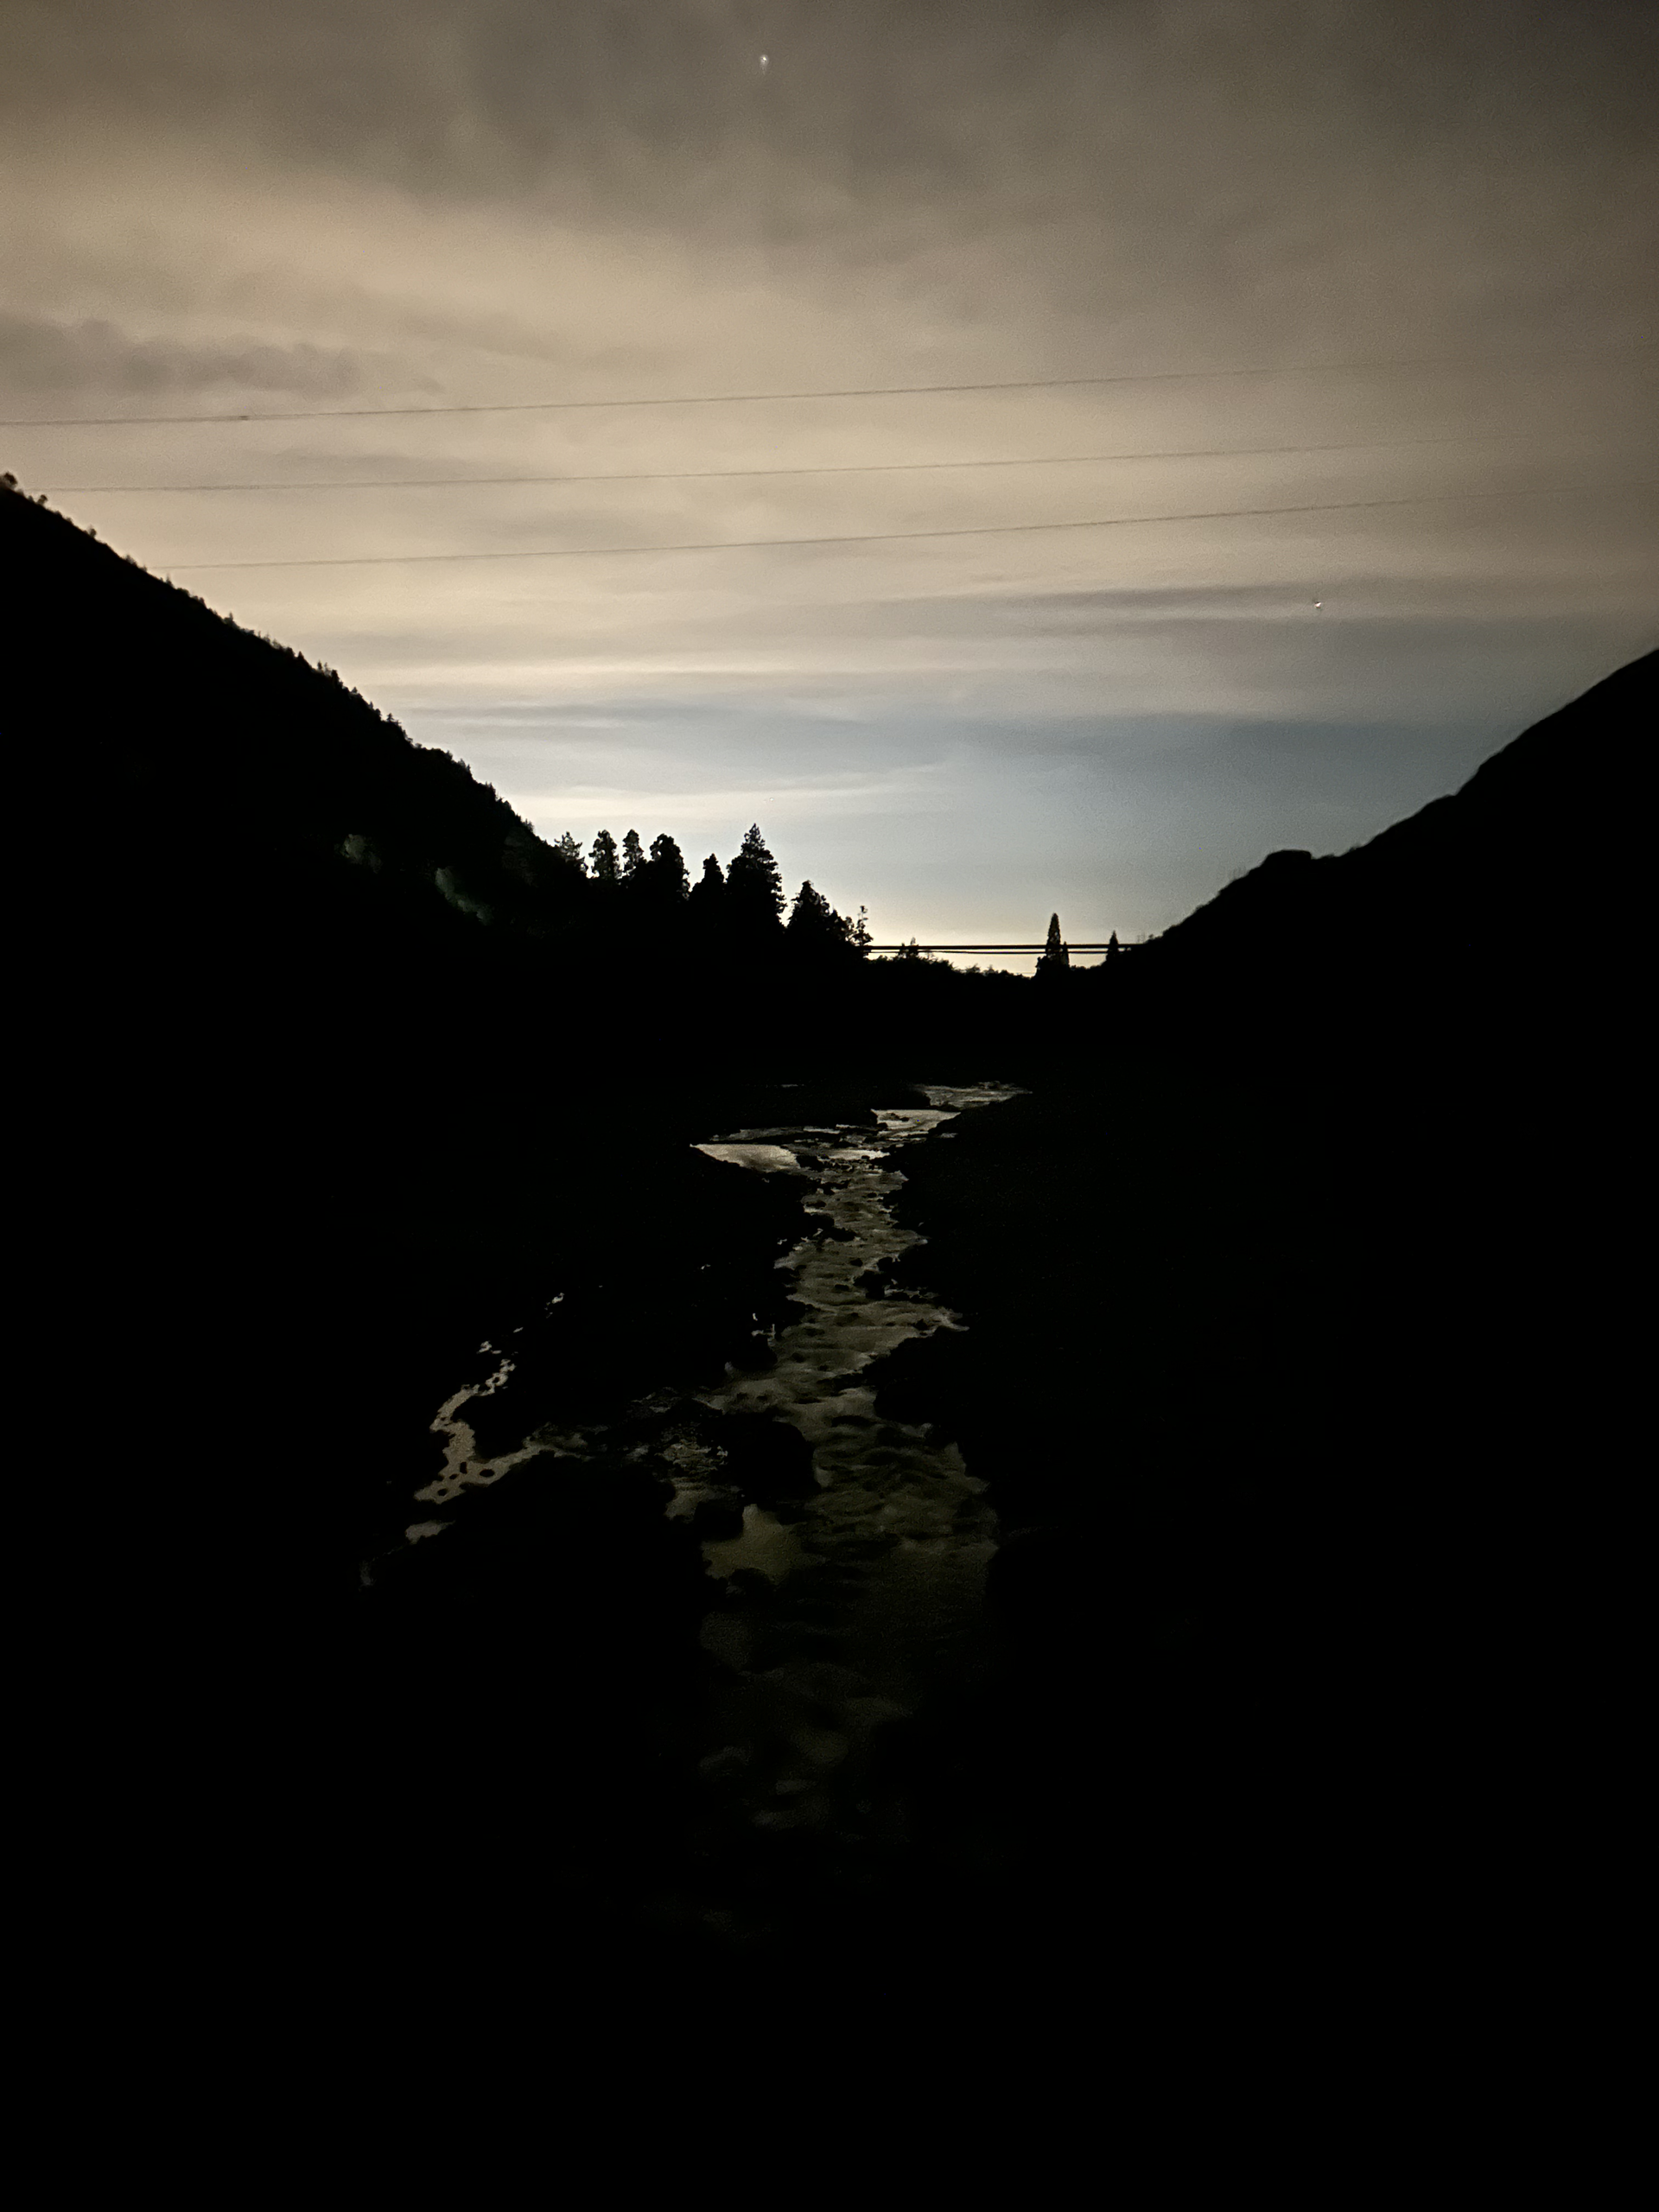
-i example/images/marina_sunset.heic \
-o tweaked.png \
--exposure 0.5 \
--shadows 30 \
--highlights -20
Three flags, three basic adjustments: brighten the image by half a stop, lift the shadows, pull back the highlights. The agx edit command exposes the same internals a preset addresses; the only difference is whether the values come from a .toml file or the command line.

Try other flags. The full list lives in the CLI reference. Common ones:
--temperature(warm/cool slider — positive warmer, negative cooler)--contrastand--saturation--vignette-amount(see the vignette explanation)--grain-amount(see the grain explanation)
What's next
You've seen the two foundational AgX commands. Where to go from here:
- Apply a preset to a folder of photos — run
batch-applyover a directory. - Compare looks side-by-side —
multi-applyfor preset audition. - Write your own preset — author a TOML preset from scratch.
- Compose layered looks — stack presets at apply time.
- CLI reference — every subcommand and flag, generated from the source.
- Preset format reference — every field, type, and default.
- Algorithm explanations — how each adjustment works under the hood.
How-to guides
Recipe-style guides for specific AgX tasks. Each one assumes you have AgX installed and you know what you want to accomplish — pick the page that matches your task.
Common tasks:
- Apply a preset to a folder of photos —
batch-applyover a directory. - Compare looks side-by-side on one image —
multi-applyfor preset audition. - Write your own preset — author a TOML preset from scratch.
- Extend a preset — build a variant on top of a base preset using
extends. - Author a custom
.cubeLUT — hand-write or generate a 3D LUT. - Compose layered looks — stack presets at apply time using
--presets. - Validate a preset before distributing — catch errors before sharing a preset.
If your task isn't here, check the CLI reference, the preset reference, or the explanation pages for background.
Apply a preset to a folder of photos
Render every image in a directory through one preset, in parallel.
Prerequisites
- A folder of input images.
- A
.tomlpreset.
Steps
agx batch-apply \
  --preset example/presets/golden-hour.toml \
  --input-dir example/images \
  --output-dir /tmp/golden-hour-out
AgX walks the input directory, decodes each image, applies the preset, and writes the result into the output directory using the original filename (with the original extension preserved by default).
Variations
Recurse into sub-directories:
agx batch-apply \
  --preset example/presets/golden-hour.toml \
  --input-dir example/images \
  --output-dir /tmp/golden-hour-out \
  --recursive
Append a suffix to the output filenames so they don't collide if you ever decide to write outputs back into the input directory:
agx batch-apply \
  --preset example/presets/golden-hour.toml \
  --input-dir example/images \
  --output-dir /tmp/golden-hour-out \
  --suffix _golden
Cap the number of parallel workers (default uses every core):
agx batch-apply \
  --preset example/presets/golden-hour.toml \
  --input-dir example/images \
  --output-dir /tmp/golden-hour-out \
  --jobs 4
Skip files that fail to decode instead of aborting the whole run:
agx batch-apply \
  --preset example/presets/golden-hour.toml \
  --input-dir example/images \
  --output-dir /tmp/golden-hour-out \
  --skip-errors
See also
- Compare looks side-by-side — render one image through several presets.
- Compose layered looks — combine presets in one render.
- CLI reference
Compare looks side-by-side on one image
Render one image through several presets in a single command. Useful when you're choosing between presets or auditioning a preset against a base reference.
Prerequisites
- One input image.
- Two or more
.tomlpresets.
Steps
agx multi-apply \
  -i example/images/cinque_terre_manarola.raf \
  -p example/presets/golden-hour.toml \
     example/presets/moody-dark.toml \
     example/presets/cool-blue.toml \
  -o /tmp/looks
AgX decodes the image once and renders it through each preset. The output directory ends up with one file per preset, named after the source image with the preset basename appended.
Variations
Include an unprocessed reference render alongside the preset results:
agx multi-apply \
  -i example/images/cinque_terre_manarola.raf \
  -p example/presets/golden-hour.toml \
     example/presets/moody-dark.toml \
  -o /tmp/looks \
  --noop
The --noop flag adds a no-preset render so you can compare each preset against the unaltered source.
Run preset renders in parallel (default is 1, since each render is already internally parallelised across pixels):
agx multi-apply \
  -i example/images/cinque_terre_manarola.raf \
  -p example/presets/golden-hour.toml \
     example/presets/moody-dark.toml \
     example/presets/cool-blue.toml \
     example/presets/high-contrast.toml \
  -o /tmp/looks \
  --jobs 4
See also
- Apply a preset to a folder — render many images through one preset.
- Write your own preset — author a preset to add to your comparison set.
- CLI reference
Write your own preset
An AgX preset is a TOML file. Every section maps to one stage of the render pipeline, and every field is optional — fields you leave out get their default (no-op) value.
Prerequisites
- A text editor.
- One sample image you want to test against.
A minimal preset
Save this as my-look.toml:
[metadata]
name = "My first preset"
version = "1.0"
author = "Your Name"

[tone]
exposure = 0.3
contrast = 12.0
highlights = -25.0
shadows = 20.0

[white_balance]
temperature = 30.0
tint = 5.0
Apply it:
agx apply -i example/images/cinque_terre_window.jpg -p my-look.toml -o /tmp/my-look.png
Open /tmp/my-look.png. Tweak any value — re-run — see the change.
Adding more sections
Each section corresponds to a stage of the render pipeline. The full set:
[tone]— basic adjustments (exposure, contrast, highlights, shadows, whites, blacks). See the basic adjustments explanation.[white_balance]— temperature and tint shifts.[hsl]— per-color hue / saturation / luminance adjustments. See HSL.[color_grading]— split-toning across shadows / midtones / highlights. See color grading.[tone_curve]— RGB and per-channel tone curves. See tone curves.[detail]— sharpening, clarity, texture. See detail pass.[dehaze]— haze removal. See dehaze.[noise_reduction]— luminance and color denoise. See noise reduction.[grain]— film grain simulation. See grain.[vignette]— corner darkening or lightening. See vignette.[lut]— apply a.cubeLUT. See authoring a custom LUT.
Every field's type, valid range, and default is documented in the preset format reference, generated from the source schema.
Iterating
AgX presets are plain text — keep your preset under version control. When you're happy with a preset, commit it. When you're auditioning variants, keep them in a looks/ directory and use multi-apply to compare side-by-side.
See also
- Extend an existing preset — build a variant on top of a base preset.
- Compose layered looks — combine presets in one render.
- Preset format reference
- Preset model concept page
Extend a preset
AgX presets compose. A preset can declare an extends reference to a base preset; AgX merges the base with the extending preset, with the extending preset's fields taking precedence. Useful for variants on a single look — one base preset captures the common style, and per-image or per-shoot variants override only what they need to.
Prerequisites
- A base preset you want to build on.
A base preset
Save as looks/base-warm.toml:
[metadata]
name = "Warm base"
version = "1.0"

[tone]
exposure = 0.2
contrast = 10.0

[white_balance]
temperature = 35.0
tint = 5.0
A variant that extends the base
Save as looks/warm-bright.toml:
[metadata]
name = "Warm — brighter"
extends = "base-warm.toml"

[tone]
exposure = 0.7
When AgX loads warm-bright.toml, it resolves extends against the same directory, merges fields recursively, and the variant's exposure = 0.7 overrides the base's exposure = 0.2. Every other field (contrast, temperature, tint) inherits from the base.
Apply the variant:
agx apply \
  -i example/images/cinque_terre_window.jpg \
  -p looks/warm-bright.toml \
  -o /tmp/warm-bright.png
Variations
- Override one section, leave the rest untouched. Don't write the
[tone]or[white_balance]keys you want to keep — AgX merges, it doesn't replace. - Chain extensions. A preset can extend another preset that itself extends a base. AgX walks the chain and merges the whole stack.
- Same field at multiple levels: the last-written value wins, with "last" defined as the most-derived preset.
See the preset model concept page for the full merge semantics, including how nested fields like HSL channel arrays merge.
See also
- Write your own preset
- Compose layered looks — runtime layering instead of file-time inheritance.
- Preset model concept page
Author a custom .cube LUT
AgX supports 3D LUTs in the Adobe .cube format, the de facto exchange format used by Photoshop, DaVinci Resolve, and most colour-grading tools. You can write a .cube file by hand, generate one programmatically, or use AgX's bundled agx-lut-gen dev tool.
Prerequisites
- A text editor (for hand-written LUTs) or the AgX source checkout (for
agx-lut-gen).
Hand-write a tiny LUT
Save as lift-shadows.cube:
TITLE "Lift shadows by 0.05"
LUT_3D_SIZE 2
0.05 0.05 0.05
1.0  0.05 0.05
0.05 1.0  0.05
1.0  1.0  0.05
0.05 0.05 1.0
1.0  0.05 1.0
0.05 1.0  1.0
1.0  1.0  1.0
This is a 2×2×2 LUT — the smallest meaningful one. Each line is the RGB output for one of the 8 corner samples; AgX trilinearly interpolates between them at render time.
Apply it via --lut:
agx edit \
  -i example/images/marina_sunset.heic \
  -o /tmp/lifted.png \
  --lut lift-shadows.cube
Production LUTs are usually 17×17×17, 33×33×33, or 65×65×65 — those have hundreds or thousands of entries and are typically generated rather than hand-written.
Generate a LUT with agx-lut-gen
AgX includes a dev-only agx-lut-gen crate that emits canonical .cube LUTs for AgX's bundled looks (Portra 400, Neo Noir, B&W High Contrast, and similar). From an AgX source checkout, point it at an output directory:
cargo run -p agx-lut-gen -- --output-dir /tmp/agx-luts
ls /tmp/agx-luts/
The tool generates one .cube file per look into the directory you pass. Use any of them with --lut <path> or reference one from a preset's [lut] section.
If you omit --output-dir, the tool writes into crates/agx-e2e/fixtures/looks/luts/ — the e2e suite's golden LUT directory. Always pass --output-dir unless you are intentionally regenerating the e2e fixtures.
Reference a LUT from a preset
In a .toml preset, the [lut] section embeds the LUT path:
[lut]
path = "lift-shadows.cube"
AgX resolves path relative to the preset file. The LUT is applied at full strength when present; there is no blend-amount field in the current schema. To partially apply a LUT, bake the blend into the .cube file itself.
See also
- Compose layered looks — combine LUTs with other adjustments.
- Write your own preset
- LUT format reference — the full Adobe
.cubespec.
Compose layered looks
AgX can layer multiple presets in a single render. Each preset is applied in order, and later presets override earlier ones at the field level. Useful when you have a base "exposure correction" preset, a colour-style preset, and a finishing-touch preset, and want to apply them as a stack.
Prerequisites
- Two or more
.tomlpresets you want to layer.
Steps
Use --presets (note the plural) on agx apply:
agx apply \
  -i example/images/cinque_terre_manarola.raf \
  --presets example/presets/golden-hour.toml \
            example/presets/high-contrast.toml \
  -o /tmp/composed.png
AgX merges the presets left-to-right. The output is the same as if you had extends-chained the second on top of the first, but without committing a merged preset to disk.
Variations
Mix and match looks until you find a stack you like. Once you do, capture it as an extends-chain in a single preset file (see Extend a preset) so the look becomes reproducible without a long command line.
Layered application versus extends inheritance — when to use which:
extendsis right when the layering is a property of the look itself — "these are the canonical Portra adjustments and any Portra variant builds on this." Inheritance is captured in the preset file and travels with it.--presetslayering is right when the layering is a property of the invocation — "for this batch I want to stack X and Y, but they're independent looks." The composition is in the command line.
See also
- Extend a preset — file-time inheritance.
- Write your own preset
- Apply a preset to a folder — using a single preset across many images.
- Preset model concept page
Validate a preset before distributing
agx validate checks a preset file (or many files) for correctness without
rendering an image. It catches typos, type mismatches, out-of-range values,
missing LUT files, and broken extends chains.
When to use it
- Before distributing a preset to other users or publishing to a preset library.
- In CI for a preset library, to ensure all presets stay valid as the schema evolves.
- As a pre-commit hook in a presets repo.
- When
agx applyproduces unexpected output — the validator gives more detail than apply-time warnings.
Single file
agx validate looks/portra.toml
Output for a clean preset:
looks/portra.toml: ok

1 file checked, all ok
Output for a preset with errors:
looks/portra.toml: 2 problems
  error: unknown table `tone_curves` (line 12)
  error: `tone.exposure` value 99.0 outside allowed range (line 5)

1 file checked, 1 with error
Multiple files
Use a shell glob:
agx validate looks/*.toml
The shell expands the glob; agx validate accepts each as a positional
argument. Exits 0 if all files are clean, 1 if any has errors.
CI integration
Use --format=json for machine-parseable output:
agx validate --format=json looks/*.toml | jq '.files[] | select(.status == "error")'
The JSON shape is documented in the CLI reference.
Diagnostic codes (unknown-table, out-of-range, etc.) are stable for
filtering and suppression in tooling.
A typical GitHub Actions step:
- name: Validate presets
  run: agx validate looks/*.toml
The job fails if any preset has errors.
Quiet mode
--quiet (or -q) skips "ok" lines, useful when validating many files
and only the broken ones matter:
agx validate --quiet looks/*.toml
What gets checked
| Category | Check |
|---|---|
| Structure | Unknown fields and tables (e.g., typo [tone_curves] vs [tone_curve]) |
| Structure | Type mismatches (e.g., exposure = "high" instead of a number) |
| Structure | Missing required fields |
| Semantic | Out-of-range numeric values (e.g., exposure = 99.0 outside [-5.0, 5.0]) |
| Filesystem | LUT file referenced by [lut] path exists on disk |
| Filesystem | extends chain references existing files and has no cycles |
Difference from agx apply
agx apply is forgiving — it warns about unknown fields on stderr but still
produces output. agx validate is strict — anything sketchy fails. Use
validate when you want to know your preset is correct; use apply when you
want the rendered image.
See also
CLI Reference
This document contains the help content for the agx command-line program.
Command Overview:
agx
Photo editing CLI with portable TOML presets
Usage: agx [OPTIONS] <COMMAND>
Subcommands:
apply— Apply a TOML preset to an imageedit— Edit an image with inline parametersbatch-apply— Apply a TOML preset to all images in a directorybatch-edit— Edit all images in a directory with inline parametersmulti-apply— Apply multiple presets to a single image (decode once, render per preset)validate— Validate one or more preset files for correctness without rendering
Options:
--gpu— Use GPU acceleration (opt-in). Falls back to CPU if no GPU is available
agx apply
Apply a TOML preset to an image
Usage: agx apply [OPTIONS] --input <INPUT> --output <OUTPUT> <--preset <PRESET>|--presets <PRESETS>...>
Options:
-
-i,--input <INPUT>— Input image path -
-p,--preset <PRESET>— Preset TOML file path (single preset, full replacement) -
--presets <PRESETS>— Preset TOML files to layer (left-to-right, last-write-wins) -
-o,--output <OUTPUT>— Output image path -
--quality <QUALITY>— JPEG output quality (1-100, default 92)Default value:
92 -
--format <FORMAT>— Output format (jpeg, png, tiff). Inferred from extension if not specified -
--output-gamut <OUTPUT_GAMUT>— Output color space: srgb (default), p3 (Display P3), or adobe-rgb. Converts the image into the chosen gamut and embeds the matching ICCDefault value:
srgb
agx edit
Edit an image with inline parameters
Usage: agx edit [OPTIONS] --input <INPUT> --output <OUTPUT>
Options:
-
-i,--input <INPUT>— Input image path -
-o,--output <OUTPUT>— Output image path -
--exposure <EXPOSURE>— Exposure in stops (-5.0 to +5.0)Default value:
0 -
--contrast <CONTRAST>— Contrast (-100 to +100)Default value:
0 -
--highlights <HIGHLIGHTS>— Highlights (-100 to +100)Default value:
0 -
--shadows <SHADOWS>— Shadows (-100 to +100)Default value:
0 -
--whites <WHITES>— Whites (-100 to +100)Default value:
0 -
--blacks <BLACKS>— Blacks (-100 to +100)Default value:
0 -
--temperature <TEMPERATURE>— White balance temperature shiftDefault value:
0 -
--tint <TINT>— White balance tint shiftDefault value:
0 -
--lut <LUT>— Path to a .cube LUT file -
--vignette-amount <VIGNETTE_AMOUNT>— Vignette amount (-100 to +100). Negative darkens edges, positive brightensDefault value:
0 -
--vignette-shape <VIGNETTE_SHAPE>— Vignette shape: elliptical (default) or circularDefault value:
elliptical -
--cg-shadows-hue <CG_SHADOWS_HUE>— Color grading: shadow wheel hue (0-360 degrees)Default value:
0 -
--cg-shadows-sat <CG_SHADOWS_SAT>— Color grading: shadow wheel saturation (0-100)Default value:
0 -
--cg-shadows-lum <CG_SHADOWS_LUM>— Color grading: shadow wheel luminance (-100 to +100)Default value:
0 -
--cg-midtones-hue <CG_MIDTONES_HUE>— Color grading: midtone wheel hue (0-360 degrees)Default value:
0 -
--cg-midtones-sat <CG_MIDTONES_SAT>— Color grading: midtone wheel saturation (0-100)Default value:
0 -
--cg-midtones-lum <CG_MIDTONES_LUM>— Color grading: midtone wheel luminance (-100 to +100)Default value:
0 -
--cg-highlights-hue <CG_HIGHLIGHTS_HUE>— Color grading: highlight wheel hue (0-360 degrees)Default value:
0 -
--cg-highlights-sat <CG_HIGHLIGHTS_SAT>— Color grading: highlight wheel saturation (0-100)Default value:
0 -
--cg-highlights-lum <CG_HIGHLIGHTS_LUM>— Color grading: highlight wheel luminance (-100 to +100)Default value:
0 -
--cg-global-hue <CG_GLOBAL_HUE>— Color grading: global wheel hue (0-360 degrees)Default value:
0 -
--cg-global-sat <CG_GLOBAL_SAT>— Color grading: global wheel saturation (0-100)Default value:
0 -
--cg-global-lum <CG_GLOBAL_LUM>— Color grading: global wheel luminance (-100 to +100)Default value:
0 -
--cg-balance <CG_BALANCE>— Color grading: shadow/highlight balance (-100 to +100)Default value:
0 -
--tc-rgb <TC_RGB>— Tone curve — RGB master channel points (e.g. "0.0:0.0,0.25:0.15,0.75:0.85,1.0:1.0") -
--tc-luma <TC_LUMA>— Tone curve — Luminance channel points -
--tc-red <TC_RED>— Tone curve — Red channel points -
--tc-green <TC_GREEN>— Tone curve — Green channel points -
--tc-blue <TC_BLUE>— Tone curve — Blue channel points -
--sharpen-amount <SHARPEN_AMOUNT>— Sharpening amount (0-100)Default value:
0 -
--sharpen-radius <SHARPEN_RADIUS>— Sharpening radius / sigma (0.5-3.0)Default value:
1 -
--sharpen-threshold <SHARPEN_THRESHOLD>— Sharpening threshold (0-100). Higher = sharpen finer detailDefault value:
25 -
--sharpen-masking <SHARPEN_MASKING>— Sharpening masking (0-100). Limits sharpening to textured areasDefault value:
0 -
--clarity <CLARITY>— Clarity: local contrast at medium frequencies (-100 to +100)Default value:
0 -
--texture <TEXTURE>— Texture: local contrast at high frequencies (-100 to +100)Default value:
0 -
--dehaze-amount <DEHAZE_AMOUNT>— Dehaze amount (-100 to +100). Positive removes haze, negative adds hazeDefault value:
0 -
--nr-luminance <NR_LUMINANCE>— Noise reduction: luminance strength (0-100)Default value:
0 -
--nr-color <NR_COLOR>— Noise reduction: color strength (0-100)Default value:
0 -
--nr-detail <NR_DETAIL>— Noise reduction: detail preservation (0-100)Default value:
0 -
--grain-type <GRAIN_TYPE>— Grain type (fine, silver, harsh)Default value:
silver -
--grain-amount <GRAIN_AMOUNT>— Grain amount (0-100)Default value:
0 -
--grain-size <GRAIN_SIZE>— Grain size (0-100)Default value:
50 -
--hsl-red-hue <HSL_RED_HUE>(alias:hsl-red-h) — Red hue shift (-180 to +180 degrees)Default value:
0 -
--hsl-red-saturation <HSL_RED_SATURATION>(alias:hsl-red-s) — Red saturation (-100 to +100)Default value:
0 -
--hsl-red-luminance <HSL_RED_LUMINANCE>(alias:hsl-red-l) — Red luminance (-100 to +100)Default value:
0 -
--hsl-orange-hue <HSL_ORANGE_HUE>(alias:hsl-orange-h) — Orange hue shift (-180 to +180 degrees)Default value:
0 -
--hsl-orange-saturation <HSL_ORANGE_SATURATION>(alias:hsl-orange-s) — Orange saturation (-100 to +100)Default value:
0 -
--hsl-orange-luminance <HSL_ORANGE_LUMINANCE>(alias:hsl-orange-l) — Orange luminance (-100 to +100)Default value:
0 -
--hsl-yellow-hue <HSL_YELLOW_HUE>(alias:hsl-yellow-h) — Yellow hue shift (-180 to +180 degrees)Default value:
0 -
--hsl-yellow-saturation <HSL_YELLOW_SATURATION>(alias:hsl-yellow-s) — Yellow saturation (-100 to +100)Default value:
0 -
--hsl-yellow-luminance <HSL_YELLOW_LUMINANCE>(alias:hsl-yellow-l) — Yellow luminance (-100 to +100)Default value:
0 -
--hsl-green-hue <HSL_GREEN_HUE>(alias:hsl-green-h) — Green hue shift (-180 to +180 degrees)Default value:
0 -
--hsl-green-saturation <HSL_GREEN_SATURATION>(alias:hsl-green-s) — Green saturation (-100 to +100)Default value:
0 -
--hsl-green-luminance <HSL_GREEN_LUMINANCE>(alias:hsl-green-l) — Green luminance (-100 to +100)Default value:
0 -
--hsl-aqua-hue <HSL_AQUA_HUE>(alias:hsl-aqua-h) — Aqua hue shift (-180 to +180 degrees)Default value:
0 -
--hsl-aqua-saturation <HSL_AQUA_SATURATION>(alias:hsl-aqua-s) — Aqua saturation (-100 to +100)Default value:
0 -
--hsl-aqua-luminance <HSL_AQUA_LUMINANCE>(alias:hsl-aqua-l) — Aqua luminance (-100 to +100)Default value:
0 -
--hsl-blue-hue <HSL_BLUE_HUE>(alias:hsl-blue-h) — Blue hue shift (-180 to +180 degrees)Default value:
0 -
--hsl-blue-saturation <HSL_BLUE_SATURATION>(alias:hsl-blue-s) — Blue saturation (-100 to +100)Default value:
0 -
--hsl-blue-luminance <HSL_BLUE_LUMINANCE>(alias:hsl-blue-l) — Blue luminance (-100 to +100)Default value:
0 -
--hsl-purple-hue <HSL_PURPLE_HUE>(alias:hsl-purple-h) — Purple hue shift (-180 to +180 degrees)Default value:
0 -
--hsl-purple-saturation <HSL_PURPLE_SATURATION>(alias:hsl-purple-s) — Purple saturation (-100 to +100)Default value:
0 -
--hsl-purple-luminance <HSL_PURPLE_LUMINANCE>(alias:hsl-purple-l) — Purple luminance (-100 to +100)Default value:
0 -
--hsl-magenta-hue <HSL_MAGENTA_HUE>(alias:hsl-magenta-h) — Magenta hue shift (-180 to +180 degrees)Default value:
0 -
--hsl-magenta-saturation <HSL_MAGENTA_SATURATION>(alias:hsl-magenta-s) — Magenta saturation (-100 to +100)Default value:
0 -
--hsl-magenta-luminance <HSL_MAGENTA_LUMINANCE>(alias:hsl-magenta-l) — Magenta luminance (-100 to +100)Default value:
0 -
--quality <QUALITY>— JPEG output quality (1-100, default 92)Default value:
92 -
--format <FORMAT>— Output format (jpeg, png, tiff). Inferred from extension if not specified -
--output-gamut <OUTPUT_GAMUT>— Output color space: srgb (default), p3 (Display P3), or adobe-rgb. Converts the image into the chosen gamut and embeds the matching ICCDefault value:
srgb
agx batch-apply
Apply a TOML preset to all images in a directory
Usage: agx batch-apply [OPTIONS] --preset <PRESET> --input-dir <INPUT_DIR> --output-dir <OUTPUT_DIR>
Options:
-
-p,--preset <PRESET>— Preset TOML file path -
--input-dir <INPUT_DIR>— Directory containing input images -
--output-dir <OUTPUT_DIR>— Directory for output images (created if missing) -
-r,--recursive— Recurse into subdirectoriesDefault value:
false -
-j,--jobs <JOBS>— Number of parallel workers (0 = auto-detect CPU cores)Default value:
0 -
--skip-errors— Continue processing when individual files failDefault value:
false -
--suffix <SUFFIX>— Append suffix to output filenames (e.g.,_edited) -
--quality <QUALITY>— JPEG output quality (1-100, default 92)Default value:
92 -
--format <FORMAT>— Output format (jpeg, png, tiff). Inferred from extension if not specified -
--output-gamut <OUTPUT_GAMUT>— Output color space: srgb (default), p3 (Display P3), or adobe-rgb. Converts the image into the chosen gamut and embeds the matching ICCDefault value:
srgb
agx batch-edit
Edit all images in a directory with inline parameters
Usage: agx batch-edit [OPTIONS] --input-dir <INPUT_DIR> --output-dir <OUTPUT_DIR>
Options:
-
--exposure <EXPOSURE>— Exposure in stops (-5.0 to +5.0)Default value:
0 -
--contrast <CONTRAST>— Contrast (-100 to +100)Default value:
0 -
--highlights <HIGHLIGHTS>— Highlights (-100 to +100)Default value:
0 -
--shadows <SHADOWS>— Shadows (-100 to +100)Default value:
0 -
--whites <WHITES>— Whites (-100 to +100)Default value:
0 -
--blacks <BLACKS>— Blacks (-100 to +100)Default value:
0 -
--temperature <TEMPERATURE>— White balance temperature shiftDefault value:
0 -
--tint <TINT>— White balance tint shiftDefault value:
0 -
--lut <LUT>— Path to a .cube LUT file -
--vignette-amount <VIGNETTE_AMOUNT>— Vignette amount (-100 to +100). Negative darkens edges, positive brightensDefault value:
0 -
--vignette-shape <VIGNETTE_SHAPE>— Vignette shape: elliptical (default) or circularDefault value:
elliptical -
--cg-shadows-hue <CG_SHADOWS_HUE>— Color grading: shadow wheel hue (0-360 degrees)Default value:
0 -
--cg-shadows-sat <CG_SHADOWS_SAT>— Color grading: shadow wheel saturation (0-100)Default value:
0 -
--cg-shadows-lum <CG_SHADOWS_LUM>— Color grading: shadow wheel luminance (-100 to +100)Default value:
0 -
--cg-midtones-hue <CG_MIDTONES_HUE>— Color grading: midtone wheel hue (0-360 degrees)Default value:
0 -
--cg-midtones-sat <CG_MIDTONES_SAT>— Color grading: midtone wheel saturation (0-100)Default value:
0 -
--cg-midtones-lum <CG_MIDTONES_LUM>— Color grading: midtone wheel luminance (-100 to +100)Default value:
0 -
--cg-highlights-hue <CG_HIGHLIGHTS_HUE>— Color grading: highlight wheel hue (0-360 degrees)Default value:
0 -
--cg-highlights-sat <CG_HIGHLIGHTS_SAT>— Color grading: highlight wheel saturation (0-100)Default value:
0 -
--cg-highlights-lum <CG_HIGHLIGHTS_LUM>— Color grading: highlight wheel luminance (-100 to +100)Default value:
0 -
--cg-global-hue <CG_GLOBAL_HUE>— Color grading: global wheel hue (0-360 degrees)Default value:
0 -
--cg-global-sat <CG_GLOBAL_SAT>— Color grading: global wheel saturation (0-100)Default value:
0 -
--cg-global-lum <CG_GLOBAL_LUM>— Color grading: global wheel luminance (-100 to +100)Default value:
0 -
--cg-balance <CG_BALANCE>— Color grading: shadow/highlight balance (-100 to +100)Default value:
0 -
--tc-rgb <TC_RGB>— Tone curve — RGB master channel points (e.g. "0.0:0.0,0.25:0.15,0.75:0.85,1.0:1.0") -
--tc-luma <TC_LUMA>— Tone curve — Luminance channel points -
--tc-red <TC_RED>— Tone curve — Red channel points -
--tc-green <TC_GREEN>— Tone curve — Green channel points -
--tc-blue <TC_BLUE>— Tone curve — Blue channel points -
--sharpen-amount <SHARPEN_AMOUNT>— Sharpening amount (0-100)Default value:
0 -
--sharpen-radius <SHARPEN_RADIUS>— Sharpening radius / sigma (0.5-3.0)Default value:
1 -
--sharpen-threshold <SHARPEN_THRESHOLD>— Sharpening threshold (0-100). Higher = sharpen finer detailDefault value:
25 -
--sharpen-masking <SHARPEN_MASKING>— Sharpening masking (0-100). Limits sharpening to textured areasDefault value:
0 -
--clarity <CLARITY>— Clarity: local contrast at medium frequencies (-100 to +100)Default value:
0 -
--texture <TEXTURE>— Texture: local contrast at high frequencies (-100 to +100)Default value:
0 -
--dehaze-amount <DEHAZE_AMOUNT>— Dehaze amount (-100 to +100). Positive removes haze, negative adds hazeDefault value:
0 -
--nr-luminance <NR_LUMINANCE>— Noise reduction: luminance strength (0-100)Default value:
0 -
--nr-color <NR_COLOR>— Noise reduction: color strength (0-100)Default value:
0 -
--nr-detail <NR_DETAIL>— Noise reduction: detail preservation (0-100)Default value:
0 -
--grain-type <GRAIN_TYPE>— Grain type (fine, silver, harsh)Default value:
silver -
--grain-amount <GRAIN_AMOUNT>— Grain amount (0-100)Default value:
0 -
--grain-size <GRAIN_SIZE>— Grain size (0-100)Default value:
50 -
--hsl-red-hue <HSL_RED_HUE>(alias:hsl-red-h) — Red hue shift (-180 to +180 degrees)Default value:
0 -
--hsl-red-saturation <HSL_RED_SATURATION>(alias:hsl-red-s) — Red saturation (-100 to +100)Default value:
0 -
--hsl-red-luminance <HSL_RED_LUMINANCE>(alias:hsl-red-l) — Red luminance (-100 to +100)Default value:
0 -
--hsl-orange-hue <HSL_ORANGE_HUE>(alias:hsl-orange-h) — Orange hue shift (-180 to +180 degrees)Default value:
0 -
--hsl-orange-saturation <HSL_ORANGE_SATURATION>(alias:hsl-orange-s) — Orange saturation (-100 to +100)Default value:
0 -
--hsl-orange-luminance <HSL_ORANGE_LUMINANCE>(alias:hsl-orange-l) — Orange luminance (-100 to +100)Default value:
0 -
--hsl-yellow-hue <HSL_YELLOW_HUE>(alias:hsl-yellow-h) — Yellow hue shift (-180 to +180 degrees)Default value:
0 -
--hsl-yellow-saturation <HSL_YELLOW_SATURATION>(alias:hsl-yellow-s) — Yellow saturation (-100 to +100)Default value:
0 -
--hsl-yellow-luminance <HSL_YELLOW_LUMINANCE>(alias:hsl-yellow-l) — Yellow luminance (-100 to +100)Default value:
0 -
--hsl-green-hue <HSL_GREEN_HUE>(alias:hsl-green-h) — Green hue shift (-180 to +180 degrees)Default value:
0 -
--hsl-green-saturation <HSL_GREEN_SATURATION>(alias:hsl-green-s) — Green saturation (-100 to +100)Default value:
0 -
--hsl-green-luminance <HSL_GREEN_LUMINANCE>(alias:hsl-green-l) — Green luminance (-100 to +100)Default value:
0 -
--hsl-aqua-hue <HSL_AQUA_HUE>(alias:hsl-aqua-h) — Aqua hue shift (-180 to +180 degrees)Default value:
0 -
--hsl-aqua-saturation <HSL_AQUA_SATURATION>(alias:hsl-aqua-s) — Aqua saturation (-100 to +100)Default value:
0 -
--hsl-aqua-luminance <HSL_AQUA_LUMINANCE>(alias:hsl-aqua-l) — Aqua luminance (-100 to +100)Default value:
0 -
--hsl-blue-hue <HSL_BLUE_HUE>(alias:hsl-blue-h) — Blue hue shift (-180 to +180 degrees)Default value:
0 -
--hsl-blue-saturation <HSL_BLUE_SATURATION>(alias:hsl-blue-s) — Blue saturation (-100 to +100)Default value:
0 -
--hsl-blue-luminance <HSL_BLUE_LUMINANCE>(alias:hsl-blue-l) — Blue luminance (-100 to +100)Default value:
0 -
--hsl-purple-hue <HSL_PURPLE_HUE>(alias:hsl-purple-h) — Purple hue shift (-180 to +180 degrees)Default value:
0 -
--hsl-purple-saturation <HSL_PURPLE_SATURATION>(alias:hsl-purple-s) — Purple saturation (-100 to +100)Default value:
0 -
--hsl-purple-luminance <HSL_PURPLE_LUMINANCE>(alias:hsl-purple-l) — Purple luminance (-100 to +100)Default value:
0 -
--hsl-magenta-hue <HSL_MAGENTA_HUE>(alias:hsl-magenta-h) — Magenta hue shift (-180 to +180 degrees)Default value:
0 -
--hsl-magenta-saturation <HSL_MAGENTA_SATURATION>(alias:hsl-magenta-s) — Magenta saturation (-100 to +100)Default value:
0 -
--hsl-magenta-luminance <HSL_MAGENTA_LUMINANCE>(alias:hsl-magenta-l) — Magenta luminance (-100 to +100)Default value:
0 -
--input-dir <INPUT_DIR>— Directory containing input images -
--output-dir <OUTPUT_DIR>— Directory for output images (created if missing) -
-r,--recursive— Recurse into subdirectoriesDefault value:
false -
-j,--jobs <JOBS>— Number of parallel workers (0 = auto-detect CPU cores)Default value:
0 -
--skip-errors— Continue processing when individual files failDefault value:
false -
--suffix <SUFFIX>— Append suffix to output filenames (e.g.,_edited) -
--quality <QUALITY>— JPEG output quality (1-100, default 92)Default value:
92 -
--format <FORMAT>— Output format (jpeg, png, tiff). Inferred from extension if not specified -
--output-gamut <OUTPUT_GAMUT>— Output color space: srgb (default), p3 (Display P3), or adobe-rgb. Converts the image into the chosen gamut and embeds the matching ICCDefault value:
srgb
agx multi-apply
Apply multiple presets to a single image (decode once, render per preset)
Usage: agx multi-apply [OPTIONS] --input <INPUT> --preset <PRESET>... --output <OUTPUT>
Options:
-
-i,--input <INPUT>— Input image path -
-p,--preset <PRESET>— Preset TOML file(s) to apply (one output per preset) -
-o,--output <OUTPUT>— Output directory (created if missing) -
--noop— Also render a no-preset (identity) outputDefault value:
false -
-j,--jobs <JOBS>— Number of preset renders to run concurrently (default: 1)Default value:
1
agx validate
Validate one or more preset files for correctness without rendering.
Reports unknown fields, type mismatches, out-of-range values, missing LUT files, and extends chain problems. Exits 0 if all clean, 1 if any file has errors.
Usage: agx validate [OPTIONS] <PATHS>...
Arguments:
<PATHS>— Paths to preset TOML files. Use shell glob to validate many at once
Options:
-
-q,--quiet— Suppress "ok" lines for clean files; only show files with errors -
--format <FORMAT>— Output formatDefault value:
humanPossible values:
human: Human-readable text output (default)json: Machine-readable JSON output
Preset Format Reference
This page documents every field available in an AgX preset TOML file, organized by on-disk table.
metadata
Preset metadata, including name, version, author, and optional inheritance.
| Field | Range / Values | Default | Note |
|---|---|---|---|
metadata.name | string | "" | Human-readable preset name. |
metadata.version | string | "" | Semantic version string for the preset. |
metadata.author | string | "" | Preset author name. |
metadata.extends | string or null | null | Optional relative path to a base preset TOML file to merge before this preset. |
tone
Controls exposure, contrast, highlights, shadows, whites, and blacks.
| Field | Range / Values | Default | Note |
|---|---|---|---|
tone.exposure | -5 to 5 | 0 | Exposure in stops, range -5.0 to +5.0. |
tone.contrast | -100 to 100 | 0 | Contrast, range -100 to +100. |
tone.highlights | -100 to 100 | 0 | Highlights, range -100 to +100. |
tone.shadows | -100 to 100 | 0 | Shadows, range -100 to +100. |
tone.whites | -100 to 100 | 0 | Whites, range -100 to +100. |
tone.blacks | -100 to 100 | 0 | Blacks, range -100 to +100. |
white_balance
Controls temperature and tint shifts applied before tonal adjustments.
| Field | Range / Values | Default | Note |
|---|---|---|---|
white_balance.temperature | number (no validated range) | 0 | White balance temperature shift (range: -100 to +100, default: 0). |
white_balance.tint | number (no validated range) | 0 | White balance tint shift, green/magenta (range: -100 to +100, default: 0). |
lut
Optional 3D LUT reference loaded from a .cube file.
| Field | Range / Values | Default | Note |
|---|---|---|---|
lut.path | string or null | null | Optional relative path to a .cube LUT file, resolved from the preset TOML file. |
lut.encoding | srgb, linear | srgb | Color space the LUT was authored in. srgb = sRGB transfer curve (standard for creative LUTs). linear = linear light, sRGB primaries. Both variants assume sRGB primaries. Applies to the LUT loaded via this preset's path; inheriting a base preset's LUT without also specifying path leaves the encoding unchanged. |
hsl
Adjusts hue, saturation, and luminance for each HSL color channel.
| Field | Range / Values | Default | Note |
|---|---|---|---|
hsl.red.hue | -180 to 180 | 0 | Hue shift in degrees (range: -180 to +180, default: 0). |
hsl.red.saturation | -100 to 100 | 0 | Saturation adjustment (range: -100 to +100, default: 0). |
hsl.red.luminance | -100 to 100 | 0 | Luminance adjustment (range: -100 to +100, default: 0). |
hsl.orange.hue | -180 to 180 | 0 | Hue shift in degrees (range: -180 to +180, default: 0). |
hsl.orange.saturation | -100 to 100 | 0 | Saturation adjustment (range: -100 to +100, default: 0). |
hsl.orange.luminance | -100 to 100 | 0 | Luminance adjustment (range: -100 to +100, default: 0). |
hsl.yellow.hue | -180 to 180 | 0 | Hue shift in degrees (range: -180 to +180, default: 0). |
hsl.yellow.saturation | -100 to 100 | 0 | Saturation adjustment (range: -100 to +100, default: 0). |
hsl.yellow.luminance | -100 to 100 | 0 | Luminance adjustment (range: -100 to +100, default: 0). |
hsl.green.hue | -180 to 180 | 0 | Hue shift in degrees (range: -180 to +180, default: 0). |
hsl.green.saturation | -100 to 100 | 0 | Saturation adjustment (range: -100 to +100, default: 0). |
hsl.green.luminance | -100 to 100 | 0 | Luminance adjustment (range: -100 to +100, default: 0). |
hsl.aqua.hue | -180 to 180 | 0 | Hue shift in degrees (range: -180 to +180, default: 0). |
hsl.aqua.saturation | -100 to 100 | 0 | Saturation adjustment (range: -100 to +100, default: 0). |
hsl.aqua.luminance | -100 to 100 | 0 | Luminance adjustment (range: -100 to +100, default: 0). |
hsl.blue.hue | -180 to 180 | 0 | Hue shift in degrees (range: -180 to +180, default: 0). |
hsl.blue.saturation | -100 to 100 | 0 | Saturation adjustment (range: -100 to +100, default: 0). |
hsl.blue.luminance | -100 to 100 | 0 | Luminance adjustment (range: -100 to +100, default: 0). |
hsl.purple.hue | -180 to 180 | 0 | Hue shift in degrees (range: -180 to +180, default: 0). |
hsl.purple.saturation | -100 to 100 | 0 | Saturation adjustment (range: -100 to +100, default: 0). |
hsl.purple.luminance | -100 to 100 | 0 | Luminance adjustment (range: -100 to +100, default: 0). |
hsl.magenta.hue | -180 to 180 | 0 | Hue shift in degrees (range: -180 to +180, default: 0). |
hsl.magenta.saturation | -100 to 100 | 0 | Saturation adjustment (range: -100 to +100, default: 0). |
hsl.magenta.luminance | -100 to 100 | 0 | Luminance adjustment (range: -100 to +100, default: 0). |
vignette
Controls creative edge darkening or brightening.
| Field | Range / Values | Default | Note |
|---|---|---|---|
vignette.amount | -100 to 100 | 0 | Vignette darkening (negative) or brightening (positive) amount (range: -100 to +100, default: 0). |
vignette.shape | elliptical, circular | elliptical | Vignette falloff geometry. |
color_grading
Controls shadows, midtones, highlights, and global color wheels.
| Field | Range / Values | Default | Note |
|---|---|---|---|
color_grading.shadows.hue | 0 to 360 | 0 | Hue angle in degrees (0–360). |
color_grading.shadows.saturation | 0 to 100 | 0 | Saturation amount (0–100, default: 0). |
color_grading.shadows.luminance | -100 to 100 | 0 | Luminance shift (range: -100 to +100, default: 0). |
color_grading.midtones.hue | 0 to 360 | 0 | Hue angle in degrees (0–360). |
color_grading.midtones.saturation | 0 to 100 | 0 | Saturation amount (0–100, default: 0). |
color_grading.midtones.luminance | -100 to 100 | 0 | Luminance shift (range: -100 to +100, default: 0). |
color_grading.highlights.hue | 0 to 360 | 0 | Hue angle in degrees (0–360). |
color_grading.highlights.saturation | 0 to 100 | 0 | Saturation amount (0–100, default: 0). |
color_grading.highlights.luminance | -100 to 100 | 0 | Luminance shift (range: -100 to +100, default: 0). |
color_grading.global.hue | 0 to 360 | 0 | Hue angle in degrees (0–360). |
color_grading.global.saturation | 0 to 100 | 0 | Saturation amount (0–100, default: 0). |
color_grading.global.luminance | -100 to 100 | 0 | Luminance shift (range: -100 to +100, default: 0). |
color_grading.balance | -100 to 100 | 0 | Shadow/highlight balance point (range: -100 to +100, default: 0). |
tone_curve
Controls five independent tone curves for RGB, luma, and per-channel adjustments.
| Field | Range / Values | Default | Note |
|---|---|---|---|
tone_curve.rgb.points | array of [x, y] points, each 0 to 1 | [(0, 0), (1, 1)] | Control points as (input, output) pairs in [0.0, 1.0], sorted by input. |
tone_curve.luma.points | array of [x, y] points, each 0 to 1 | [(0, 0), (1, 1)] | Control points as (input, output) pairs in [0.0, 1.0], sorted by input. |
tone_curve.red.points | array of [x, y] points, each 0 to 1 | [(0, 0), (1, 1)] | Control points as (input, output) pairs in [0.0, 1.0], sorted by input. |
tone_curve.green.points | array of [x, y] points, each 0 to 1 | [(0, 0), (1, 1)] | Control points as (input, output) pairs in [0.0, 1.0], sorted by input. |
tone_curve.blue.points | array of [x, y] points, each 0 to 1 | [(0, 0), (1, 1)] | Control points as (input, output) pairs in [0.0, 1.0], sorted by input. |
detail
Controls sharpening, clarity, and texture adjustments.
| Field | Range / Values | Default | Note |
|---|---|---|---|
detail.sharpening.amount | 0 to 100 | 0 | Sharpening intensity, 0–100. |
detail.sharpening.radius | 0.5 to 3 | 1 | Gaussian blur radius in pixels. |
detail.sharpening.threshold | 0 to 100 | 25 | Minimum luminance delta (0–255 scale) below which sharpening is suppressed. |
detail.sharpening.masking | 0 to 100 | 0 | Edge-aware masking strength, 0–100. |
detail.clarity | -100 to 100 | 0 | Mid-frequency local contrast, -100 to +100. |
detail.texture | -100 to 100 | 0 | Fine-frequency detail, -100 to +100. |
dehaze
Controls atmospheric haze removal or addition.
| Field | Range / Values | Default | Note |
|---|---|---|---|
dehaze.amount | -100 to 100 | 0 | Dehaze strength from -100 (add fog) to +100 (remove haze). |
noise_reduction
Controls luminance and chroma noise reduction.
| Field | Range / Values | Default | Note |
|---|---|---|---|
noise_reduction.luminance | 0 to 100 | 0 | Luminance denoising strength, 0–100. |
noise_reduction.color | 0 to 100 | 0 | Chroma denoising strength, 0–100. |
noise_reduction.detail | 0 to 100 | 0 | Finest-scale detail preservation, 0–100. |
grain
Controls film grain simulation.
| Field | Range / Values | Default | Note |
|---|---|---|---|
grain.type | fine, silver, harsh | silver | Grain type controlling the internal character of the noise. |
grain.amount | 0 to 100 | 0 | Grain intensity, 0–100. |
grain.size | 0 to 100 | 50 | Grain particle size, 0 (fine) to 100 (coarse). |
grain.seed | integer or null | null | Optional fixed seed for deterministic grain. |
See Grain for details.
Concepts
The conceptual reference covers the photographic and AgX-specific ideas the rest of the documentation builds on. It serves CLI users, preset authors, and curious photo nerds — readers who want to look up what a concept is, separately from the algorithmic how (covered under Explanation) and the field-level schema (covered by the auto-generated Preset format page).
Foundations
The substrate everything else relies on.
- Color spaces — Linear vs sRGB definitions, conversion formulas, and per-stage assignment.
- Color models — RGB, HSL, and luminance: when AgX uses each.
Photography lexicon
Short entries grouped by photographer-panel mental model. Tutorials and how-to guides cite these by anchor (e.g., color.md#white-balance).
- Tone — Exposure, contrast, highlights, shadows, whites, blacks, tone curves.
- Color — White balance, HSL, color grading.
- Detail — Sharpening, clarity, dehaze, noise reduction.
- Effects — Grain, vignette.
AgX-specific
Concepts that aren't covered by general photography references because they are AgX inventions or AgX integrations.
- Preset model — The three-part structure and the
extendschain merge semantics. - Render pipeline — The conceptual journey from decoded image to encoded output.
- LUT format —
.cubesyntax, trilinear interpolation, and supported sizes and features.
Color spaces in AgX
AgX's render pipeline does math on pixel values in two related color spaces: linear Rec.2020 (the working space for physical operations) and gamma-encoded Rec.2020 (the working space for perceptual operations). Each stage runs in the space where its math is physically or perceptually correct. This page is the lookup reference for definitions, conversions, gamut matrices, and the per-stage assignment.
Linear vs gamma-encoded
There are two common ways to represent color values:
Linear light (also called "scene-referred"): values are proportional to physical light intensity. Double the value = double the photons. This is how light works in the real world. The specific linear space AgX uses internally is linear Rec.2020.
Gamma-encoded (also called "display-referred"): values are perceptually spaced for human vision. Our eyes are much more sensitive to changes in dark tones than bright ones. A gamma encoding allocates more of the 0–1 range to dark values, which is why JPEGs and PNGs use a gamma encoding by default.
AgX's gamma working space reuses the sRGB transfer-curve shape applied to Rec.2020 linear values. A sign-preserving variant of the curve handles small negative components that can arise from wide-gamut matrix conversions.
The conversion
The approximate relationship is a power curve:
- Linear to gamma:
gamma = linear ^ (1/2.2) - Gamma to linear:
linear = gamma ^ 2.2
The exact sRGB specification uses a piecewise function with a linear segment near zero, and AgX uses that exact shape. The sign-preserving form is:
gamma  = sign(x) * srgb_curve(|x|)
linear = sign(x) * srgb_curve_inverse(|x|)
What 0.5 means in each space
- Linear 0.5 = 50% of maximum light intensity (physically half as bright as 1.0).
- Gamma 0.5 = a perceptual midtone (the gray that looks halfway between black and white on screen).
Doing math in the wrong space produces wrong results. Multiplying linear values by 2 doubles the light (correct exposure adjustment). Multiplying gamma values by 2 produces a non-physical result that doesn't look right.
Gamut and matrices
AgX accepts three primary input gamuts and converts each into linear Rec.2020 at decode:
| Input primaries | Conversion to linear Rec.2020 |
|---|---|
| sRGB / BT.709 | 3×3 matrix (see below) |
| Display P3 | 3×3 matrix (see below) |
| BT.2020 | identity (primaries match Rec.2020) |
PQ and HLG transfer-encoded inputs are not parsed as HDR; the decoder treats them as sRGB with a stderr warning.
Linear Rec.2020 → linear sRGB:
| R | G | B | |
|---|---|---|---|
| R | 1.660491 | -0.587641 | -0.072850 |
| G | -0.124550 | 1.132899 | -0.008349 |
| B | -0.018151 | -0.100579 | 1.118730 |
Linear sRGB → linear Rec.2020:
| R | G | B | |
|---|---|---|---|
| R | 0.627404 | 0.329283 | 0.043313 |
| G | 0.069097 | 0.919541 | 0.011362 |
| B | 0.016391 | 0.088013 | 0.895595 |
Linear Display P3 → linear Rec.2020:
| R | G | B | |
|---|---|---|---|
| R | 0.753833 | 0.198597 | 0.047570 |
| G | 0.045744 | 0.941776 | 0.012480 |
| B | -0.001210 | 0.017601 | 0.983610 |
The Rec.2020 gamut contains the P3 gamut, but P3 primaries expressed in Rec.2020 coordinates can produce small negative components (e.g., the blue channel of P3 red is ≈ −0.0012). Downstream stages tolerate these; the final encode clamps to the 0–1 range.
Working space
AgX's working space is linear Rec.2020 for physical operations and gamma-encoded Rec.2020 for perceptual operations. The gamma encoding uses the sRGB transfer-curve shape applied to Rec.2020 linear values, in the sign-preserving variant.
Per-stage table
Each stage runs in the space where its math is correct.
| Stage | Color space |
|---|---|
| White balance | Linear Rec.2020 |
| Exposure | Linear Rec.2020 |
| Dehaze | Linear Rec.2020 |
| Noise reduction | Linear Rec.2020 |
| Contrast, highlights, shadows, whites, blacks | Gamma Rec.2020 |
| Tone curves | Gamma Rec.2020 |
| HSL adjustments | Gamma Rec.2020 |
| Color grading | Gamma Rec.2020 |
| LUT | Gamma Rec.2020 (sampled in sRGB gamma via the engine's conversion bracket) |
| Detail pass (sharpen, clarity, texture) | Gamma Rec.2020 |
| Grain | Gamma Rec.2020 |
| Vignette | Gamma Rec.2020 |
The LUT stage lives in the gamma-Rec.2020 portion of the pipeline, but the LUT itself is sampled in sRGB gamma — the engine wraps the LUT call with a conversion bracket so third-party .cube LUTs authored against sRGB continue to work unchanged.
See also
- Why each stage runs where it runs — the design rationale.
- Color models — the channel structure inside each space.
- Render pipeline — where in the pipeline the linear↔gamma conversions happen.
Color models
A color model is a way of describing a color with numbers. AgX uses three: RGB, HSL, and luminance. Each fits a different kind of operation.
RGB
RGB describes a color by how much red, green, and blue light it contains. The three channels add together (additive synthesis): pure red plus pure green plus pure blue produces white. RGB is the model the input image already uses (decoded from JPEG, PNG, TIFF, or raw demosaic) and the model AgX outputs.
Operations that respond to channel intensities — white balance (per-channel multipliers), exposure (uniform multiplier), per-channel tone curves, LUT lookup — work in RGB.
HSL
HSL re-parameterizes RGB into three perceptually meaningful axes:
- Hue (0°–360°) — the color's position around the color wheel: red at 0°, yellow at 60°, green at 120°, cyan at 180°, blue at 240°, magenta at 300°.
- Saturation (0–1) — how vivid the color is, from gray (0) to fully saturated (1).
- Luminance (0–1) — how bright the color is, from black (0) to white (1).
HSL is useful when you want to edit one of these properties without disturbing the others. AgX's HSL pass adjusts hue, saturation, and luminance per color band (red, orange, yellow, green, aqua, blue, purple, magenta) — letting you, for example, deepen blues without darkening reds.
Luminance
Luminance is a single number representing perceived brightness. Human vision is more sensitive to green than to red or blue, so luminance is a weighted sum:
luma ≈ 0.2126 R + 0.7152 G + 0.0722 B (Rec. 709 weights, used in sRGB)
AgX uses luminance as a weighting signal in places where "how bright is this pixel" matters more than "what color is it":
- The grain weight function fades grain in highlights based on luminance.
- The luma channel of the tone curve operates on luminance, applying the same brightness curve regardless of hue.
- Tonal-region selectors (highlights, shadows, whites, blacks) define their regions by luminance.
When AgX uses each model
| Operation | Model | Reason |
|---|---|---|
| White balance | RGB (linear) | Per-channel multipliers correct color cast at the channel level |
| Exposure | RGB (linear) | Uniform multiplier across all channels |
| Contrast, highlights, shadows, whites, blacks | RGB (gamma Rec.2020) | Targets defined perceptually; tonal regions are selected by luminance |
| Tone curves (RGB channel) | RGB | Per-channel response shaping |
| Tone curves (luma channel) | Luminance | Brightness shaping that preserves hue and saturation |
| HSL | HSL | Selective edits per color band |
| Color grading | RGB (per tonal region defined by luminance) | Three-way wheels operate on RGB; their region weights come from luminance |
| LUT | RGB (gamma Rec.2020; LUT samples in sRGB-gamma via the engine's conversion bracket) | LUT is a 3D RGB→RGB mapping |
| Grain weighting | Luminance | Strength varies with brightness |
See also
- Color spaces — the linear-vs-gamma encoding choice that sits underneath the model choice.
- HSL — algorithm explanation for the HSL pass.
- Tone curves — algorithm explanation, including the luma channel.
Tone
Tone refers to the distribution of light and dark in an image — everything that controls how bright a pixel is, separately from what color it is. The Tone group covers the seven knobs that shape the brightness landscape: a global brightness, a global contrast, four targeted region adjustments, and the freeform tone curve.
Exposure
Simulates changing the amount of light reaching the sensor. Doubling exposure doubles the linear-light value of every pixel. AgX exposes exposure in stops (a logarithmic unit: +1 stop = 2× brighter, +2 stops = 4× brighter). Practical values stay within ±5 stops; beyond that, the math still works but most pixels saturate or go near-black.
Contrast
Pushes pixel values away from a midpoint, brightening the highlights and darkening the shadows. AgX applies contrast in the gamma Rec.2020 working space so the midpoint matches the perceptual middle gray, not the linear-light midpoint (which would crush shadows).
Highlights
Targets the brightest part of the tonal range. Negative values pull highlights down, recovering blown-out areas; positive values lift them, brightening already-bright regions. AgX defines "highlight" by luminance.
Shadows
Targets the darkest part of the tonal range. Negative values deepen shadows; positive values lift them, revealing detail in dark areas. AgX defines "shadow" by luminance.
Whites
Adjusts the upper extreme of the tonal range — the values at or near pure white. Distinct from highlights, which target a broader bright region; whites pulls the maximum down or pushes it up.
Blacks
Adjusts the lower extreme of the tonal range — the values at or near pure black. Distinct from shadows, which target a broader dark region; blacks pulls the minimum up or pushes it down.
Tone curves
A per-channel mapping from input value to output value, drawn as a curve. AgX provides five curves: a master RGB curve, a luma curve (tone-only, hue-preserving), and one per R/G/B channel for color-shifting. Tone curves give the most expressive shaping of the brightness landscape but also the easiest way to crush detail or shift color unintentionally.
See: Basic adjustments (exposure and tonal sliders — white balance lives under Color) and Tone curves for the algorithm-level math behind these knobs.
Color
Color refers to hue and saturation — the chromatic content of pixels, separately from their brightness. The Color group covers the three knobs that shape AgX's chromatic response: white balance (the global cast), HSL (per-color-band edits), and color grading (three-way wheels for tonal regions).
White balance
Corrects (or creatively shifts) the color cast of a scene. AgX exposes two parameters:
- Temperature — shifts the image along the blue-yellow axis, undoing the warm cast of incandescent lighting or the cool cast of overcast daylight.
- Tint — shifts along the green-magenta axis, useful for fluorescent and mixed-lighting scenes.
White balance runs in linear-light RGB because color casts are physical properties of the light source.
Color temperature
Background concept. Photographers describe the color of light in Kelvin. Lower temperatures are warmer (orange/red, ~2700K candle, ~3200K tungsten), higher temperatures are cooler (blue, ~6500K daylight, ~10000K shade). Cameras and editors that "set" a white-balance temperature in Kelvin interpret that as the source-light temperature and shift the image to neutralise its cast.
AgX's temperature slider is not a Kelvin value. It is a creative warm-cool slider: positive values warm the image (boost red, reduce blue), negative values cool it. The mapping is dimensionless — the slider controls a relative channel-multiplier shift, not a Kelvin delta. Use the slider with the photographer's intuition above as a guide, but read the on-screen result rather than expecting a specific Kelvin source-temperature interpretation.
HSL
Per-color-band adjustments to hue, saturation, and luminance. AgX divides the color wheel into eight bands (red, orange, yellow, green, aqua, blue, purple, magenta) and lets you shift each band's hue (push reds toward orange), modify its saturation (mute blues), or lift/lower its brightness (darken yellows). HSL is the right tool when one color needs different treatment than the others.
Color grading
Three-way color grading distributes color shifts across tonal regions: shadows get one color, midtones another, highlights a third, with an optional global wheel layered on top. The "blue shadows + orange highlights" cinematic look is the canonical use; AgX also exposes a balance control to bias the regions.
Color grading sits in RGB (gamma Rec.2020) and uses luminance to weight the regions.
See: Basic adjustments (white balance section), HSL, and Color grading for the algorithm-level math behind these knobs.
LUTs also produce color transforms; AgX applies them as part of the color stage. See LUT format for what a LUT is and how AgX handles it.
Detail
Detail refers to the micro-level texture and edge structure of an image — everything that controls how sharp, how clean, and how clear the small-scale content reads. The Detail group covers four knobs: sharpening (edge contrast), clarity (mid-frequency local contrast), dehaze (long-range local contrast), and noise reduction (the inverse direction).
Sharpening
Boosts the contrast of edges to make them appear crisper. AgX implements sharpening as an unsharp-mask variant: blur the image, subtract the blur from the original to isolate edges, scale the difference, and add it back. The amount slider controls the gain; the radius controls how local the edges are.
Over-sharpening produces halos around high-contrast edges and amplifies sensor noise — sharpening is best applied with restraint and ideally after noise reduction.
Clarity / structure
Boosts contrast at the mid-frequency scale — larger than edges (where sharpening operates) but smaller than the whole image. Clarity makes textures pop: stone, fabric, foliage, weathered surfaces. Negative clarity produces a dreamy soft-focus effect.
Clarity is sometimes called "structure" or "texture" in other editors. AgX's detail pass exposes both clarity and a separate texture parameter that target slightly different frequency ranges.
Dehaze
Removes (or adds) the low-contrast, low-saturation veil that haze, fog, or smog produces over distant subjects. Dehaze increases local contrast and saturation in regions the algorithm identifies as hazy, and decreases them in regions that look clear. Negative dehaze adds the veil back, simulating mist or atmosphere.
Dehaze is the longest-range of the local-contrast tools — it operates over much larger image regions than sharpening or clarity.
Noise reduction
Reduces the random pixel-to-pixel variation that high-ISO sensors and pushed exposures introduce. AgX separates noise reduction into two channels:
- Luminance noise — variation in brightness; appears as grain-like speckling.
- Chroma noise — variation in color; appears as red/green/blue blotches in shadows.
Chroma noise is usually more objectionable and easier to remove without losing detail; luminance noise reduction trades sharpness for smoothness, so it's best used in moderation.
See: Detail pass (sharpening + clarity), Dehaze, and Noise reduction for the algorithm-level math behind these knobs.
Effects
Effects are overlaid or added artifacts — they don't restore or correct anything in the underlying image, they layer something on top. AgX applies effects late in the pipeline so they aren't disturbed by earlier color or tone work. The Effects group covers two knobs: grain (added noise) and vignette (edge darkening or brightening).
Grain
Simulates film grain by adding spatial noise to the image. Real film shows grain because silver halide crystals form in discrete clumps; AgX models the look without the chemistry. The effect is shadow-weighted — grain is more visible in dark areas, matching how real film behaves at higher ISOs.
See Grain for the full algorithm and the design history behind the choices.
Vignette
Darkens (or brightens) the corners of the image relative to the center. Photographers use vignettes for two reasons: to correct lens fall-off (real lenses produce some natural darkening at the edges) and as a creative tool to draw the eye toward the center subject.
AgX's vignette is creative — symmetric, controllable in amount and falloff. Lens-correction vignetting (geometric, lens-profile-driven) is not part of the current pipeline.
See: Grain and Vignette for the algorithm-level math behind these knobs.
Preset model
A preset is a portable, human-readable description of an edit. AgX's preset model has three parts:
- Metadata — name, version, author, and an optional
extendsreference. - Partial parameters — a set of overrides on the engine's default parameters. Any parameter the preset doesn't mention keeps the default.
- Optional LUT — a
.cubefile path applied at the LUT stage of the pipeline.
The combination is enough to reproduce an edit from a clean image without any GUI state, sidecar file, or hidden context.
The extends chain
A preset can declare an extends field inside its [metadata] block to inherit from another preset:
[metadata]
name = "warm-cinematic"
extends = "neutral-base.toml"
AgX resolves the chain at load time:
- Load the parent preset and its partial parameters.
- Load the child preset and its partial parameters.
- Merge: child overrides parent on every field the child specifies; child inherits everything else.
The chain can be arbitrarily deep. A leaf preset specifies only its incremental changes from its parent; the parent specifies its incremental changes from its parent; and so on up to a base preset (or to the engine defaults if no extends is set).
The merge is recursive through composite sections, last-write-wins at the leaf. AgX walks each top-level partial section (tone, hsl, tone_curve, color_grading, vignette, dehaze, noise_reduction, grain, detail) and merges fields from the parent and child by union. The child's specified fields win at the leaf level; any field the child doesn't mention is inherited from the parent.
Concretely, if the parent sets tone_curve.luma and the child sets tone_curve.rgb, the merged preset has both — the child does not replace the parent's luma curve just because both presets opened a [tone_curve] table. If both parent and child set tone_curve.luma, the child's curve fully replaces the parent's at that leaf — AgX does not interpolate or merge individual control points within a single curve.
See also
- Why partial parameters and the patch-on-baseline mental model — the design rationale.
- Preset format — auto-generated field-by-field schema reference.
- Render pipeline — where in the pipeline each parameter takes effect.
Render pipeline
A render in AgX takes an input image (decoded from JPEG, PNG, TIFF, or raw) through a fixed sequence of stages and produces an output image. Each stage applies one kind of adjustment in the color space where its math is correct.
Stages
flowchart TD
    Decode["Decode<br/>(JPEG, PNG, TIFF, raw)"]
    LinearEntry["Linear Rec.2020"]
    WB["White balance<br/>(linear Rec.2020)"]
    Exposure["Exposure<br/>(linear Rec.2020)"]
    Dehaze["Dehaze<br/>(linear Rec.2020)"]
    Denoise["Noise reduction<br/>(linear Rec.2020)"]
    ConvToGamma["Auto-conversion:<br/>Linear → Gamma Rec.2020"]
    Tonal["Contrast, highlights,<br/>shadows, whites, blacks<br/>(Gamma Rec.2020)"]
    ToneCurves["Tone curves<br/>(Gamma Rec.2020)"]
    HSL["HSL adjustments<br/>(Gamma Rec.2020)"]
    ColorGrading["Color grading<br/>(Gamma Rec.2020)"]
    ConvToLut["Auto-conversion:<br/>to LUT encoding space"]
    LUT["LUT<br/>(sRGB gamma or linear sRGB,<br/>per lut.encoding)"]
    ConvFromLut["Auto-conversion:<br/>back to Gamma Rec.2020"]
    Detail["Detail pass<br/>(sharpen, clarity, texture)<br/>(Gamma Rec.2020)"]
    Grain["Grain<br/>(Gamma Rec.2020)"]
    Vignette["Vignette<br/>(Gamma Rec.2020)"]
    ConvToLinear["Auto-conversion:<br/>Gamma → Linear Rec.2020"]
    Encode["Encode<br/>(Linear Rec.2020 → output gamut:<br/>matrix + transfer + quantize)"]

    Decode --> LinearEntry
    LinearEntry --> WB
    WB --> Exposure
    Exposure --> Dehaze
    Dehaze --> Denoise
    Denoise --> ConvToGamma
    ConvToGamma --> Tonal
    Tonal --> ToneCurves
    ToneCurves --> HSL
    HSL --> ColorGrading
    ColorGrading --> ConvToLut
    ConvToLut --> LUT
    LUT --> ConvFromLut
    ConvFromLut --> Detail
    Detail --> Grain
    Grain --> Vignette
    Vignette --> ConvToLinear
    ConvToLinear --> Encode
Color space discipline
Each stage runs in the color space where its math is physically or perceptually correct. The pipeline does the linear-to-gamma conversion in the middle to switch from physical to perceptual operations. Conversions between stages are inserted automatically by the pipeline executor based on each stage's declared input and output color space. The LUT stage samples in the space declared by lut.encoding (srgb by default; linear for linear-light LUTs). See Color spaces for the linear-vs-gamma distinction and the per-stage table.
See also
- Why pipeline order matters — the design rationale for the stage sequence.
- Color spaces — the linear-vs-gamma distinction the pipeline lives in.
- Preset model — how a preset's parameters map to pipeline stages.
- Algorithm explanations — algorithm-by-algorithm walkthroughs in pipeline order.
LUT Format Reference
This document describes 3D LUTs, the .cube file format, and how AgX handles them.
What is a LUT?
A LUT (Look-Up Table) is a pre-computed color transformation. Instead of defining a transformation as a formula (like "multiply by 2"), a LUT stores the result for every possible input. Given an input RGB color, you look up the corresponding output RGB color in the table.
LUTs are widely used for:
- Film emulation: Mimicking the look of specific film stocks (Portra 400, Ektar 100, Tri-X)
- Color grading: Applying a cinematic color grade (teal and orange, bleach bypass, etc.)
- Technical transforms: Converting between color spaces or log curves
- Creative looks: Any arbitrary color transformation
1D vs 3D LUTs
1D LUT: Three separate curves, one per channel (R, G, B). Each channel is transformed independently. Fast but limited: cannot do cross-channel effects (e.g., "when red is high, boost blue"). Essentially the same as three tone curves.
3D LUT: A three-dimensional grid indexed by input R, G, B. Each grid point stores an output RGB value. Because the grid is indexed by all three channels simultaneously, 3D LUTs can represent any color transformation, including cross-channel effects. This is what AgX supports.
The .cube Format
The .cube format was defined by Adobe for use in DaVinci Resolve and has become the de facto standard for LUT interchange. It is supported by virtually every editing tool: Lightroom, Photoshop, Resolve, Capture One, Final Cut Pro, Premiere, Affinity Photo, and many more.
It is a plain text file with a simple structure.
Header Keywords
TITLE "Film Emulation"
LUT_3D_SIZE 33
DOMAIN_MIN 0.0 0.0 0.0
DOMAIN_MAX 1.0 1.0 1.0
| Keyword | Required | Default | Description |
|---|---|---|---|
TITLE "name" | No | none | Descriptive name for the LUT |
LUT_3D_SIZE N | Yes | - | Cube dimension: creates N x N x N entries |
DOMAIN_MIN r g b | No | 0.0 0.0 0.0 | Minimum input value per channel |
DOMAIN_MAX r g b | No | 1.0 1.0 1.0 | Maximum input value per channel |
Lines starting with # are comments and are ignored.
Data Section
After the header, each line contains three space-separated floating-point numbers representing the output R, G, B values for one grid point:
0.000000 0.000000 0.000000
0.003906 0.000000 0.000000
0.007812 0.000000 0.000000
...
There must be exactly N^3 data lines (e.g., 35,937 lines for a 33x33x33 LUT).
Entry Ordering
Entries are ordered with R changing fastest, then G, then B. In pseudocode:
for b in 0..N:
    for g in 0..N:
        for r in 0..N:
            write output_rgb[r][g][b]
The flat array index for input (r, g, b) is: r + g*N + b*N*N.
Trilinear Interpolation
A 33x33x33 LUT only stores output values for 33 evenly-spaced points along each axis. For input values that fall between lattice points, the output is trilinearly interpolated from the 8 surrounding grid points.
This is analogous to bilinear interpolation in 2D (used in image scaling), extended to 3D:
- Find the cell containing the input point (the 8 surrounding lattice vertices)
- Compute the fractional position within the cell (0.0 to 1.0 in each axis)
- Interpolate along R (4 pairs -> 4 values)
- Interpolate along G (2 pairs -> 2 values)
- Interpolate along B (1 pair -> 1 value)
The result smoothly blends between grid points, producing continuous color transitions.
Common LUT Sizes
| Size | Entries | File Size (~) | Quality | Use Case |
|---|---|---|---|---|
| 17 | 4,913 | ~100 KB | Good | Lightweight, fast loading |
| 33 | 35,937 | ~700 KB | Very good | Standard for most LUTs |
| 65 | 274,625 | ~5 MB | Excellent | High precision, technical use |
Most creative LUTs use size 33, which provides excellent quality with reasonable file size. Larger sizes offer diminishing returns for most color grades.
What AgX Supports
Supported:
- 3D LUTs in
.cubeformat TITLE,LUT_3D_SIZE,DOMAIN_MIN,DOMAIN_MAXheader keywords- Trilinear interpolation
- Any cube size (commonly 17, 33, 65)
- Comments (
#lines) - Applied in sRGB gamma space after tone adjustments
Not supported (currently):
- 1D LUTs (
LUT_1D_SIZEkeyword is ignored, not an error) - Shaper LUTs (1D pre-processing before 3D lookup)
- Tetrahedral interpolation (trilinear is used instead; the quality difference is minimal)
- Non-sRGB input spaces (log curves, linear)
.3dl,.csp,.icc, or other LUT formats
Where to Find .cube LUTs
Many free LUTs are available online:
- Film emulation packs (Fuji, Kodak, etc.)
- Cinematic color grades
- Black and white conversions
- Technical conversion LUTs
When using third-party LUTs, verify they expect sRGB gamma input (most creative LUTs do). LUTs designed for video log input (S-Log3, LogC) will produce incorrect results in AgX.
See also
- How AgX generates its bundled LUTs — the design choices behind the
agx-lut-gencrate. - LUT encoding — why LUT encoding matters and when to use
srgbvslinear.
Explanation
This section covers the why behind AgX. Two sub-sections:
- Concepts — architecture, preset-first philosophy, design decisions, render pipeline, preset model, color spaces.
- Algorithms — per-algorithm walkthroughs in pipeline order.
If you are looking up a specific fact, see the reference section instead. If you are following a guided learning path, start with the tutorials.
Conceptual explanations
This sub-section discusses the architectural and design choices that shape AgX. Pages are oriented around understanding why AgX is built the way it is, not what to look up.
If you want to look up a specific fact (a CLI flag, a preset field, a color-space conversion formula), see the reference section. If you want to learn AgX from scratch, start with the tutorials.
Pages
- Architecture — how the codebase is layered and why those layers are load-bearing.
- Preset-first philosophy — what "preset-first" means and what AgX deliberately is and isn't.
- Design decisions — load-bearing invariants and the choices that produced them.
- Render pipeline — why the pipeline runs stages in the order it does.
- Preset model — the patch-on-baseline mental model behind partial parameters.
- Color spaces — why operations live in linear vs gamma Rec.2020 working space.
- How AgX generates its bundled LUTs — the design choices behind the
agx-lut-gencrate.
See also
- Algorithm explanations — per-algorithm walkthroughs.
- Conceptual reference — lookup-style coverage of the same topics.
Architecture
AgX is a layered Rust library and CLI. This page discusses why the layers are shaped the way they are, what the contracts between them are, and which constraints are load-bearing.
If you want to look up the dependency rules or run the architectural tests, see ARCHITECTURE.md at the repo root — that file is the contract; this page is the discussion.
The layers
The agx crate splits its source into eight modules: error (the foundation type), adjust (per-pixel and per-buffer math), lut (3D LUT parsing and lookup), decode (files into pixels), metadata (EXIF and ICC bytes), encode (pixels into files), preset (TOML serialization of parameter sets), and engine (orchestration, including the dual CPU and GPU pipelines). The agx-cli crate sits on top, consuming only the public library API. Three workspace crates exist for development: agx-docgen generates reference markdown, agx-lut-gen produces the bundled .cube LUTs, and agx-e2e runs golden-file tests.
The dependency direction is strictly bottom-up. error is the foundation — every other module imports from it; it imports from nothing. Above sit adjust, lut, decode, metadata, and encode — mostly siblings, with decode → metadata → encode forming a small sub-layering for raw-file I/O (metadata reads two helpers from decode; encode reads ImageMetadata from metadata). preset consumes Parameters from engine and Lut3D from lut, but defines no engine logic. At the top, engine pulls in adjust, lut, and preset and orchestrates rendering. agx-cli depends only on agx, never on internal modules. The structural test in crates/agx/tests/architecture.rs enforces these rules and fails any change that crosses a forbidden boundary.
Why this shape
adjust cannot import from engine because adjust is pure pixel math. Each function takes scalar or buffer inputs and returns the same, with the color space documented per function. There is no state and no orchestration — the engine decides iteration order and pipeline sequencing. Letting adjust reach into engine would entangle math with state, and the math would no longer be testable in isolation. The parameter structs and pre-compute helpers in adjust that the GPU path depends on also require adjust to stay free of orchestration concerns — the GPU path reimplements pixel math in WGSL, sharing those structs without calling into adjust for computation.
engine sits at the top of the library because it owns orchestration: which adjustments to apply, in which order, and which of the two pipelines (CPU via Rust + rayon, or GPU via wgpu + WGSL) to dispatch on. Putting orchestration anywhere else would push pipeline knowledge into the math modules — exactly what the adjust boundary forbids. Parameters lives in engine because the parameter shape is dictated by what the pipeline consumes.
agx-cli depends only on the public library API for the same reason any other consumer would. A future GUI, a batch worker, or a third-party application all need the same surface. If the CLI needs functionality the library does not expose, the right answer is to expose it, not to reach past the API.
decode and encode are siblings of adjust, not stages of a pipeline. Image I/O is independent of editing math; tying them together would force every consumer to think about both. A caller with decoded pixels already in memory should be able to use the engine without a file system, and one that wants to inspect output should be able to call encode without running an edit.
preset depends on lut (for Lut3D) and engine (for Parameters); these types are what a TOML document declares. The dependency rules permit engine to import from preset — and it does: apply_preset() and layer_preset() read parameter values out of a parsed preset. The conceptual flow is still one-directional: preset values flow into the engine; the engine never asks preset to compute anything. Serialization is a preset concern, not an engine concern.
metadata stays out of every other module because it carries no semantic load on the rendered image. EXIF bytes flow from input to output without being interpreted. ICC profile bytes on output come from the encoder, which always labels the file as sRGB. Pixel logic never touches metadata; metadata never touches pixels.
Core invariants and why they exist
The five invariants from ARCHITECTURE.md each carry weight. This section discusses what each one prevents.
Always re-render from original
The engine holds an immutable original image and a mutable parameter state. Every render() call starts from the original and replays all adjustments in pipeline order. There is no incremental editing surface and no operation history.
The invariant prevents two failure modes. The first is accumulated rounding error from sequential editing — repeatedly mutating a working buffer drifts pixels away from where a direct render would land them. The second is the order-sensitivity of "apply X, then Y, then undo X," which an editor with operation state must either model precisely or paper over. Re-rendering sidesteps both: every render is a function of (original, parameters), with no path dependence.
The cost is that every parameter change forces a full pipeline replay. Dual-pipeline parallelization has made this acceptable on consumer hardware — rayon plus the optional GPU path keep render times fast enough for batch workflows.
Declarative presets
A preset is a TOML document declaring parameter values, not an operation sequence. A preset says exposure = +1.0, never "apply exposure +1.0 after white balance." Parameters are partial; values not declared fall back to defaults or to whatever a parent preset declared via extends.
The declarative shape is what makes presets portable, composable, and inspectable. A reader can open a TOML file and see exactly which knobs the preset turns. The extends chain works because there is no hidden order to reconcile — applying preset B on top of preset A is a recursive last-write-wins merge, not a replay of two operation logs.
The alternative considered was an operation log, which is what most photo editors use under the hood. That model was rejected because it ties presets to engine version (operation names, parameter shapes, and ordering rules become part of the preset's contract) and reintroduces the order-sensitivity that the always-re-render-from-original invariant exists to remove.
Wide working space (linear Rec.2020)
All internal processing uses linear Rec.2020 for physical operations and gamma-encoded Rec.2020 (the sRGB transfer curve applied to Rec.2020 linear values) for perceptual operations. The sRGB transfer curve shape carries over, so anchor points like the 0.5 midtone keep their perceptual meaning; what's different is the wider gamut underneath. Decode converts inputs (sRGB / BT.709 matrix, Display P3 matrix, BT.2020 SDR identity) into linear Rec.2020; encode converts linear Rec.2020 to 8-bit sRGB at output.
What this avoids is squashing wide-gamut inputs at the decode boundary. iPhone HEIC photos tagged Display P3 keep their vivid reds and saturated greens through every edit; the final clamp to display gamut happens only at encode. ICC profile reading from input images, wide-gamut output, and HDR transfer curves (PQ/HLG) are intentionally out of scope at this revision; HDR HEIC sources fall back to "treat as sRGB" with a stderr warning. The color spaces page covers the per-stage placement and the conversion matrices.
Fixed render order
The engine applies adjustments in a fixed, hardcoded order. The order in which fields appear in a preset, in Parameters, or in API calls has no effect on the output. Render order is an engine implementation detail, not a user-facing concept.
This works because each stage is designed to run in the color space and pipeline position where its math is correct. Exposure runs first, in linear space, before any tonal stage that operates on perceptual values; dehaze runs before denoise so denoise can clean up artifacts dehaze has amplified; LUTs run as their own stage after the per-pixel adjustments, sampling in the space declared by the LUT's encoding (sRGB gamma for srgb, linear sRGB for linear), with the executor inserting the conversion bracket automatically; detail, grain, and vignette follow. Moving a stage breaks an assumption a downstream stage depends on. The render pipeline page walks through the worked examples.
The cost is that stages are not user-reorderable. The trade-off was made for predictability: a preset produces the same output regardless of how it was authored.
Dual pipeline, same output
The engine has CPU and GPU pipelines that execute the same stages in the same order. CPU is the canonical path — deterministic across platforms, used for golden-file testing and as the fallback when no GPU adapter is available. GPU is opt-in via Engine::new_gpu_auto() or --gpu, and runs the same stage list on a wgpu device using WGSL compute shaders. Cross-path consistency tests in gpu_consistency.rs verify both produce near-identical output.
Both paths exist because the trade-offs are different. CPU is portable, deterministic, and easy to reason about; the test suite trusts it. GPU is faster on machines with capable hardware, especially for per-pixel and convolution-heavy stages, and is opt-in precisely because the canonical path cannot depend on a GPU vendor's driver.
The cost is that every new adjustment is implemented twice — once in adjust, once in WGSL — and the cross-path test surface grows with the feature set. Adding a CPU stage without a GPU dispatcher is a half-finished feature.
Negative constraints in practice
The "what does NOT exist" list in ARCHITECTURE.md is as load-bearing as the dependency rules. The invariants describe what the system does; the negative constraints describe what each module deliberately is not.
The most common temptation is to push file I/O into adjust. An adjustment might want a profile, a calibration table, or an auxiliary asset; reading from disk inside the math function is the path of least resistance. The right answer is to load the asset upstream — in decode if it is part of the input file, in preset if a TOML document references it, or in the engine if it is a runtime resource — and pass the parsed data in as a parameter.
When GPU support landed, dual-path coverage forced new boundary discipline. The temptation was to scatter wgpu types and shader bindings across modules that already held the CPU implementation. The architecture instead keeps GPU code inside engine/gpu/, with WGSL shaders dispatched from per-stage functions. The CPU path delegates math to adjust; the GPU path reimplements the same algorithms in WGSL. Neither leaks into adjust.
A subtler temptation is to short-circuit the rules with re-exports. If engine re-exported a type from adjust, a sibling could import it from engine and technically pass the test. This is still a violation in spirit: the dependency the rule prevents has just been laundered. When a re-export is the right tool — hoisting Parameters so consumers do not have to know its internal location — it is a documented public API choice, not a way to dodge a rule.
The structural test catches drift early, but interpreting a failure is the contributor's job. The right reaction is "find the right module" or "extract a shared type to a lower layer," not "weaken the test."
When the architecture should evolve
The rules are not eternal. When a new feature genuinely needs a boundary change, AgX evolves the architecture deliberately rather than letting boundaries drift: any new cross-module dependency is justified explicitly, the structural tests that enforce the rules are updated to match, and the change is reviewed under the same scrutiny as any other architectural shift. The goal is not to prevent change, but to make boundary changes visible and intentional rather than accidental.
See also
- Design decisions — the cross-cutting decisions that produced these invariants.
- Render pipeline — why the pipeline order is fixed.
- Color spaces — why linear Rec.2020 is the working space.
- Preset model — how presets fit into the layered design.
Preset-first photo editing
AgX is a preset-first photo editing tool. This page explains what "preset-first" means, what it implies for the shape of the project, and what AgX deliberately is and is not.
The short version: AgX's bet is that the portable preset language — not the rendering engine — is the durable, valuable thing. Lightroom and Capture One have decades of engine refinement behind them; AgX competes on a different axis — making a look legible, shareable, and composable as plain text.
Presets as recipes
A preset in AgX is a recipe for an edit: a complete, declarative statement of which knobs to turn and how far. It is not a log of operations the user performed. The TOML document says exposure = +0.5 and contrast = 15; it does not say "the user dragged the exposure slider, then opened the curves panel, then undid the curve change." The engine reads the recipe, applies every value in a fixed pipeline order, and produces an image. The same recipe applied to the same input always produces the same output.
This shape makes a preset durable. The recipe is just a list of parameter values, so it survives software upgrades the same way any plain-text data format does — as long as the parameter names mean what they used to mean, the file still describes the same edit. The recipe is also legible without the editor that produced it: a reader can open the TOML, see what the preset does, and reason about it without launching the application. And because the recipe captures intent — "I want this much warmth, this much contrast" — rather than the GUI clicks that produced it, sharing a preset does not leak whatever session state the author happened to have open.
The contrast with operation-log editors is sharp. Most photo editors store edits as a sequence of operations: applied filter X with parameter set Y, then filter Z, then undid filter X. The sequence is meaningful — reordering it changes the output — and the operation names and parameter shapes are tied to the editor's internal data model. Sidecar files from operation-log editors tend to be opaque, version-locked, and brittle across upgrades. AgX trades the flexibility of arbitrary operation sequences for the simplicity of a flat parameter dictionary, and gets shareability and durability in exchange. The mechanics of how recipes layer on top of one another are covered on the preset model page.
Batch-oriented, not pixel-level
AgX is good at one specific thing: applying a consistent look to many images. The library exposes a render engine that consumes a parameter set and produces a buffer; the CLI wraps that engine in preset-oriented subcommands — apply, multi-apply, and batch-apply — alongside edit and batch-edit for inline flag-based workflows. All are designed around throughput rather than interactivity. A user with a folder of 500 images and a single preset can render the lot in one command and walk away. That use case is the centre of gravity for every design decision.
What AgX deliberately is not is a pixel-level retouching tool. There is no spot-heal brush and no clone-stamp surface. There is no undo stack — the engine renders from the original image on every call, and the parameter set is the only state. There are no local adjustments yet: every adjustment is global, applied uniformly to every pixel in the image. None of these are oversights. They are coherent omissions that follow from the recipe model.
Each missing feature would fight the recipe. Spot retouching's output depends on hand-placed brushes on a specific image; encoding that in a portable, image-independent recipe is a different design space from "this much exposure, this much contrast." An undo stack is a per-session GUI construct — it presupposes a user sitting in front of an editor, which presupposes a UI, which presupposes a session, none of which the recipe model has. Local adjustments are tractable but not trivial: they require a portable way to encode masks, and any encoding scheme has to survive being applied to images of different sizes and orientations than the one it was authored on. Local adjustments are on the long-term map; they are not free.
The roadmap follows from this. Features that strengthen the recipe model — more expressive parameters, better composability, more efficient batch dispatch — come first. Features that would make AgX a Lightroom replacement — a full editing GUI, an asset catalog, layer-style local edits before the portability problem is solved — come never, or come only in a form that fits the recipe. The point is not to apologize for what is missing; the point is that every absent feature is absent on purpose.
Shareable by design
Presets are plain text. They live in TOML files; they sit in a Git repository as cleanly as any other source file; a git diff between two preset versions reads as a list of parameter changes. Two collaborators iterating on a look can review each other's changes the way they review code. Nothing about the format depends on opaque binary blobs, embedded thumbnails, or editor-specific identifiers.
This makes presets forkable. A preset author can publish a "neutral starting point" preset that fixes white balance and gives the input a sensible tonal baseline; another author can fork it, add a tone curve and a LUT, and publish the result without the original author's involvement. The extends mechanism makes the fork structural rather than copy-paste — the child preset declares what it overrides on top of its parent — so a fix to the parent propagates to every preset that extends it.
The longer-term bet is that a preset format which is shareable enough accumulates an ecosystem. If presets travel as easily as code does — readable, diffable, version-controllable, composable — then preset libraries, preset marketplaces, and preset remixing become possible in a way they are not for editor-locked sidecar formats. AgX's design wagers that a portable recipe format is a precondition for that ecosystem, and that the ecosystem itself is worth building toward. Part of that wager is portability across tools: a recipe legible enough to share is one that could, in principle, be translated into the formats other editors read — though faithful translation is a hard, unsolved problem, since every engine renders the same nominal adjustment differently.
CLI and API first
There is no GUI on the critical path. The library is the source of truth: it owns the engine, the parameter set, the preset parser, and the dispatch into the CPU and GPU pipelines. The CLI is a thin wrapper that turns command-line arguments into parameter overrides and preset paths into engine inputs. Any other consumer — a batch worker, a web service, a third-party application — would consume the same library API. The recipe model is what makes this work: every surface that produces a preset can drive the engine the same way.
If a UI is added, nothing about the architecture changes. A UI would consume the same library API, expose sliders that map to parameter values, and write the result to a TOML file. The UI's job in that future would be to help a user produce a preset, not to manage a session — there is no session to manage, because the engine is stateless across renders. The recipe stays canonical; the UI is one more way to author one. The architecture page covers how this constraint shapes the module dependency graph: agx-cli depends only on the public library API, the same surface a UI would have to use.
See also
- Preset model — the patch-on-baseline mental model that follows from the recipe view.
- Architecture — how the codebase is shaped to serve the philosophy.
- Design decisions — the cross-cutting invariants this philosophy implies.
Design decisions
This page collects the load-bearing invariants of AgX and the choices that produced them. The bulleted list at the top is a fast scannable answer to "what defines AgX?" The narrative entries below give the reasoning behind each decision and what it costs.
Load-bearing invariants
- Always re-render from original — the engine holds an immutable original image and replays all adjustments from scratch on every render.
- Declarative presets — a preset declares parameter values, not an operation sequence.
- Wide working space (linear Rec.2020) — wider than P3 and Adobe RGB, input ICC profile parsing deferred.
- Fixed render order — the engine applies adjustments in a fixed, hardcoded order.
- Dual pipeline, CPU canonical — CPU and GPU pipelines produce near-identical output; CPU is the deterministic source of truth.
- Partial-parameter merge semantics — recursive through composite sections, last-write-wins at the leaf.
- LUT encoding and the auto-conversion bracket — LUTs declare their authoring encoding; the pipeline auto-converts to that space before sampling.
- Preset-first scope — no UI on the critical path; CLI and library are the surface.
Always re-render from original
What we chose
The engine holds an immutable original image and a mutable parameter state. Every call to render() starts from the original and replays every adjustment in pipeline order. There is no working buffer that mutates between renders and no operation history — a parameter change updates the state, and the next render re-derives the output from scratch.
What we considered
The obvious alternative is incremental editing on a working buffer: apply each parameter change as a delta to the most recent rendered output. A second is an explicit operation log that records each user action and replays it on render. A third is a hybrid undo/redo stack — a working buffer plus a list of operations that can be wound back.
Why we chose this
Photo editing operations are not mathematically commutative, so a system that promises order-independent edits has to either hide the order from the user or accept the order-sensitivity. AgX takes the first route: every render is a function of (original, parameters) evaluated in a fixed engine-defined order, so the user never has to reason about which of their adjustments came first. This sidesteps two failure modes at once — accumulated rounding error from sequential mutation of a working buffer, and the path dependence of "apply X, then Y, then undo X" that an operation log must either model exactly or paper over. Lightroom, darktable, and RawTherapee use the same pattern for the same reasons.
What this costs
Every parameter change forces a full pipeline replay. There is no "render only the changed stage" optimization, because downstream stages see the original image rather than a partially-rendered buffer. Interactive preview is therefore more expensive than it would be in an incremental editor, and a future GUI would need a caching strategy layered on top of the engine. Dual-pipeline parallelization keeps render times fast enough for batch workflows, but the cost shows up the first time anyone proposes interactive editing as a primary use case.
Declarative presets
What we chose
A preset is a TOML document declaring parameter values, not an operation sequence. A preset says exposure = +1.0, never "apply exposure +1.0 after white balance." The engine reads the values, applies them in its own fixed order, and produces an output. The preset format does not encode pipeline order or name operations.
What we considered
The dominant alternative across the photo-editing world is the operation log: a sidecar file that records each adjustment as the user made it, with the editor replaying the log to reconstruct the rendered image. Operation logs make it easy to support arbitrary undo/redo and editor-specific operations whose order matters. A second alternative is a partial-log hybrid where presets declare values but reserve room for operation-style entries (custom curves, masking strokes) applied in declaration order.
Why we chose this
The choice follows directly from the always-re-render-from-original invariant. If the engine renders from (original, parameters) without a session buffer, there is no operation history to record, and a preset format that pretends there is one would leak engine internals into every TOML file. A flat parameter dictionary is also what makes presets portable across machines and durable across software versions: the file is a list of name-value pairs, not an executable sequence tied to engine version. AgX's extends chain builds on this shape — layering presets is a recursive merge of parameter dictionaries, not a replay of two operation logs.
What this costs
The engine cannot represent any edit whose meaning depends on its position in a sequence. This precludes order-sensitive features that other editors offer naturally: a per-preset override of pipeline order, or a custom "this, then that" sequence. It also constrains how local adjustments (masks, brushes) would have to work if added — they have to be portable parameter values, not hand-placed strokes that survive only in the editor that made them. The recipe model is what makes presets shareable, and any feature that breaks the recipe loses that property.
Wide working space (linear Rec.2020)
What we chose
The engine works in linear Rec.2020 for physical-light operations (white balance, exposure, dehaze, denoise) and gamma-encoded Rec.2020 — the sRGB transfer curve applied to Rec.2020 linear values — for perceptual operations (contrast, tonal sliders, HSL, color grading, LUT, detail, grain, vignette). Decode converts every input format (sRGB / BT.709 matrix, Display P3 matrix, BT.2020 SDR identity, RAW via LibRaw's sRGB output then matrix) into linear Rec.2020 at the boundary; encode converts linear Rec.2020 to 8-bit sRGB at output. The sRGB transfer-curve shape is reused on Rec.2020 linear values, with a sign-preserving variant that handles the small negative components that arise from wide-gamut matrix output without corrupting them. ICC profile reading, wide-gamut output, and HDR transfer curves are intentionally out of scope at this revision.
What we considered
The obvious sub-option is sRGB-only, which was AgX's previous working space — narrow enough to fit on any consumer display, with no gamut-mapping decisions to make, but it squashes Display P3 (iPhone HEIC) and BT.2020 inputs at the decode boundary, discarding wide-gamut information before any edits. Adobe RGB is wider than sRGB and covers most professional print pipelines, but is narrower than Rec.2020 and would still squash some Display P3 colors. ProPhoto RGB is what Lightroom uses internally — wider than Rec.2020, but its primaries fall outside the visible spectrum, which means many in-gamut values map to non-physical negative tristimulus components and the inverse transfer curve has stability issues around those negatives. Display P3 matches iPhone-native captures exactly but is narrower than Rec.2020. Full color management — wide working space plus ICC parsing on input — adds gamut handling at every input decision and is much more design surface than the working-space choice itself.
Why we chose this
Rec.2020 is wide enough to contain Display P3, Adobe RGB, sRGB, BT.709, and BT.2020 without clipping at the working-space boundary, so wide-gamut inputs survive the entire edit pipeline. It's narrower than ProPhoto RGB, avoiding the negative-tristimulus stability problems that ProPhoto introduces. Reusing the sRGB transfer-curve shape on Rec.2020 linear values means existing sRGB-tuned anchor points (0.5 midpoint, 0.25/0.75 splits) keep their perceptual meaning — preset values calibrated against the old sRGB-only design carry over without re-tuning. The sign-preserving curve handles the small negative components that arise from matrix-converting saturated colors. Scoping input ICC profile parsing separately (deferred to a later sub-project) keeps the working-space change tractable and unblocks the headline Display P3 win for iPhone HEIC users without requiring the full color-management subsystem.
What this costs
Wide-gamut inputs flow unclamped through the entire pipeline, which means heavy edits — high contrast, aggressive saturation — can produce out-of-gamut intermediate values; the final clamp to display gamut at encode catches them, but a wide-gamut output (Rec.2020 JPEG, P3 PNG) would preserve them. That output path is deferred. ICC profile reading from input images is also deferred — files that declare a non-standard primaries triple via ICC fall back to "treat as sRGB" rather than reading the profile. HDR HEIC sources (PQ / HLG transfer curves) similarly fall back to "treat as sRGB" with a stderr warning, because the BT.2020 transfer-curve work is its own design surface. The wider working space also means small float-rounding noise from the matrix conversions is unavoidable at the decode and encode boundaries — within tolerance for the existing golden tests, but visible when comparing exact byte-equal output across the migration boundary.
Fixed render order
What we chose
The engine applies adjustments in a fixed, hardcoded order. Exposure and white balance run first in linear Rec.2020; dehaze and denoise follow, also in linear Rec.2020; the buffer is converted to gamma Rec.2020; the gamma-space per-pixel adjustments (contrast, highlights, shadows, whites, blacks, tone curves, HSL, color grading) run in one pass; the LUT runs as its own stage after that pass, in the space declared by its encoding; detail, grain, and vignette run last. The order in which fields appear in a preset, in the Parameters struct, or in API calls has no effect on output.
What we considered
The alternative is user-reorderable stages: a preset can declare "run dehaze after the LUT" or "run grain before detail." This would give finer creative control and let an advanced user override engine assumptions. A second alternative is partial reorder: most stages are fixed, but a handful (vignette, grain) can be marked "before" or "after" a neighboring stage.
Why we chose this
Each stage is designed to run in the color space and pipeline position where its math is correct: exposure is a linear scaling and must precede the gamma conversion; dehaze and denoise both operate on physical light and stay in linear Rec.2020; contrast and tonal sliders reshape perceptual brightness and require the gamma-Rec.2020 encoding; LUTs run as their own stage after the per-pixel pass, in the space declared by their encoding so existing .cube LUTs work unchanged; grain and vignette are surface effects that should not be re-modified by upstream stages. Reordering any of these breaks an assumption a downstream stage depends on. The render pipeline explanation page walks through the worked examples. Hiding the order from users is also what makes the declarative-preset model work: a preset produces the same output regardless of how it was authored.
What this costs
Stages are not user-reorderable. A photographer who wants grain before detail, or a LUT applied before tonal sliders for a log-grading workflow, has to either accept the engine's order or wait for the pluggable-pipeline design to land. The trade-off is predictability over flexibility: the same preset always produces the same output, at the cost of foreclosing creative orderings some users would value.
Dual pipeline, CPU canonical
What we chose
The engine has two pipeline executors that run the same stages in the same order: a CPU pipeline using Rust and rayon, and a GPU pipeline using wgpu and WGSL compute shaders. The CPU path is canonical — deterministic across platforms, used for golden-file testing, and the default when no GPU adapter is available. The GPU path is opt-in via Engine::new_gpu_auto() or the --gpu CLI flag. Cross-path consistency tests verify both produce near-identical output.
What we considered
Three alternatives were on the table when GPU support was designed. CPU-only — keep the existing rayon pipeline and accept the throughput ceiling of consumer cores. GPU-only — port everything to wgpu and drop the CPU path, accepting the dependency on a working GPU adapter. GPU-as-default with CPU as a fallback only when no adapter is found, removing CPU's role as the testing source of truth.
Why we chose this
The decision follows from what AgX is for. AgX is primarily a batch CLI tool with no interactive preview, and batch throughput is already saturated by cross-image parallelism on consumer cores — GPU's latency advantage does not translate into a proportional batch speedup. Keeping CPU canonical avoids GPU floating-point variance across hardware vendors and driver versions, which would otherwise force per-vendor golden files. It eliminates the CI gap that would arise if golden output depended on a GPU adapter not every CI runner has. The GPU path remains worthwhile because per-pixel and convolution-heavy stages run dramatically faster on capable hardware, and a future interactive-preview feature would benefit directly. GPU becomes the default if and when interactive preview is added.
What this costs
Every new adjustment is implemented twice — once in adjust for the CPU path, once in WGSL for the GPU path. The cross-path test surface grows with the feature set, and adding a CPU stage without a GPU dispatcher is a half-finished feature by the project's standards. Subtle floating-point differences between rayon-parallel CPU code and wgpu-parallel GPU code occasionally surface as off-by-one differences in 8-bit output, which the consistency tests catch but which require care to keep within tolerance.
Partial-parameter merge semantics
What we chose
A preset declares only the parameters it wants to change. Internally, the deserialization target is a PartialParameters type where every field is Option<T>: None means "this preset does not touch this field," Some(0.0) means "this preset explicitly sets this field to zero." Merging two PartialParameters is recursive through composite sections (HSL channel groups, color-grading regions) and last-write-wins at the leaf. A preset chain materializes into the engine's concrete Parameters only after every layer has been merged.
What we considered
The straightforward alternative is full replacement: each preset declares the entire parameter set, and applying a preset overwrites engine state wholesale. This is what AgX did before the composability work, and the result was that a "warm tint" preset meant to change only temperature also reset exposure and contrast to zero — serde could not distinguish "missing field" from "explicit default." A second alternative is a flat top-level merge that replaces composite sections like HSL wholesale even when the overlay specifies one channel. A third is a noisy merge that fails when two presets both set the same field to different values.
Why we chose this
The merge is built around how users actually layer presets: a base look preset, a color-grading overlay, a tint adjustment. The recursion through composite sections is what makes "specify only red.hue" work the way users expect — only that one channel changes, the rest of HSL is untouched. Last-write-wins at the leaf is the simplest semantic that keeps the merge associative and predictable. Cycle detection during the recursive extends load prevents chains from looping. The materialization step keeps the engine API unchanged: callers still receive a concrete Parameters, and the partial form exists only at the preset boundary.
What this costs
Two parameter representations have to be maintained: Parameters (concrete, the engine's working type) and PartialParameters (every field optional, the preset deserialization target). Adding a new parameter means updating both, plus the materialize and merge implementations. Last-write-wins also means the merge is silent about conflicts — two presets setting the same field to different values produces a result without warning. The chosen semantic means a user who layers two presets with overlapping intent has no automatic feedback about which one won.
LUT encoding and the auto-conversion bracket
What we chose
LUTs are applied as their own pipeline stage after the per-pixel pass, sampling in the space declared by the LUT's encoding field. A preset declares encoding = "srgb" (the default) or encoding = "linear"; the executor auto-inserts the conversion bracket — converting the working buffer into the LUT's declared space before the lookup and back afterward. Both encodings use sRGB primaries; the distinction is the transfer curve: sRGB gamma for srgb, linear light for linear.
What we considered
The alternative is to apply LUTs unconditionally in linear sRGB. A pipeline that already runs dehaze, denoise, and exposure in linear could plausibly run LUTs there too. A second alternative is a global setting that picks one space for all LUTs. A third is a per-LUT declared input space with named log curves (S-Log3, LogC, ACEScct), which would support video-grading LUTs that expect a log-encoded signal.
Why we chose this
AgX treats LUTs as opaque numeric mappings whose correct input space is determined by how they were authored, not by what the engine prefers. The vast majority of creative .cube LUTs — film emulations, color grades, Instagram-style looks — are authored by colorists working on screens that display sRGB. The lattice values in those LUTs correspond to sRGB pixel values, not linear ones. Applying such a LUT to linear values produces incorrect colors. Providing the srgb default covers that common case, while linear handles the less common case of LUTs produced by tools that operate in a physical-light pipeline. A per-LUT declared encoding with auto-inserted conversions is what makes both cases portable without manual bracket code in each preset.
What this costs
Log-input LUTs (S-Log3, LogC, ACEScct) used in video grading workflows are not supported. A colorist who wants to apply a log-to-Rec709 conversion LUT cannot use AgX's LUT pipeline as is — the input the LUT expects (a log-encoded signal) is not what it receives. Adding named log transfer curves is deferred; it requires HDR-transfer-curve infrastructure that AgX does not yet have.
Preset-first scope
What we chose
AgX is a preset-first photo editing tool. The library is the source of truth — it owns the engine, the parameter set, the preset parser, and dispatch into the CPU and GPU pipelines. The CLI is a thin wrapper that turns command-line arguments into parameter overrides and preset paths into engine inputs. There is no GUI on the critical path. Every consumer — CLI today, a web service or batch worker tomorrow, a UI someday — uses the same library API.
What we considered
The alternatives are all variations on building a UI as a primary surface: a full editing GUI as the centerpiece with the library and CLI as exports, a web editor with the engine compiled to WebAssembly, or a plug-in surface inside an existing editor where AgX provides the preset format and the host provides the UI. Each would change what AgX is fundamentally about — the centre of gravity moves from the recipe to the editing surface.
Why we chose this
AgX is a preset-first batch editing tool, not a Lightroom replacement. The recipe model is what makes the project coherent: every feature has to fit a portable, declarative, image-independent description, and a UI on the critical path would constantly tempt features that fit a UI better than they fit a recipe. Keeping the surface CLI-and-library-first forces every feature to justify itself as a parameter on the recipe. A future UI is not ruled out, but if added it would be one more way to author a preset, not a session manager that drives the engine through hidden state.
What this costs
AgX is not what most photo editors look like, and the reach of the project is constrained accordingly. A user who learns photo editing through GUI-driven tutorials does not have an obvious entry point — the docs assume comfort with a command line, a TOML file, and a text editor. Spot retouching, local adjustments, and brush-driven workflows are out of scope until a portable encoding for them is designed. The project trades the broad audience of a GUI editor for the durability and shareability of a recipe format.
See also
- Architecture — how these invariants are enforced by the module graph.
- Preset-first philosophy — the user-facing framing this list serves.
- Render pipeline — the order constraint discussed in detail.
- Color spaces — the working-space constraint discussed in detail.
Render pipeline
The render pipeline is a fixed sequence of stages, and the stage order is load-bearing. This page explains why — what would break if the order changed, and what design constraints the order encodes.
If you want to look up which stage runs in which color space, see the render pipeline reference.
Why pipeline order matters
Stage order is not interchangeable. A few examples:
- Exposure before tonal sliders. Exposure scales linear light; tonal sliders re-shape the resulting brightness landscape. Reversing them would re-shape unexposed values, then scale the result, which produces different output.
- Dehaze and denoise in linear space. Both operate on physical light intensities — dehaze increases local contrast where atmospheric haze has reduced it, and denoise smooths sensor noise. Running them in linear space (before gamma encoding) keeps the math operating on the same domain the optical effects originate in.
- Dehaze before denoise. Dehaze can amplify low-level structure that includes noise; denoise then cleans up the result. Reversing them would let dehaze re-amplify noise that denoise had just removed.
- LUT after per-pixel adjustments, before detail. The LUT applies a creative color transform; sharpening and clarity then operate on the graded result. Sharpening before the LUT would amplify edges that the LUT would then re-grade.
- Grain after detail and dehaze, before vignette. Grain is added texture; the surrounding stages should not modify it. Vignette is a final overlay that doesn't disturb grain structure.
The stage order encodes design decisions made when each adjustment was added. The algorithm explanations for each algorithm record the algorithm-specific reasoning.
See also
- Render pipeline reference — the lookup view of the pipeline.
- Color spaces — why operations live in linear vs gamma Rec.2020 working space.
- LUT encoding — why LUTs sample in a separate space and how to choose between encodings.
- Algorithm explanations — per-algorithm walkthroughs.
Preset model
A preset is a description of an edit. This page explains the design decisions behind that description: why presets describe what they change rather than the full parameter set, and the patch-on-baseline mental model that follows from that choice.
If you want to look up how extends resolution works mechanically, see the preset model reference.
Why partial parameters
Most edits change only a handful of knobs. A film-emulation preset might set saturation, white balance, a tone curve, and a LUT — leaving everything else at default. Modeling parameters as partial (every field is optional) means the preset only describes what it changes, and a reader can see the intent at a glance.
This also makes presets composable: a base "neutral starting point" preset can be extended by a "warm cinematic" preset that only specifies the warmth and cinematic-curve overrides.
Mental model
Think of a preset as a patch applied to a baseline render, not as a complete description of an edit. The baseline is "engine defaults applied to the input image." Each preset in the extends chain stacks its overrides on the baseline. The final rendered image is the result of applying every override in chain order.
This mental model is why extends is useful: it reflects how editing actually works — small adjustments layered on top of larger style choices, each of which builds on a more general starting point.
See also
- Preset model reference — the lookup view of
extendsresolution. - Preset format — auto-generated field schema.
- Preset-first philosophy — why AgX is built around presets in the first place.
Color spaces
AgX's render pipeline does color math in a wider working space than either the input image or the final output. The pipeline runs in linear Rec.2020 for physical-light operations and gamma-encoded Rec.2020 for perceptual operations. This page explains why those two spaces were chosen, what they unlock for wide-gamut inputs, and what's intentionally deferred.
If you want to look up a conversion formula, a matrix, or the per-stage color-space table, see the color spaces reference.
Why physical operations run in linear space
Physical operations operate on light intensities. They produce correct results only when the values represent linear light.
- Exposure simulates changing the amount of light hitting the sensor. Doubling the light means doubling the linear value. The formula
value * 2^stopsonly works correctly in linear space. - White balance adjusts the relative intensity of color channels to correct for the color temperature of the light source. This is a physical property of light, so it must operate on linear (physically proportional) values.
- Dehaze restores local contrast where atmospheric haze has reduced it. Haze is an additive optical phenomenon — it adds an offset to the physical light reaching the sensor. The math that recovers the original signal works in linear light, not in the perceptually-encoded representation.
- Noise reduction smooths sensor noise. Sensor noise is a property of the linear-light signal, not the perceptual one; smoothing in linear space avoids creating perceptual artifacts that gamma-space smoothing would introduce.
The gamut for these operations is linear Rec.2020. The core point (physical math needs linear values) is unchanged from any other linear working space; what Rec.2020 changes is the volume of colors the math can carry without clipping.
Why perceptual operations run in gamma space
Perceptual operations operate on what the image looks like. They produce correct results only when the values represent perceptual brightness.
- Contrast pushes values away from or toward a midpoint. The "midpoint" that looks right is the perceptual midtone (~0.5 in gamma space), not the physical midpoint (linear 0.5, which looks very bright).
- Highlights, shadows, whites, blacks target specific tonal regions. These regions are defined by how they look on screen, which means they're defined in the perceptual space.
If you applied contrast in linear space, the result would look wrong: the midpoint would be too bright, and shadows would get crushed while highlights barely change.
The gamut for these operations is gamma-encoded Rec.2020. AgX reuses the sRGB transfer-curve shape — the same piecewise function that maps linear 0.18 to roughly 0.5 in gamma space — but applies it to Rec.2020 linear values rather than sRGB linear values. The result: the 0.5 perceptual midtone keeps the same meaning a colorist would expect, just over a wider gamut. A sign-preserving variant of the curve handles the small negative components that arise when wide-gamut inputs (or aggressive edits) push values just outside the Rec.2020 cube on intermediate matrix conversions.
Why LUT sampling requires a conversion bracket
Creative .cube LUTs are almost universally authored in the sRGB-gamma domain. A colorist building a film emulation or grade works with pixel values as they appear on an sRGB display; the input–output mapping baked into the LUT corresponds to sRGB-gamma values, not Rec.2020 values.
To preserve portability — so third-party LUTs work out of the box — AgX converts the buffer to the LUT's declared encoding before sampling and back afterward. For the default srgb encoding this is: gamma Rec.2020 → linear Rec.2020 → linear sRGB → sRGB gamma → LUT sample → reverse. For linear-encoded LUTs (less common, used in physical-light pipelines), the bracket stops at linear sRGB instead of going through the transfer curve.
The LUT module itself stays gamut-agnostic; the engine handles the wide-working-space round trip on every pixel. See LUT encoding for the design rationale behind the two encoding choices.
What this means for Display P3 photos
The wide working space matters most for inputs that already carry wide-gamut color. iPhone HEIC captures are typically tagged Display P3. Without a wide working space, AgX would have to squash those to sRGB at decode time, discarding wide-gamut information before any adjustment ran.
With linear Rec.2020 as the working space, Display P3 is matrix-converted directly into the working space (P3 is a subset of Rec.2020). Vivid reds, saturated greens, and other wide-gamut colors flow through the entire pipeline unclamped; the final clamp to display gamut happens only at encode.
For sRGB-only workflows — the historical case — the math is functionally unchanged. Input sRGB widens to Rec.2020 at decode, edits happen in the wider space, and encode brings the result back. The end-to-end output looks the same (modulo float rounding) unless the input was actually wide-gamut.
What hasn't changed
The sRGB perceptual-curve shape stays. The 0.5 midpoint, the 0.25 and 0.75 region splits, and the same tone-slider math carry over unchanged. Existing presets and .cube LUTs continue to work without modification. Output is still 8-bit sRGB JPEG, PNG, or TIFF; the wide working space is an internal detail.
What's intentionally deferred
A few related capabilities are out of scope:
- ICC profile reading from input images. Only the NCLX color-primaries tag is consulted today; embedded ICC profiles are not parsed.
- Wide-gamut output. Encoded output is sRGB. Rec.2020 or P3 output containers are not produced.
- HDR transfer curves. PQ and HLG inputs fall back to "treat as sRGB" at decode with a stderr warning.
Color management is an evolving area; further work is tracked in the project backlog.
See also
- Color spaces reference — definitions, conversions, per-stage table.
- Render pipeline — where in the pipeline the linear↔gamma conversions happen.
- LUT encoding — why the LUT sampling space differs from the pipeline working space.
Color profiles
AgX reads the color profile embedded in an input file to interpret its colors, and writes a color profile into every output file to label the result. This page explains what those profiles do, why they're necessary, and why AgX picks a specific open-source profile for output rather than the better-known vendor reference profiles.
If you want to look up the underlying color spaces or matrices, see the color spaces explanation.
What an embedded color profile does
A color profile (an ICC profile, named for the International Color Consortium that standardizes the format) is a small chunk of data inside an image file that names the color space the pixel values live in. Pixel value (255, 0, 0) means a different shade of red depending on the color space — moderately saturated in sRGB, much more vivid in Display P3. Without a profile, a viewer has to guess which interpretation applies.
Most viewers default-guess sRGB, which matches AgX's output most of the time. But profile-aware tools (Photoshop, color-managed browsers, professional viewers on wide-gamut displays) honor the embedded profile when one is present. Embedding the right profile turns an implicit guess into an explicit statement.
Reading the profile on input
The same ambiguity applies when AgX opens your photo. A JPEG straight from a camera set to Adobe RGB, or a 16-bit TIFF exported from Lightroom in ProPhoto RGB, carries an embedded profile that says "these pixel values are Adobe RGB" (or ProPhoto, or Display P3). If AgX ignored that and assumed sRGB, every saturated color would land in the wrong place — greens and reds pulled inward, the whole image subtly desaturated and hue-shifted.
So AgX reads the embedded profile and converts the image into its internal working space accordingly, preserving the colors the file actually describes. Adobe RGB, ProPhoto RGB, Display P3, and explicitly-tagged sRGB inputs are all interpreted correctly. A file with no embedded profile is assumed to be sRGB — the safe, overwhelmingly-common default for untagged images.
Choosing the delivery gamut
Every image AgX produces is tagged with the color space the pixels actually live in, so viewers and professional tools render it correctly without guessing. By default that space is sRGB — the safe, universal choice that every screen, printer, and application understands.
When you're delivering to a wide-gamut display or a workflow where the next tool (Photoshop, a RIP, another editor) will handle the full gamut, sRGB clips any color that sits outside its triangle. Display P3, which covers roughly 25% more of visible color than sRGB, is the standard choice for modern consumer devices — iPhones, recent MacBooks, and most premium monitors since 2015 can display it. Adobe RGB is wider still in the green-cyan region, and has long been the choice for print workflows and stock photography.
AgX encodes the pixels into the chosen gamut and embeds the matching ICC profile — sRGB, Display P3, or Adobe RGB — so the embedded profile names the color space the pixels actually live in. The default sRGB output is byte-identical to what AgX has always produced. The gamut choice is made when the file is written; the internal editing math is unaffected. See the CLI reference for the --output-gamut flag.
What AgX embeds
AgX embeds an ICC profile in every JPEG, PNG, and TIFF output that names the output gamut. For the default sRGB output, that is an sRGB v4 ICC profile; for Display P3 or Adobe RGB output, the matching v4 profile is embedded instead.
v4 is the modern ICC spec (the v2 spec dates to 1998). Every contemporary tool — macOS Preview, Photoshop, Lightroom, Safari, Chrome, Firefox, GIMP — handles v4 correctly. AgX's blobs are compact parametric-curve representations under 1 KB each, small enough to be invisible against typical photo file sizes.
Why an open-source profile
The math behind sRGB is in an ISO standard, but the binary ICC files that encode that math are themselves copyrighted as data — similar to how a font file is copyrightable even if the underlying typeface design is not. Shipping an ICC profile from an unclear-license source exposes downstream users of AgX (which is MIT/Apache-2.0 licensed) to licensing ambiguity.
The original sRGB ICC profile, distributed by HP, Microsoft, and the ICC consortium, has always carried vague terms ("free to use" without a formal license). The official Display P3 profile comes from Apple. Adobe RGB is actively copyrighted by Adobe.
The open-source color-management community responded by publishing clean-license alternatives. AgX takes the cleanest possible approach: it synthesizes its own ICC profiles from primaries and standard transfer curves using the lcms2 color-management library (MIT-licensed). The generated bytes inherit MIT cleanly, and the provenance — the same math as every other conforming profile for those color spaces, generated by a well-known library — is fully auditable. This approach covers all three supported output gamuts: sRGB, Display P3, and Adobe RGB.
What this means for you
For most users on a typical sRGB workflow, nothing changes — the default output is sRGB, and most viewers were already guessing sRGB. The embedded profile turns that guess into an explicit statement, which matters most in profile-aware professional tools and on wide-gamut displays.
If your display is wide-gamut (Display P3 or Adobe RGB) and your editing workflow supports it, choosing a wider output gamut at export preserves colors that sRGB would clip. Which gamut to choose depends on your delivery target: Display P3 for digital (web, video, most screen-based workflows); Adobe RGB for print and stock photography. When in doubt, sRGB is the most compatible choice.
See also
- Color spaces — the working space the embedded profile points back to.
- Architecture — where metadata bytes sit relative to pixel logic.
How AgX generates its bundled LUTs
AgX bundles a set of .cube LUTs derived from film-emulation parameters. The agx-lut-gen crate produces these as a build step. This page explains the design choices behind the generation process — why the LUTs are pre-built rather than computed at runtime, and what the parameters mean.
AgX ships a set of generated .cube LUTs used by the e2e test pipeline and as starting points for film-emulation looks. The generator lives in the agx-lut-gen crate (crates/agx-lut-gen/); the bundled outputs live in crates/agx-e2e/fixtures/looks/luts/.
The generator is a small Rust binary that, for each named LUT, evaluates a transformation function over a regular 3D grid in input RGB and writes the result as a .cube file. The current set splits into two categories:
- Film stocks: Portra 400, Kodachrome 64, Cinestill 800T, Tmax 100, Tri-X 400.
- Stylistic looks: Blade Runner, Cinema Warm, Dune, Faded BW, High Contrast BW, Neo Noir.
Why generate LUTs in code rather than authoring them in a colorist tool:
- Reproducibility. Each LUT is the deterministic output of a versioned function. Bug fixes or design changes propagate by re-running the generator.
- Test stability. The e2e suite compares rendered output against committed golden images. A regenerated LUT that introduces unintended color shifts shows up as a visual diff in the test suite.
- Onboarding. Contributors can read the generator source to understand how each look is constructed, rather than treating each LUT as an opaque file.
See also
- LUT format — the
.cubefile format reference.
LUT encoding
A .cube LUT stores output RGB values for a grid of input RGB values. To sample it correctly, the engine needs to know what color space those input values live in — that is, what the LUT author assumed about the pixel values they were working with. This page explains why encoding matters, what the two choices mean, and when to use each.
Why encoding matters
A LUT is a lookup table, not a formula. The baked-in mapping between input and output reflects whatever color space the author was working in when they built the LUT. Feed it pixels in the wrong domain and the output is wrong — colors shift, saturation drifts, contrast changes in unexpected ways.
Two encodings cover the common cases:
srgb— the LUT author worked with sRGB-gamma pixel values. This is the default and the universal assumption for creative.cubeLUTs produced in Lightroom, DaVinci Resolve, Capture One, Affinity Photo, and most other editing tools. When a colorist grades a "film look" or exports a LUT from a scoping tool, they are almost always working with display-referred sRGB values.linear— the LUT author worked with linear-light pixel values, using sRGB primaries. This covers LUTs produced by tools that operate in a physical-light pipeline — certain compositing applications, some VFX pipelines, and code-generated LUTs that apply transformations in linear space before baking.
Both encodings assume sRGB primaries. The distinction is only in the transfer curve: gamma-encoded for srgb, linear light for linear.
How AgX uses the encoding
AgX's render pipeline operates in Rec.2020 working space. When it reaches the LUT stage, the pixel buffer is not in the LUT's expected domain — it needs to be converted first. The engine does this automatically, based on the encoding declared in the preset:
- For a
srgbLUT, the engine converts the buffer from gamma Rec.2020 to sRGB gamma before sampling, then converts back afterward. - For a
linearLUT, the engine converts to linear sRGB before sampling, then converts back.
This conversion bracket is transparent to the LUT. From the LUT's perspective, it always receives pixels in the domain it was authored in. Third-party LUTs work out of the box without modification.
When to use each
For nearly every creative .cube LUT — film emulations, color grades, look packages downloaded from the internet — the correct choice is srgb (the default). If you omit the encoding key entirely, srgb applies automatically, so existing presets and LUTs continue to work without changes.
Use linear only when you know the LUT was authored expecting linear-light input values. This is uncommon in practice but does arise with code-generated LUTs or LUTs intended for use in a VFX pipeline's linear-light stage.
When in doubt, srgb is the right default. Applying an srgb LUT with linear encoding (or vice versa) produces obviously wrong results — the image will shift noticeably in contrast and color balance — so testing with a known neutral input makes mismatches easy to spot.
See also
- LUT format reference — the
.cubefile format, domain, and trilinear interpolation. - Preset format reference — the
lut.encodingfield. - Color spaces — why the engine's working space differs from the LUT's input domain.
Algorithm explanations
This sub-section explains how each editing algorithm works under the hood. Pages are listed in pipeline order — the order in which each stage modifies the image during a render.
In pipeline order
- Basic adjustments — white balance, exposure, tonal sliders.
- Dehaze
- Noise reduction
- Tone curves
- HSL
- Color grading
- Detail pass — sharpening, clarity, texture.
- Grain
- Vignette
Browse by photographer-panel mental model
The same algorithms grouped by the panels used in the conceptual reference:
Basic
- Basic adjustments — white balance, exposure, tonal sliders.
Color
Detail
- Detail pass — sharpening, clarity, texture.
- Dehaze
- Noise reduction
Effects
See also
- Conceptual explanations — architecture, preset-first philosophy, design decisions, and cross-cutting topics like the render pipeline and color spaces.
- Algorithm API reference — rustdoc for the
adjustmodule.
Basic adjustments
The Basic-panel sliders below share a mental model (they all sit at the "top of the stack" in Lightroom / Capture One), but their math divides cleanly by color space. White balance and exposure run in linear light before gamma encoding; the tone sliders run in the gamma Rec.2020 working space after. See Color spaces for the linear-vs-gamma distinction and the per-stage rationale.
White balance
White balance shifts the image's overall color cast — pulling it warmer
or cooler, more magenta or more green — by scaling the linear-light RGB
channels independently and re-normalizing so the average brightness
stays put. AgX exposes this as two sliders, temperature and tint,
both calibrated around 0.0 (no shift).
How it works
The math runs on linear-light RGB values, before gamma encoding. Channel scaling is only proportional to physical light energy when the data is linear, so doing the work here keeps the adjustment physically meaningful and preserves predictable behavior for downstream tone and color stages.
The two slider inputs are mapped into per-channel multipliers:
r_mult = 1 + temperature / 200
b_mult = 1 - temperature / 200
g_mult = 1 - tint / 200
Positive temperature boosts red and reduces blue, which warms the
image. Negative temperature does the opposite and cools it. Positive
tint reduces green, pulling the image toward magenta; negative tint
boosts green.
Those raw multipliers are then normalized so the adjustment preserves the overall channel-average brightness:
sum  = r_mult + g_mult + b_mult
norm = 3 / sum
output_channel = max(0, input_channel * channel_mult * norm)
The normalization rescales the three multipliers so they still average
to 1.0 over the slider's typical operating range. That keeps a neutral
gray from drifting brighter or darker when the user only wants to shift
color balance. It is a channel-average normalization, not a perceptual
luminance guarantee, so very strong shifts can still nudge mid-gray
appearance slightly. The trailing max(0, …) keeps a channel from
going negative when an extreme shift or invalid upstream value would
push it below zero.
Why we chose it
Two design choices drive the implementation. First, linear space: applying scalar multipliers to gamma-encoded values would make the warming or cooling effect track display brightness instead of light energy, so a "+50 warm" applied to a dark midtone would behave very differently from the same shift applied to a highlight. Doing the math in linear light makes the slider feel like a physical color-temperature change.
Second, per-channel multipliers with a brightness-preserving normalization rather than a full Bradford or CIECAM chromatic adaptation transform. Bradford and friends give the most accurate results when you know the source and target illuminants in detail, but AgX's white-balance sliders are creative controls — the photographer just wants the image warmer or cooler — and the linear scaling matches how Lightroom's Temperature/Tint pair feels in practice while keeping the algorithm a few lines of math rather than a 3×3 matrix and a reference white.
The 200.0 denominator is the calibration that makes the slider feel
right. At temperature = 100, r_mult = 1.5 and b_mult = 0.5,
which is a noticeable but not extreme warming shift. At temperature = 200, blue would clamp to zero entirely, so the practical operating
range is [-100, +100].
Parameters and constants
| Parameter / constant | Value | Role | Sensitivity |
|---|---|---|---|
temperature (preset) | f32, expected -100.0..=+100.0, default 0.0 | Warm/cool shift. | Linear in the per-channel multiplier. ±50 produces a 25% relative shift between red and blue; ±100 is the practical limit before blue clamps. Values outside the expected range extrapolate rather than error out. |
tint (preset) | f32, expected -100.0..=+100.0, default 0.0 | Magenta/green shift. | Linear in the green-channel multiplier. Same calibration as temperature. |
| Calibration denominator | 200.0 | Maps slider value to ±0.5 per-channel multiplier swing. | Smaller denominators make sliders more sensitive; the chosen value matches the typical Lightroom feel. |
| Brightness normalization | norm = 3 / (r_mult + g_mult + b_mult) | Keeps channel-average brightness constant. | Without normalization, a "warm" shift would also brighten the image overall; with it, the user's shift is purely chromatic. |
| Channel floor | 0.0 | Prevents negative output. | Trailing max handles extreme shifts and out-of-range upstream values. |
Beyond the expected range: white balance does not preset-validate
temperature or tint, so out-of-range values reach the algorithm.
At temperature = 200, b_mult = 0 and the blue channel collapses to
zero (image goes orange-magenta). Past that, multipliers go negative
and the trailing max(0, …) clamps each channel to zero, so very
large shifts produce a hard channel kill rather than continuing to
intensify. tint follows the same pattern with green. Values past
±100 are not useful in practice.
Preset-slider mapping
[white_balance]
temperature = 25.0   # warm by 25
tint        = -10.0  # slightly green
Both fields are direct numeric mappings — there is no hidden curve or
log scaling on the slider value. Preset composition (merge /
materialize) treats the two fields independently. A preset that omits
[white_balance] entirely, or sets both fields to 0.0, takes the
early-out path in apply_white_balance and returns the input
untouched.
Source
- CPU (Rust):
crates/agx/src/adjust/white_balance.rs - CPU buffer orchestrator:
apply_white_balance_exposure_bufferbundles white balance with exposure for a single buffer pass. - GPU (WGSL):
crates/agx/src/shaders/linear_adjustments.wgsl(combined linear-space WB + exposure pass).
The CPU and GPU implementations share the formula above; the GPU shader performs the multiply-and-normalize in a single compute dispatch over the linear buffer.
References
No canonical external paper applies — temperature/tint sliders backed by linear-space channel multipliers are the conventional creative-WB formulation in Lightroom-class editors. AgX-specific motivation is recorded inline in the source comments.
Exposure
Exposure scales linear-light pixel values by a power-of-two factor so
that the slider value reads as photographic stops: +1 brightens by a
factor of two, -1 halves the light, 0 leaves the image alone. AgX
applies this in linear space before gamma encoding so the math behaves
like a real exposure change.
How it works
The slider value (stops) is converted into a multiplier and applied
per channel:
factor          = 2^stops
output_channel  = max(0, input_channel * factor)
The multiplier is always positive because it comes from a power of two,
so the trailing max(0, …) only matters when an upstream value would
otherwise be negative — the clamp keeps the output well-defined even
for invalid input.
The expected slider feel:
0stops → multiplier1.0, no change+1stop →2.0, twice as bright-1stop →0.5, half as bright+2stops →4.0, four times as bright
Working in linear space matters. Stops are a ratio of light energy, not a ratio of display-encoded brightness, so the multiplier only behaves photographically when it lands on linear pixel values. Applied after gamma encoding the same multiplier would skew midtones and clip the highlights asymmetrically, no longer matching how a camera's exposure dial behaves.
Why we chose it
The whole adjustment is a single multiply, which is exactly the level of
machinery the operation deserves. Some editors expose exposure as a log
slider with a hidden non-linearity; AgX keeps it as a literal 2^stops
so a preset author can reason about a "+0.5 stop" lift the same way they
reason about a half-stop in a camera.
The pipeline placement is the other choice. Exposure runs in linear space alongside white balance, before sRGB encoding. This means the later tone sliders, HSL, and color grading all see the exposure-adjusted image — which is what photographers expect: "correct" exposure first, then shape the look on top.
Parameters and constants
| Parameter / constant | Value | Role | Sensitivity |
|---|---|---|---|
exposure (preset) | f32, in stops, default 0.0 | Brightness shift. | Each unit doubles or halves the light. +0.5 ≈ 41% brighter, -0.5 ≈ 29% darker. No hard upper bound, but very large values quickly push everything past 1.0 in linear space — the highlight tail is then handled by downstream clamping or tone shaping. |
| Power base | 2.0 | Photographic-stop semantics. | Hard-coded; switching to a different base would break the "stops" mental model. |
| Channel floor | 0.0 | Guards against negative output from invalid upstream values. | Multiplier is always positive, so this only matters for malformed input. |
Beyond the expected range: exposure does not preset-validate the
exposure field. The math accepts any finite stops value — at +10
stops the multiplier is 1024, which pushes essentially every channel
past 1.0 and downstream clamping turns the image solid white. At
-10 stops the multiplier is ~0.001 and the image goes near-black.
Practical preset values stay within ±5 stops; anything more is
better expressed as a multiplied raw or a different exposure on the
camera.
Preset-slider mapping
[tone]
exposure = 0.5   # +½ stop
The exposure field maps directly to stops — no hidden non-linearity
on the slider value. Preset composition merges this field independently
of the other tone sliders. A preset that omits [tone] or sets
exposure = 0.0 leaves the image unchanged at this stage.
Source
- CPU (Rust):
crates/agx/src/adjust/exposure.rs - CPU buffer orchestrator:
apply_white_balance_exposure_bufferbundles exposure with white balance for a single buffer pass. - GPU (WGSL):
crates/agx/src/shaders/linear_adjustments.wgsl(combined linear-space WB + exposure pass).
The CPU and GPU implementations share the same 2^stops multiplier and
linear-space placement.
References
No canonical external paper applies — 2^stops is the standard
photographic exposure formulation. The pipeline placement and slider
range are documented inline in the source.
Tone sliders
The basic-tone sliders — contrast, highlights, shadows, whites, blacks — shape the brightness distribution of the image without re-introducing hue shifts. Each slider runs as a small piecewise-linear curve targeted at a specific part of the tone range, in the gamma-encoded working space (sRGB transfer curve applied to Rec.2020 linear values) so the adjustments track perceptual brightness rather than physical light energy.
Working space
This stage runs in gamma-encoded Rec.2020 — the sRGB transfer curve
applied to Rec.2020 linear values — alongside HSL, color grading, tone
curves, detail, grain, and vignette. The 0.5 midpoint and the 0.25
/ 0.75 band anchors keep their perceptual meaning because the gamma
curve shape is unchanged from the previous sRGB-only design; what's
different is the wider gamut underneath, so wide-gamut headroom from
Display P3 or other wide-gamut inputs survives the slider math instead
of being clamped at the boundary. The final clamp to display gamut
happens only at encode. The per-channel [0, 1] clamps inside each
slider stay as domain-safety bounds.
How it works
The five sliders all run in gamma Rec.2020, after the image has been white-balanced and exposure-corrected in linear light. Each slider remaps a single channel value with a small piecewise-linear curve that targets a specific part of the tone range.
Contrast
Contrast is the only truly global control here. The code pivots around
0.5, the midpoint of the normalized gamma-encoded range, and scales
the distance from that pivot:
factor = (100 + contrast) / 100
output = clamp(0.5 + (input - 0.5) * factor, 0, 1)
Positive contrast pushes values away from the midpoint. Negative contrast pulls them toward it.
Highlights
Highlights only affect values above 0.5. The weight rises linearly
from 0 at 0.5 to 1 at 1.0, so brighter pixels are affected more
than dimmer ones in the highlight band:
weight = (input - 0.5) / 0.5
output = clamp(input + weight * highlights / 100 * 0.5, 0, 1)
This gives a soft, one-sided curve that leaves the lower half of the range unchanged.
Shadows
Shadows mirror the highlight curve below 0.5. The darker the pixel,
the larger the weight:
weight = 1 - input / 0.5
output = clamp(input + weight * shadows / 100 * 0.5, 0, 1)
Values at or above midpoint are left alone, so the adjustment stays localized to the dark half of the tone range.
Whites
Whites target only the upper quarter of the range. The curve is the same idea as highlights, but it starts later and uses a narrower band:
weight = (input - 0.75) / 0.25
output = clamp(input + weight * whites / 100 * 0.25, 0, 1)
This gives finer control over near-white detail without pushing midtones as aggressively.
Blacks
Blacks are the lower-quarter counterpart to whites:
weight = 1 - input / 0.25
output = clamp(input + weight * blacks / 100 * 0.25, 0, 1)
Only values below 0.25 are affected, so the control can lift or
crush deep shadows without changing the rest of the image much.
Why we chose it
The five-slider model — contrast plus four band-localized controls — matches the Lightroom Basic panel one-for-one, which is what most preset authors expect when they think about "tone shaping." Splitting "highlights" and "whites" (and similarly shadows / blacks) into two overlapping sliders gives photographers fine control: highlights can roll off the bright midtones while whites separately decide where the brightest pixels sit. Folding them into a single curve would lose that separation.
The implementation deliberately stays piecewise-linear and gamma-space
rather than reaching for a smooth global tone curve. That keeps each
slider's effect localized and predictable for batch-applied presets,
makes the math cheap on both CPU and GPU, and leaves global re-shaping
for the dedicated tone_curves stage downstream. Working in gamma
Rec.2020 is the standard choice for these sliders because it matches
the "perceptual brightness" mental model the controls are named for —
running them in linear light would make the slider behave differently
in shadows than in highlights.
The triggering thresholds (0.5 for contrast/highlights/shadows, 0.75
and 0.25 for whites/blacks) are calibrated to give Lightroom-shaped
slider feel: highlights and shadows each affect roughly half the
range, whites and blacks each affect roughly a quarter.
Parameters and constants
| Name | Type | Range / value | Used by | Meaning |
|---|---|---|---|---|
contrast | slider | -100..100 | Contrast | Global scale around the 0.5 midpoint. |
highlights | slider | -100..100 | Highlights | Positive values brighten, negative values darken. |
shadows | slider | -100..100 | Shadows | Positive values lift, negative values crush. |
whites | slider | -100..100 | Whites | Adjusts the top quarter of the range. |
blacks | slider | -100..100 | Blacks | Adjusts the bottom quarter of the range. |
0.0 | constant | neutral / floor check | All functions | Neutral value checks and lower clamp bound. |
0.25 | constant | quarter-range cutoff | Whites, Blacks | Boundary for the whites/blacks band. |
0.5 | constant | midpoint cutoff | Contrast, Highlights, Shadows | Midpoint pivot and half-range width. |
0.75 | constant | three-quarter cutoff | Whites | Start of the whites band. |
1.0 | constant | full-scale endpoint | Highlights, Shadows, Blacks | Upper bound of normalized channel space. |
100.0 | constant | percent scale | All functions | Converts slider percentages into fractional adjustments. |
Beyond the expected range: none of the basic-tone sliders are
preset-validated, so out-of-range values reach the algorithm directly.
Each per-channel adjustment is clamped to [0, 1] after the math, so
extreme positive contrast/highlights/whites push pixels to the upper
clamp (highlights blow out toward solid white) and extreme negative
values crush toward the lower clamp. Values past ±200 produce no
additional visible change because almost every pixel is already at the
clamp; the practical operating range is ±100.
Preset-slider mapping
The preset values map directly to the slider ranges used by the code:
| Slider | Input range | Curve shape |
|---|---|---|
| Contrast | -100..100 | Symmetric linear scaling around 0.5. |
| Highlights | -100..100 | One-sided ramp on the bright half of the range. |
| Shadows | -100..100 | One-sided ramp on the dark half of the range. |
| Whites | -100..100 | Narrow bright-end ramp, limited to the top quarter. |
| Blacks | -100..100 | Narrow dark-end ramp, limited to the bottom quarter. |
All five sliders are direct numeric mappings; there is no hidden non-linearity in the slider value itself. The curve shape comes from the piecewise weights in the adjustment functions, which localize each control to the tone band that photographers expect.
Source
- CPU (Rust):
crates/agx/src/adjust/basic_tone.rs - GPU (WGSL):
crates/agx/src/shaders/gamma_adjustments.wgsl(the gamma-space stack also runs tone curves, HSL, and color grading inside the same shader).
The CPU and GPU implementations share the same per-slider piecewise formulas; the GPU shader runs all five sliders inside the bundled gamma-space pass.
References
No canonical external paper applies — these are the conventional Lightroom-style Basic-panel sliders. AgX-specific calibration notes live inline in the source.
See also
- Concept references: Tone, Color (white balance entry), Color spaces
- API references: white balance, exposure, basic tone
- Related explanations: HSL, Tone curves, Color grading
- How-tos: Write your own preset, Apply a preset to a folder
HSL
HSL adjustments let users target the same familiar color bands they see in mainstream editors: red, orange, yellow, green, aqua, blue, purple, and magenta. Each band can shift hue, saturation, and luminance independently, so a preset can cool shadows, tame greens, or warm skin tones without forcing the user into a global color cast.
Working space
This stage runs in gamma-encoded Rec.2020 — the sRGB transfer curve
applied to Rec.2020 linear values — alongside basic tone, color
grading, tone curves, detail, grain, and vignette. The HSL palette
geometry (band centers, half-widths, cosine windows) keeps its
perceptual meaning because the gamma curve shape is unchanged from the
previous sRGB-only design; what's different is the wider gamut
underneath, so wide-gamut headroom from Display P3 or other wide-gamut
inputs survives the per-pixel math instead of being clamped at the
boundary. The final clamp to display gamut happens only at encode. The
[0, 1] clamp on the per-pixel RGB before entering the RGB↔HSL
conversion stays as a domain-safety guard, because the HSL palette is
only defined on that range.
How it works
HSL runs in the gamma-space per-pixel stage, after the basic tone curve controls and before color grading and the final LUT. That placement matters: HSL is a perceptual color tool, so it belongs with the other gamma-encoded adjustments instead of the linear-light exposure and white balance work. On the GPU path, the shared gamma-adjustment stage still dispatches, but the shader skips the HSL substep entirely when no HSL channel is active.
The public data model is HslChannels, which stores one HslChannel
for each of the 8 bands:
| Band | Center hue | Half-width |
|---|---|---|
| Red | 0° | 30° |
| Orange | 30° | 30° |
| Yellow | 60° | 30° |
| Green | 120° | 60° |
| Aqua | 180° | 60° |
| Blue | 240° | 30° |
| Purple | 270° | 30° |
| Magenta | 330° | 30° |
The centers are not evenly spaced. The warm side gets tighter spacing so the red, orange, and yellow bands can separate skin-tone work more precisely, while the green and aqua bands get wider windows because the gaps around them are larger. The half-width values are explicit per-band radii in code, not one universal cutoff, so each band reaches zero at its own configured edge.
Each HslChannel stores three user-facing controls:
huein degrees, from-180to+180saturationin percent, from-100to+100luminancein percent, from-100to+100
The implementation first converts the pixel from gamma Rec.2020 RGB into HSL, then accumulates weighted per-band deltas:
if pixel_saturation < 1e-4:
    return original RGB

for each band i:
    distance = hue_distance(pixel_hue, center[i])
    weight = cosine_weight(distance, half_width[i]) * pixel_saturation
    hue_delta += weight * hue_shift[i]
    sat_delta += weight * (saturation_shift[i] / 100)
    lum_delta += weight * (luminance_shift[i] / 100)

new_hue = wrap(pixel_hue + hue_delta, 0, 360)
new_sat = clamp(pixel_sat + sat_delta, 0, 1)
new_lum = clamp(pixel_lum + lum_delta, 0, 1)
The hue math uses the shortest arc on the color wheel. hue_distance
returns a value in [0, 180], so a pixel near 350° can still match
the red and magenta bands correctly instead of taking the long way
around the circle.
The saturation guard handles the case where hue is effectively undefined. Near-gray pixels do not carry a stable hue signal, so the code skips the pass entirely when saturation is almost zero. Even above that cutoff, the per-band weight is scaled by the pixel saturation, so low-chroma pixels fade toward neutrality instead of getting a strong band-specific shove.
The final step converts the adjusted HSL value back to gamma Rec.2020
RGB. Hue wraps around 360 degrees, saturation and luminance stay
clamped to [0, 1], and the RGB result returns to the rest of the
gamma-space pipeline.
The cosine window is the key targeting function. cosine_weight is
1.0 at the band center and falls smoothly to 0.0 at the half-width.
That creates a soft bell-shaped response with zero slope at both ends,
so neighboring bands meet cleanly instead of stepping into each other.
The weight function is pluggable through WeightFn, but cosine is the
default because it gives a smooth, cheap, and predictable band mask.
Why we chose it
The cosine window gives smoother behavior than a boxcar mask. A boxcar would turn each band on at full strength until a hard cutoff, then drop to zero instantly. That makes the boundary visible whenever a pixel sits near two adjacent bands or when a user drags a slider across a hue transition. Cosine weighting keeps the response continuous, so the same pixel changes gradually as it moves through the overlap region.
The cosine curve also matches the mental model of an HSL panel better than a rigid mask. Editors expect a color band to have a center of maximum influence and a gradual falloff toward neighboring bands. That is exactly what the cosine window expresses. The implementation pays a tiny trigonometric cost per active band, but in return it avoids the hard-edged transitions and banding artifacts that a boxcar introduces.
The shortest-arc hue distance is the other important choice. Hue is
cyclic, so red at 0° and red at 360° are the same color. Using the
wrapped distance keeps the band masks symmetric around the color wheel
and makes the red and magenta edges behave correctly at the wrap point.
The saturation guard is just as deliberate. HSL is only meaningful when the pixel already has some chroma. If the input is nearly gray, the implementation leaves it alone instead of inventing a hue from numerical noise. That keeps neutral areas stable and avoids pushing highlight noise into a colored tint.
Parameters and constants
The public model is HslChannels, which contains eight HslChannel
values in band order. The internal constants below shape the targeting
math.
| Constant | Value | Role | Sensitivity |
|---|---|---|---|
| Channel count | 8 | Number of color bands exposed to the user | Defines the entire user surface — adding or removing bands would change the preset schema. |
| Band centers | 0° / 30° / 60° / 120° / 180° / 240° / 270° / 330° (red / orange / yellow / green / aqua / blue / purple / magenta) | Hue angle each band targets | Shifts the perceived "what counts as orange" line; the chosen values match Lightroom's HSL layout so presets cross-port well. |
| Warm-band half-width | 30° | Influence radius for red, orange, and yellow | Narrower would make warm-band edits more surgical but produce visible band transitions; wider blurs the distinction between adjacent warm bands. |
| Mid-band half-width | 60° | Influence radius for green and aqua | Wider than warm/cool bands because the green-aqua region of the wheel is sparser; narrowing would leave gaps where pixels match no band strongly. |
| Cool-band half-width | 30° | Influence radius for blue, purple, and magenta | Same trade-offs as the warm-band half-width. |
| Gray cutoff | 1e-4 | Skips pixels with effectively undefined hue | Deliberately tiny — only suppresses pixels whose hue signal is too weak to trust. Raising it visibly desaturates near-gray pixels under HSL adjustments. |
Beyond the expected range: HSL does not preset-validate the
per-channel hue / saturation / luminance shifts, so out-of-range values
reach the algorithm. Hue shifts are angles in degrees and wrap modulo
360°. Saturation and luminance shifts are percents that the
implementation maps to ±1.0 internally; values past ±100 accumulate
proportionally but the per-pixel result is clamped to [0, 1] after the
adjustment, so very large shifts saturate against the clamp instead of
producing more visible change.
Preset-slider mapping
In preset TOML, HSL lives under one [hsl] block with one nested table
per band:
[hsl.red]
hue = 5.0
saturation = -15.0

[hsl.orange]
saturation = 10.0
luminance = 5.0

[hsl.green]
saturation = -40.0
Each nested table maps directly to HslChannel { hue, saturation, luminance }. Missing fields default to 0.0, so an omitted channel or
an omitted field inside a channel stays neutral. That keeps presets
compact and lets users touch only the bands they actually want to
change.
The units map literally:
- hue shifts are degrees around the color wheel
- saturation shifts are percentages that become
-1.0..=1.0internally - luminance shifts are percentages that become
-1.0..=1.0internally
A 0.0 saturation shift leaves chroma unchanged, and a 0.0
luminance shift leaves brightness unchanged. A channel only affects the
image when its own values are non-zero and the pixel hue falls inside
that channel's cosine window.
Source
- CPU (Rust):
crates/agx/src/adjust/hsl.rs - GPU helper functions:
crates/agx/src/shaders/common/color.wgsl - GPU dispatch path:
crates/agx/src/engine/gpu/stages/gamma_adjustments.rs - GPU shader path:
crates/agx/src/shaders/gamma_adjustments.wgsl - GPU parameter upload:
crates/agx/src/engine/gpu/params.rs
The CPU and GPU implementations use the same band order, the same
center hues, the same half-widths, and the same shortest-arc hue math.
The CPU code exposes WeightFn so the window function stays swappable,
while the current pipeline uses cosine_weight on both sides of the
renderer.
References
No canonical external paper applies — eight-band HSL with cosine-window hue selection is a conventional photo-editor formulation. AgX-specific band centers, half-widths, and the shortest-arc hue math are recorded inline in the source.
See also
- Concept references: Color (HSL entry), Color models (HSL section)
- API references: HSL
- Related explanations: Color grading, Tone curves
- How-tos: Write your own preset
Color grading
Pipeline
flowchart TD
    Pixel["Per-pixel RGB (gamma space)"] --> Lum["luminance l (Rec. 709)"]
    Lum --> Bal["l_adj = l ^ (2 ^ (-balance/100))"]
    Bal --> Masks["zone weights<br/>w_s = (1 - l_adj)^2<br/>w_h = l_adj^2<br/>w_m = 1 - w_s - w_h"]
    SH["Shadow wheel<br/>(hue, sat, lum)"] --> RT
    MID["Midtone wheel"] --> RT
    HI["Highlight wheel"] --> RT
    Masks --> RT["regional_tint =<br/>w_s*tint_s + w_m*tint_m + w_h*tint_h"]
    GL["Global wheel"] --> CT
    RT --> CT["combined_tint =<br/>regional_tint * tint_g"]
    Pixel --> Mul["pixel * combined_tint"]
    CT --> Mul
    Mul --> Add["+ weighted luminance offsets<br/>w_s*lum_s + w_m*lum_m + w_h*lum_h + lum_g"]
    Masks --> Add
    Add --> Out["Clamp 0..1"]
Each wheel's hue/saturation pair is converted to an RGB tint once per render via three cosine lobes spaced 120° apart; the balance exponent and the precomputed wheel data are then fixed inputs to the per-pixel inner loop. The three zone weights always sum to one, so regions blend smoothly instead of producing hard boundaries.
Color grading blends three tonal wheels - shadows, midtones, and highlights - plus a global wheel, using the same lift/gamma/gain mental model that photographers already know from tools like DaVinci Resolve. Each wheel can push hue, saturation, and luminance independently, so the effect can stay subtle and neutral or move all the way into a stylized split-tone look.
Working space
This stage runs in gamma-encoded Rec.2020 — the sRGB transfer curve
applied to Rec.2020 linear values — alongside basic tone, HSL, tone
curves, detail, grain, and vignette. The luminance crossover, balance
exponent, and quadratic zone masks keep their perceptual meaning
because the gamma curve shape is unchanged from the previous
sRGB-only design; what's different is the wider gamut underneath, so
wide-gamut headroom from Display P3 or other wide-gamut inputs
survives the wheel math instead of being clamped at the boundary.
The final clamp to display gamut happens only at encode. The Rec. 709
luminance weights and the per-pixel [0, 1] clamp after the tint
multiply stay as domain-safety bounds — the luminance proxy needs to
sit on a defined range for the zone weights to behave.
How it works
The public data model is a ColorWheel for each tonal region. A wheel
stores:
huein degreessaturationas a percentageluminanceas a signed brightness shift
The hue/saturation pair is treated as a polar representation of a tint.
During precomputation, AgX converts each wheel into an RGB multiplier by
sampling three cosine lobes spaced 120 degrees apart. That gives a
compact, stable way to turn one angle plus one radius into a neutral
[1.0, 1.0, 1.0] tint at zero saturation and a smooth color bias at
higher saturation. Luminance stays separate because it is an additive
offset, not a chroma rotation.
The implementation splits work into a precompute phase and a per-pixel
hot path. apply_color_grading_pre is the hot-path entry point, but it
relies on a ColorGradingPrecomputed struct built once per render. That
precompute step does the expensive, loop-invariant work:
- convert each wheel from hue/saturation into an RGB tint
- normalize each wheel's luminance shift into
[-1.0, 1.0] - compute the balance exponent —
2.0raised to the power of-balance / 100(in code,2.0_f32.powf(-balance / 100.0); not bitwise XOR) - cache whether balance is active at all
That keeps the inner loop free of repeated trig and powf work when the
effect is active. When the parameters are neutral, the CPU and GPU paths
still run their shared per-pixel gamma-adjustment stage, but they skip
the color-grading substep inside that stage.
Per pixel, the algorithm first measures luminance in gamma Rec.2020 with the Rec. 709 coefficients:
lum = 0.2126*r + 0.7152*g + 0.0722*b
This is a perceptual proxy, not a linear-light measurement. That choice matches the rest of the gamma-space adjustment stack and makes the region weights feel closer to what an editor user expects to see.
The balance slider shifts where the tonal crossover lands. With a neutral balance, the pixel luminance passes straight into the mask curves. When balance moves negative or positive, the code remaps the luminance with a power curve before weighting the zones. Negative balance expands the shadow region; positive balance gives the highlights more room.
The three zone masks are smooth, overlapping boundaries rather than hard cutoffs. In code they are quadratic crossfades:
w_shadow = (1 - lum_adj)^2
w_highlight = lum_adj^2
w_midtone = 1 - w_shadow - w_highlight
Those masks always sum to 1.0, so the three tonal regions stay
complementary. Near black, the shadow wheel dominates; near white, the
highlight wheel dominates; and the midtone wheel fills the overlap in
between. This behaves like a smoothstep-style transition even though the
implementation uses squared ramps rather than a literal smoothstep
call.
Once the weights are known, AgX blends the shadow, midtone, and highlight RGB tints into one regional tint, then multiplies that by the global wheel. The per-pixel color change is a channel-wise multiply followed by an additive luminance shift:
regional_tint = shadow_tint*w_shadow + midtone_tint*w_midtone + highlight_tint*w_highlight
combined_tint = regional_tint * global_tint

out = clamp(pixel * combined_tint, 0.0, 1.0)
out += shadow_lum*w_shadow + midtone_lum*w_midtone + highlight_lum*w_highlight + global_lum
The order matters. The tint multiply applies the color cast first, and the luminance offset rides on top of it afterward. That keeps the slider behavior close to a classic grading wheel: hue and saturation change the color balance, while luminance pushes the tonal weight of that region brighter or darker.
The three wheels map naturally onto the lift/gamma/gain vocabulary:
- shadows behaves like lift
- midtones behaves like gamma
- highlights behaves like gain
The global wheel is separate because it acts as a uniform finishing trim on the whole image instead of one specific tonal region. That extra global control is useful when the regional wheels establish the look but the whole frame still needs a small overall color bias.
Why we chose it
This model matches the way users already think about grading. The three zone wheels give a direct path from a creative intention - cooler shadows, warmer highlights, cleaner midtones - to a preset parameter set. The global wheel adds the final broad correction without forcing the user to rebalance every region by hand.
The cosine-based hue representation is also a good fit for this problem. It is cheap to compute, it wraps cleanly around the color circle, and it gives a smooth transition from neutral to strongly tinted without needing a larger color model or a lookup table. In practice, the wheel behaves like an intuitive angle-plus-strength dial rather than a fragile RGB recipe.
The luminance masks deliberately stay soft. Hard region boundaries would make the effect visible as bands or halos whenever the user pushes the wheels hard. The smooth overlap keeps the tonal zones continuous, so the image can cross from shadow to midtone to highlight without an obvious seam.
The precompute split is the other important choice. Hue-to-RGB
conversion and balance setup are invariant across the image, so they
belong outside the pixel loop. apply_color_grading_pre keeps the hot
path lean while still using the same math on CPU and GPU. That makes the
rendering cost predictable and keeps the implementation easy to mirror
in shader code.
Parameters and constants
The public model is ColorGradingParams, which contains four wheels and
one balance slider. The internal constants below shape how the math
behaves.
| Constant | Value | Role | Sensitivity |
|---|---|---|---|
| Hue units | degrees | User-facing hue angle for each wheel | Wraps modulo 360°; out-of-range hues land at the equivalent angle. |
| Saturation units | percent | Strength of the tint derived from each hue angle | Scales the tint before mixing; doubling has near-doubled visible effect when other controls are neutral. |
| Luminance units | -100 to +100 (informal — no runtime range validation; the per-pixel luminance result is clamped after the adjustment) | Additive brightness shift for each wheel | At small values feels like "lift the shadows by N%"; large values quickly saturate against the per-pixel [0, 1] clamp and stop being visually proportional. |
| Balance units | -100 to +100 | Shifts the shadow/highlight crossover | The whole feel of the wheel weighting; ±50 is a strong shift, ±100 collapses one zone almost entirely. |
| Rec. 709 luma coefficients | 0.2126, 0.7152, 0.0722 | Gamma-space luminance proxy used for zone weighting | Standard Rec. 709 — changing them shifts which pixels count as shadows vs highlights and changes the feel of the entire tool. |
| Hue-lobe spacing | 120° | Separates the RGB cosine lobes used to form the tint | Tied to RGB channel symmetry; changing it would distort the tint conversion and break expected channel balance. |
| Balance exponent | 2.0 raised to the power of -balance / 100 | Remaps luminance before the zone weights are computed | The exponential shape gives a smooth crossover as the user drags the slider; a linear remap would feel abrupt at the extremes. |
Beyond the expected range: color grading does not preset-validate
its slider values, so out-of-range numbers reach the algorithm directly.
Per-pixel luminance is clamped to [0, 1] after the adjustment, so
pushing a wheel's luminance past ±100 mostly saturates against that
clamp rather than producing larger visible change. Hue values wrap
modulo 360°. Saturation behaves as a multiplier — values above 100
just amplify the tint proportionally.
Preset-slider mapping
Preset TOML uses one root [color_grading] table plus four nested
wheel tables:
[color_grading]
balance = -10.0

[color_grading.shadows]
hue = 200.0
saturation = 30.0
luminance = -5.0

[color_grading.midtones]
hue = 45.0
saturation = 10.0

[color_grading.highlights]
hue = 30.0
saturation = 25.0

[color_grading.global]
hue = 15.0
saturation = 5.0
Each wheel field maps directly to ColorWheel { hue, saturation, luminance }. Missing fields stay neutral, so an untouched wheel still
acts like a no-op. That keeps presets compact and lets users store only
the parts of a grade they actually care about.
The mapping is intentionally literal:
shadowscontrols the lift-like regionmidtonescontrols the gamma-like regionhighlightscontrols the gain-like regionglobalapplies the same tint and luminance bias everywherebalancemoves the tonal crossover point between shadow and highlight
A saturation of zero is neutral regardless of hue, and a luminance of zero leaves that wheel's brightness contribution unchanged. That makes it easy to keep a wheel present in a preset without forcing it to affect the image.
Source
- CPU (Rust):
crates/agx/src/adjust/color_grading.rs - CPU render-stage hookup:
crates/agx/src/engine/stages/per_pixel.rs - GPU upload path:
crates/agx/src/engine/gpu/params.rsandcrates/agx/src/engine/gpu/mod.rs - GPU dispatch path:
crates/agx/src/engine/gpu/stages/gamma_adjustments.rs - GPU shader path:
crates/agx/src/shaders/gamma_adjustments.wgsl
The CPU and GPU implementations follow the same math. The CPU version precomputes wheel tints and balance data once per render, and the GPU path uploads the same derived values into storage buffers before running the per-pixel grading pass.
References
No canonical external paper applies — three-way lift/gamma/gain color grading is a long-standing convention in colorist tooling rather than a published algorithm. AgX-specific calibration (Rec. 709 luma proxy, 120° hue-lobe spacing, exponential balance) is recorded inline in the source.
See also
- Concept references: Color (color grading entry), Color models
- API references: color grading
- Related explanations: Basic adjustments, HSL, Tone curves
- How-tos: Write your own preset, Compose layered looks
Tone curves
Pipeline
flowchart TD
    CP["Control points<br/>5 curves: rgb, luma, R, G, B"] --> Build["Build 5 LUTs (256 entries each)<br/>1. Compute secant slopes<br/>2. Seed Hermite tangents<br/>3. Fritsch-Carlson tangent clamp<br/>4. Sample at x = i / 255"]
    Build --> LUTs["5 cached LUTs"]
    Pixel["Per-pixel RGB"] --> Master["Master RGB curve<br/>r, g, b lookup in LUT_rgb"]
    LUTs --> Master
    Master --> PerCh["Per-channel curves<br/>r via LUT_R, g via LUT_G, b via LUT_B"]
    LUTs --> PerCh
    PerCh --> Luma["Luminance curve<br/>l = 0.2126R + 0.7152G + 0.0722B<br/>l_new = LUT_luma(l)<br/>scale = l_new / l<br/>RGB *= scale"]
    LUTs --> Luma
    Luma --> Out["Clamp 0..1"]
The Fritsch-Carlson tangent limiter at LUT-build time is what keeps the cubic Hermite interpolation monotone: regular cubic splines can overshoot between control points, inventing tonal reversals the user never specified, so AgX clamps the tangent magnitudes whenever the standard monotonicity test fails. Identity curves are detected and skipped at lookup time so untouched channels add no work to the hot path.
Tone curves remap RGB values through five curve slots: a master RGB curve, a luminance curve, and separate red, green, and blue curves. The master curve shapes overall contrast and tonal rolloff. The per-channel curves let the user push color relationships directly. The luminance curve changes brightness while trying to preserve color ratios. Together they cover the classic tone-curve workflow without forcing the user into one fixed interpretation of "tone."
Working space
This stage runs in gamma-encoded Rec.2020 — the sRGB transfer curve
applied to Rec.2020 linear values — alongside basic tone, HSL, color
grading, detail, grain, and vignette. The curve domain ([0, 1]
control points), the LUT sample grid, and the Rec. 709 luminance proxy
keep their perceptual meaning because the gamma curve shape is
unchanged from the previous sRGB-only design; what's different is the
wider gamut underneath, so wide-gamut headroom from Display P3 or
other wide-gamut inputs survives the curve lookup instead of being
clamped at the boundary. The final clamp to display gamut happens only
at encode. The 256-entry LUT index domain stays bounded to [0, 255]
and the per-channel output is clamped to [0, 1] after the luminance
scaling — both are domain-safety guards required by the LUT lookup and
the public normalized range, not aesthetic limits.
How it works
Each curve is defined by control points in normalized coordinates:
(x, y) pairs in [0.0, 1.0], sorted by x, with the first point at
x = 0.0 and the last at x = 1.0. The default curve is the identity
line [(0.0, 0.0), (1.0, 1.0)], so an untouched curve has no effect.
AgX converts each non-identity curve into a 256-entry lookup table once
per render. The table samples the curve at x = i / 255.0 for
i = 0..=255, so the endpoints are represented exactly and the middle
of the curve is dense enough for smooth tonal work. Per-pixel evaluation
then reads from the table with linear interpolation between adjacent
entries. That keeps the hot path small, deterministic, and cheap to
share between CPU and GPU code.
The interpolation itself uses monotone cubic Hermite splines with the Fritsch-Carlson tangent limiter.1 This matters because tone curves are supposed to be editing tools, not surprise generators. Regular cubic splines can overshoot between control points, which can create false reversals: a region the user intended to brighten can dip dark again, or vice versa. Monotone cubic Hermite interpolation keeps a monotone control polygon monotone in the interpolated result, so the curve stays faithful to the points the user actually set.
The implementation follows the standard Fritsch-Carlson procedure:
- Compute the secant slopes between adjacent control points.
- Use the adjacent slopes to seed tangents at each control point.
- Clamp the tangents with the Fritsch-Carlson monotonicity test.
- Evaluate the Hermite basis functions at each of the 256 sample positions.
For a two-point curve, the code falls back to straight linear interpolation. That path is both exact and simpler than forcing the general Hermite machinery to do the same job.
Once the LUTs are built, pixel application runs in three stages and the order matters:
-
Master RGB curve - look up
r,g, andbindependently in the master LUT. This sets the broad tonal shape first. -
Per-channel curves - apply the red, green, and blue LUTs to their matching channels. This is where color grading moves happen: channel compression, split-toned bias, and cross-process style shifts.
-
Luminance curve - compute luminance with the same Rec. 709 coefficients used elsewhere in gamma-space color math, map that luminance through the luma LUT, then scale all channels by the same factor:
scale = l_new / lThat proportional scaling changes brightness while preserving color ratios. If the luminance is near zero, the code skips the division and sets all three channels to the mapped luminance instead. That fallback avoids a divide-by-zero and turns lifted-black cases into a stable neutral gray instead of noisy color fringes.
The per-channel scaling step is clamped back into [0.0, 1.0] after
multiplication. That keeps the adjustment bounded even when a curve
pushes the mapped luminance upward or downward aggressively.
The CPU path caches each non-identity curve in an Option<[f32; 256]>
inside ToneCurvePrecomputed. Identity curves stay as None, so the
renderer can skip the lookup entirely when a channel is neutral. The GPU
path uses the same five 256-entry curves packed contiguously in upload
memory, so both execution paths share the same sampled transfer
function.
Why we chose it
Monotone cubic Hermite interpolation gives the best balance of fidelity, predictability, and implementation cost for tone curves. A piecewise linear curve would avoid overshoot, but it would look too angular once a curve has more than a couple of points. A standard cubic spline looks smoother, but its overshoot can invent tonal behavior the user never specified. The monotone Hermite variant keeps the smoothness of a cubic while refusing to create new extrema between points, which is exactly what a tone-curve editor needs.
The 256-entry LUT is the other half of that choice. It turns spline evaluation into a small table lookup that is easy to reuse across the CPU and shader code paths. Linear interpolation between adjacent LUT entries keeps the table compact without making the result visibly steppy. In practice, the LUT is a cache of the curve, not a lower-quality approximation of it.
The luminance path uses proportional scaling instead of a separate RGB reconstruction because it preserves chroma better than remapping each channel independently. That keeps the luminance curve useful for global brightness shaping while leaving the earlier master and per-channel curves in control of color intent.
Parameters and constants
The public model is ToneCurveParams, which contains five independent
ToneCurve values: rgb, luma, red, green, and blue. The
internal constants below shape interpolation and lookup behavior.
| Constant | Value | Role | Sensitivity |
|---|---|---|---|
| LUT size | 256 | Number of cached samples per curve | Enough for smooth 8-bit and 10-bit output; doubling it would barely change visible quality but doubles upload cost. Halving introduces visible stair-stepping in steep curves. |
| LUT sample step | 1 / 255 | Maps table indices to normalized curve space | Pure index math; tied to LUT size. |
| Fritsch-Carlson limiter threshold | 9.0 | Clamps tangent pairs when alpha^2 + beta^2 is too large | The standard Fritsch-Carlson bound. Lowering it flattens the curve and removes overshoot at the cost of expressiveness; raising it lets users sketch curves that overshoot near tight control-point clusters. |
| Near-zero luminance guard | 1e-6 | Switches to gray fallback instead of proportional scaling | Deliberately tiny — only triggers near pure black where proportional scaling becomes numerically unstable. Raising it would visibly desaturate dark midtones; lowering it risks NaN-ish artifacts. |
| Zero-length segment guard | 1e-9 | Avoids division by zero for degenerate or repeated x spacing | Defensive. Public validation already rejects non-increasing x values; the guard only matters if a malformed curve slips through. |
| Rec. 709 luma coefficients | 0.2126, 0.7152, 0.0722 | Luminance weights shared with the rest of gamma-space color math | Standard Rec. 709 — changing them shifts which pixels register as bright vs dark across every luma-aware adjustment. |
| Output clamp | [0.0, 1.0] | Keeps sampled and scaled values in the public normalized range | Hard clamp at the boundary; not a tuning knob. |
Beyond the expected range: the public ToneCurve::validate() path
rejects control points outside [0, 1] and any non-monotonic x
sequence. Curves that pass validation but produce y values outside
[0, 1] after Fritsch-Carlson interpolation are clamped at lookup
time, so out-of-range curves cannot push pixels past valid linear RGB.
The internal constants above are not user-addressable.
Preset-slider mapping
Tone curves are serialized as per-channel point lists in preset TOML.
Each curve maps directly to the matching field in ToneCurveParams:
[tone_curve.rgb]
points = [[0.0, 0.0], [0.25, 0.20], [0.75, 0.85], [1.0, 1.0]]

[tone_curve.luma]
points = [[0.0, 0.0], [0.5, 0.6], [1.0, 1.0]]

[tone_curve.red]
points = [[0.0, 0.0], [0.5, 0.55], [1.0, 1.0]]
Missing curve sections mean identity for that channel. That keeps presets concise: users only serialize the curves they actually touch, and untouched slots stay neutral.
Validation follows the code in ToneCurve::validate():
- At least two points are required.
- The first point must start at
x = 0.0. - The last point must end at
x = 1.0. xmust increase strictly from point to point.- Both coordinates must stay in
[0.0, 1.0].
Those rules make the preset format predictable and keep the interpolator's assumptions intact.
Source
- CPU (Rust):
crates/agx/src/adjust/tone_curves.rs - GPU lookup path:
crates/agx/src/shaders/gamma_adjustments.wgsl - GPU upload path:
crates/agx/src/engine/gpu/mod.rs,crates/agx/src/engine/gpu/runtime.rs, andcrates/agx/src/engine/gpu/params.rs - GPU shared helpers:
crates/agx/src/shaders/common/tone.wgsl
The CPU and GPU paths share the same five curve slots and the same 256-sample layout. The CPU precomputes the table values with Fritsch-Carlson interpolation; the GPU consumes the uploaded data and does the same linear-in-LUT lookup at render time.
References
F. N. Fritsch and R. E. Carlson (1980). Monotone Piecewise Cubic Interpolation. SIAM J. Numer. Anal. 17(2): 238–246. DOI: https://doi.org/10.1137/0717021.
See also
- Concept references: Tone (tone curves entry), Color models (luminance section)
- API references: tone curves
- Related explanations: Basic adjustments, HSL, Color grading
- How-tos: Write your own preset
Vignette
Vignette darkens or brightens the image edges with a position-dependent multiplicative mask anchored at the center. It is one of the simplest adjustments in AgX but a staple of nearly every film-look preset because it draws the viewer's eye toward the subject.
How it works
The mask is built from the pixel's normalized distance to the image
center. For each pixel (x, y) in a w × h image, the algorithm
computes:
dx = (x - half_w) * inv_x
dy = (y - half_h) * inv_y
d²  = dx² + dy²
base   = clamp(1 - d², 0, 1)
factor = base²
multiplier = 1 + strength * (1 - factor)
output_channel = clamp(input_channel * multiplier, 0, 1)
with strength = amount / 100.0. At the center, factor = 1.0 and the
multiplier is exactly 1.0 (no change). As factor falls toward 0.0
near the edges, the multiplier approaches 1.0 + strength, so the
border darkens uniformly across RGB for negative amount and brightens
for positive amount. The trailing per-channel clamp handles the
small slice of values that would otherwise leave the displayable range.
The shape is chosen by the inv_x/inv_y precompute. Elliptical mode
uses inv_x = 1 / half_w and inv_y = 1 / half_h, so the four edge
midpoints reach d² = 1 at the same time and the fall-off matches the
image aspect ratio. Circular mode uses a single radius — R = max(half_w, half_h) — for both axes. On a non-square image that leaves
the short edges less affected at their midpoints (because they sit
closer to the center than R) and the corners more affected (because
they extend past the circle boundary; the clamp keeps factor from
going negative there).
The squaring factor = base² gives a soft fall-off with a slightly
stronger core than a linear 1 - d² would, and avoids a hard ring at
the boundary. AgX hard-codes this curve rather than exposing it as a
slider — see "Why we chose it" below.
On the CPU path, VignettePrecomputed::new caches half_w,
half_h, the per-axis reciprocals, and the normalized strength once
per render. apply_vignette_pre reuses those cached values, so the
hot path is a handful of multiplies plus the clamp. The GPU shader
reproduces the same mask equation but recomputes the geometry terms per
invocation rather than sharing a struct.
Why we chose it
This is a creative vignette (a stylistic effect applied late in the pipeline), not a lens-correction vignette (undoing optical falloff early). The two have different placements: lens correction runs on linear-light data near the start of the pipeline, before tonal and color adjustments, so it cancels a physical artifact before later math amplifies it. Creative vignette runs in the gamma Rec.2020 working space late in the pipeline, after every tonal and color adjustment, so it shapes the final perceptual image the way a darkroom dodge or a software wash would. AgX puts this stage right before the final gamma-to-linear conversion, matching where Lightroom and Capture One place their "Effects" vignette.
The two-parameter API (amount, shape) is deliberate. Lightroom and
Capture One expose midpoint, feather, roundness, and highlight
priority, but most preset authors only ever touch amount and shape, and
the additional parameters compound surprises in batch processing. The
hard-coded factor = base² curve gives a result that consistently reads
as "vignette" without tuning. If a preset library later demands
midpoint or feather, they can be added as opt-in Option<f32> fields
without breaking existing presets.
Two shape options cover the common cases. Elliptical falloff is the right default because it darkens all four image edges evenly. Circular falloff approximates real lens image-circle behavior — the lens projects a disc onto the rectangular sensor, so the corners receive less light than the centers of the long edges — and is useful for recreating that look on already-corrected files. Off-center placement is intentionally not supported; the effect is anchored to the image midpoint.
Parameters and constants
| Parameter / constant | Value | Role | Sensitivity |
|---|---|---|---|
amount (preset) | f32, expected -100.0..=+100.0, default 0.0 | Strength. Negative darkens, positive brightens, 0.0 is identity (early-out). | Linear in the multiplier — ±50 halves or doubles the edge brightness; ±100 reaches 0.0 or 2.0 at the corner before clamping. Values outside the expected range extrapolate rather than error out. |
shape (preset) | enum Elliptical (default) or Circular | Falloff geometry. | Elliptical = even edge darkening regardless of aspect ratio; Circular = stronger short-edge / corner effect on non-square images. |
| Falloff exponent | 2 (hardcoded — factor = base * base) | Smoothness of the radial transition. | Higher exponents push the effect toward the edges, leaving more of the center untouched; lower exponents spread the falloff inward. Not exposed because adjusting it in a preset rarely beats tweaking amount. |
| Circular radius rule | R = max(half_w, half_h) | Single radius for both axes in Circular mode. | Picking min instead would clip the corners exactly to the image; picking max is the convention that mimics real lenses. |
Output is per-channel-clamped to [0.0, 1.0] after multiplication so a
strong brightening or out-of-range upstream value cannot push a channel
past displayable bounds.
Beyond the expected range: vignette does not preset-validate
amount, so out-of-range values reach the algorithm directly. The
formula extrapolates linearly — amount = 200 gives a corner
multiplier of 3.0 before clamping, amount = -200 gives -1.0
(everything in the corner clamps to black). Values past ±100 quickly
saturate against the per-channel clamp and stop being visually
proportional. shape accepts only the two enum variants; anything else
fails preset parsing.
Preset-slider mapping
[vignette]
amount = -30.0          # darkens edges
shape  = "circular"     # optional; defaults to "elliptical"
amount maps linearly to strength: strength = amount / 100.0. A
preset that omits [vignette] entirely, or sets amount = 0.0, takes
the early-out path in apply_vignette and skips the multiplication
loop. Preset composition (merge/materialize) treats the two fields
independently — a child preset can override amount without touching
shape.
Source
- CPU (Rust):
crates/agx/src/adjust/vignette.rs - GPU (WGSL):
crates/agx/src/shaders/vignette.wgsl - GPU dispatcher:
crates/agx/src/engine/gpu/stages/vignette.rs - Render-pipeline placement: runs in the gamma Rec.2020 working space immediately before the final gamma-to-linear conversion in
engine::render.
The CPU and GPU implementations follow the same mask equation. The CPU
path precomputes VignettePrecomputed once per render; the GPU path
recomputes the per-pixel geometry inline.
References
No canonical external paper applies — this is a standard creative-vignette formulation rather than a published algorithm. The motivation and parameter choices are documented in docs/plans/2026-03-18-vignette-design.md.
See also
- Concept references: Effects (vignette entry)
- API references: vignette
- Related explanations: Grain
- How-tos: Write your own preset, Compose layered looks
Grain
Film grain gives digital images a less sterile surface by reintroducing the kind of irregularity that real sensors and film stocks always have. The effect works because the eye reads small, uneven density changes as texture and physical presence rather than as a perfectly smooth synthetic field.
How it works
grain.rs applies grain in the gamma Rec.2020 working space after the main tonal and detail work. The core pipeline is:
- Build a deterministic white-noise field from the render seed.
- Optionally Gaussian-blur that noise with
sigmaderived fromsize. - Compute per-pixel luminance and use it to weight the grain strength.
- Blend the noise back into each RGB channel with a type-specific amount curve.
The current implementation has three grain presets: GrainType::{Fine,Silver,Harsh}. The original design considered six (adding Soft, Cubic, and Tabular for finer-grained stock emulation) but only the three above are implemented today; the others are deferred until preset authors actually need that resolution. Each preset maps to a fixed internal tuple in GrainTypeConfig:
contrast: scales the final noise amplitude.luma_falloff: controls how quickly grain fades from shadows into highlights.chromatic: controls how much the RGB channels diverge on saturated pixels.amount_curve: shapes the user-facingamountslider before it reaches the noise.
The presets are intentionally simple:
Finefavors subtle texture: lower contrast, steeper luminance falloff, and the lightest chromatic split.Silveris the default middle ground: moderate contrast, moderate falloff, and balanced chromatic behavior.Harshpushes the effect hardest: highest contrast, the weakest falloff, and the strongest chromatic separation.
Internally, the implementation generates one shared noise field plus three channel-specific noise fields. For neutral pixels, the shared field dominates and the grain stays monochrome. For colorful pixels, the channel-specific fields are mixed in more strongly, so the grain picks up the slight color disagreement that real emulsions tend to show.
Why we chose it
AgX uses blur-based sizing instead of a frequency-based size control. That removes the failure mode where extreme size values collapse into blotchy low-frequency artifacts. The blur approach keeps the visual result effectively the same for normal settings, but it is much easier to reason about and tune.
Chromatic variation also lives in the grain type itself rather than in a purely digital RGB-noise model. Real film layers are correlated, not independent, so a small amount of per-channel decorrelation is enough. That is why the implementation uses a mostly shared noise field with only a modest type-specific channel split.
Parameters and constants
The user-facing GrainParams fields are grain_type, amount, size, and seed. Everything below is internal and fixed in code.
| Constant | Value | Role | Sensitivity |
|---|---|---|---|
GRAIN_PARAM_MIN | 0.0 | Lower bound for amount/size validation | Pure schema value; changing it would change the accepted preset range. |
GRAIN_PARAM_MAX | 100.0 | Upper bound for amount/size validation | Same — bumping it widens the slider but doesn't recalibrate downstream constants, so the rest of the math would have to be retuned. |
GRAIN_DEFAULT_SIZE | 50.0 | Default grain size when omitted | Sets the "no size specified" feel to a balanced middle. Lower defaults push the omitted case toward fine grain; higher toward coarse. |
GRAIN_SIZE_CURVE_EXPONENT | 1.5 | Shapes the size-to-sigma curve | Higher exponent makes low size values feel even finer and high values jump to coarse faster; 1.0 would be linear and feel too aggressive at low slider settings. |
GRAIN_LUMINANCE_WEIGHT_SCALE | 0.5 | Scales luminance falloff sensitivity | Doubling it makes shadow-vs-highlight grain emphasis snap harder; halving it flattens grain across the tonal range. |
GRAIN_BLUR_SIGMA_THRESHOLD | 0.3 | Skips blur below this sigma | Threshold below which the Gaussian blur is skipped entirely (it would barely change the noise anyway); raising it makes more "fine" sizes leave the noise un-blurred. |
GRAIN_MAX_SIGMA | 1.0 | Maximum sigma at size 100 | The single biggest knob for "how coarse can grain get?". Raising to 2.0 doubles the visible grain footprint at size = 100. |
GRAIN_REF_RESOLUTION | 2000.0 | Reference long-edge resolution for sigma scaling | Defines the "1× zoom" image. Lower references make grain scale up more aggressively on large images; higher makes it shrink more. |
GRAIN_STRENGTH_MULT | 0.04 | Maps amount to the final modulation strength | A 25% change here is visibly different at the same amount slider; doubling makes mid-grain look harsh and Silver start to feel like Harsh. |
GRAIN_ADDITIVE_END | 0.1 | End of the additive-grain shadow region | Defines where additive shadow grain stops fading in. Raising it pulls the shadow grain band higher up the tonal range. |
GRAIN_MULTIPLICATIVE_START | 0.2 | Start of the multiplicative-grain midtone region | Pairs with the previous knob; together they set the smooth handoff from additive (shadows) to multiplicative (mid+) grain. |
GRAIN_ADDITIVE_SCALE | 0.35 | Scales the additive delta in deep shadows | Direct multiplier on shadow grain visibility; halving it makes shadows almost grain-free. |
GRAIN_FALLOFF_REDUCTION | 0.4 | Reduces luminance falloff as amount rises | At high amount values, this dampens the shadow-emphasis falloff so heavy grain spreads into highlights instead of just blowing out the dark areas. |
| GrainType | contrast | luma_falloff | chromatic | amount_curve | Reasoning |
|---|---|---|---|---|---|
Fine | 0.95 | 2.5 | 0.05 | 0.7 | The softest preset. It keeps contrast low, pushes grain out of highlights, and keeps channel decorrelation barely visible. |
Silver | 1.2 | 1.5 | 0.10 | 0.6 | The default stock-like preset. It balances visible grain with enough chromatic separation to feel filmic without looking digital. |
Harsh | 1.5 | 0.8 | 0.15 | 0.5 | The strongest preset. It preserves grain across more of the tonal range and allows the most visible channel disagreement on saturated pixels. |
Beyond the expected range: preset validation rejects amount and
size outside 0.0..=100.0, so out-of-range values never reach the
algorithm. The seed field is Option<u64> so any non-negative integer
is fine. grain_type accepts only the three string variants (fine,
silver, harsh); anything else fails preset parsing with an explicit
error.
Preset-slider mapping
In a preset TOML file, the [grain] block uses the serialized keys type, amount, size, and seed; that type key corresponds to the Rust GrainParams.grain_type field. The current implementation does not expose chromatic as a user slider; chromatic intensity is baked into the selected grain type.
amount is not linear. The code raises the normalized slider value to the preset's amount_curve before scaling the noise, so low settings stay subtle and the effect ramps in more gently than a straight linear blend would. In practice:
- Low
amountvalues keep the effect mostly invisible and are useful for a light texture pass. - Mid-range values produce the classic visible grain look.
- High values become obvious quickly, especially for
Harsh, because the amount curve is shallower and the contrast multiplier is higher.
size controls the Gaussian blur sigma applied to the noise field. Small values leave the noise nearly unblurred, which reads as fine grain. Larger values increase sigma nonlinearly, so the grain grows coarser without collapsing into the low-frequency blobs that the earlier frequency-based algorithm could produce.
Source
- CPU (Rust):
crates/agx/src/adjust/grain.rs - GPU (WGSL):
The CPU and GPU implementations line up on the user-facing controls, luminance weighting, and the non-chromatic preset behavior, but the current GPU path does not yet implement the CPU chromatic-grain split: the CPU mixes a shared noise field with per-channel chromatic noise, while the GPU applies a single noise field.
References
No canonical external paper applies — AgX's grain is an original implementation. The decisions above are recorded in the AgX design docs: grain, grain size fix, and chromatic grain.
See also
- Concept references: Effects (grain entry), Color models (luminance section — grain is luma-weighted)
- API references: grain
- Related explanations: Noise reduction (the inverse direction), Vignette
- How-tos: Write your own preset, Compose layered looks
Dehaze
Pipeline
flowchart TD
    I["Input I (linear RGB)"] --> DC["dark_channel(I) -- 15x15 patch min"]
    DC --> A["estimate_airlight -- top 0.1% of dark channel"]
    A --> Branch{"amount sign"}
    Branch -- negative --> Blend["I*(1 - s) + A*s, s = -amount/100"]
    Branch -- positive --> Norm["normalize: I / max(A, 0.01)"]
    Norm --> DCN["dark_channel(I/A)"]
    DCN --> Traw["t_raw = 1 - omega * dc_norm, omega = amount/100"]
    I --> Guide["luma guide (Rec. 709)"]
    Guide --> GF["guided_filter -- radius 40, eps 0.001"]
    Traw --> GF
    GF --> Tref["t (refined)"]
    A --> Rec
    Tref --> Rec["recover: J = (I - A) / max(t, 0.1) + A"]
    Rec --> Out["Output J, clamp 0..1"]
    Blend --> Out
Positive amount runs the full Dark Channel Prior recovery path; negative amount reuses the airlight estimate to add scene-aware fog and skips the transmission and guided-filter stages.
Haze lowers contrast because distant scene light is attenuated on the way to the camera and mixed with a veil of atmospheric light. AgX's dehaze pass models that veil explicitly: positive values estimate how much airlight was added and subtract it back out, while negative values do the inverse and re-introduce haze. That negative path matters in practice because it gives preset authors a scene-aware way to pair a softer atmospheric look with stronger contrast, clarity, or color treatments, instead of settling for a flatter-looking image.
How it works
The implementation follows the Dark Channel Prior pipeline from He, Sun, and Tang1, but swaps the original soft-matting refinement for a guided filter in the later He, Sun, and Tang formulation2. In AgX the pass runs on linear RGB data after white balance and exposure, so the haze model operates on physically meaningful intensities before the later gamma-space tonal work.
The haze model is:
I(x) = J(x) * t(x) + A * (1 - t(x))
where I is the observed hazy image, J is the recovered scene
radiance, A is the global atmospheric light color, and t(x) is the
per-pixel transmission. The core idea behind the dark channel prior is
that, in most non-sky outdoor patches, at least one RGB channel gets
very close to zero somewhere in the patch. Haze lifts those dark values
toward the airlight color, so the local minimum becomes a useful haze
estimate.
AgX computes that estimate in five stages for positive values:
dark = dark_channel(I)
A = brightest original pixel among top 0.1% of dark-channel values

if amount < 0:
    strength = clamp(-amount / 100, 0, 1)
    return clamp(I * (1 - strength) + A * strength, 0, 1)

dc_norm = dark_channel(I / max(A, 0.01))
t_raw = 1 - omega * dc_norm
guide = luma(I)
t = guided_filter(guide, t_raw)
J = clamp((I - A) / max(t, 0.1) + A, 0, 1)
Stage by stage:
dark_channel()takes the per-pixelmin(R, G, B), then applies a separable15 x 15min filter. The Rust path uses an O(n) monotonic deque inmin_filter_1d()for each row and column; the GPU path splits the same work acrossdehaze_pixel_min.wgslanddehaze_min_filter.wgsl.estimate_airlight()looks at the top0.1%brightest values in the dark channel and, among those candidate pixels, picks the original RGB pixel with the highestr + g + b. That gives a scene-specific airlight color instead of assuming neutral gray.- For positive dehaze only, the image is normalized by
Aand clamped to a minimum denominator of0.01per channel to avoid unstable division. The normalized dark channel drives the raw transmission estimatet_raw = 1 - omega * dc_norm, whereomega = amount / 100. guided_filter()refinest_rawwith a grayscale guide derived from Rec.709 luminance. The filter computes local linear coefficientsaandb, box-filters them, and reconstructst_refined = mean(a) * guide + mean(b). This removes the blockiness from the patch min filter without washing transmission across hard edges.- The recovery step applies
J = (I - A) / max(t, 0.1) + A, then clamps each channel back to[0, 1]. The0.1floor prevents very small transmission values from exploding noise and halos in dense haze.
Negative values reuse only the first two stages. AgX still estimates the
dark channel and atmospheric light so the added haze is colored by the
image's own airlight, then skips transmission estimation and guided
filtering entirely and blends linearly toward A. That is why negative
dehaze behaves like a scene-aware fog control rather than a generic gray
overlay.
Why we chose it
Dark Channel Prior is a good fit for AgX's constraints: one slider, no per-image tuning, strong results on the outdoor scenes where users expect dehaze to help, and a physically interpretable negative mode that can add haze as well as remove it. AgX intentionally keeps the user model simple. There is only one public strength control; patch size, transmission floor, guided filter radius, and the airlight percentile stay fixed so presets remain portable and predictable.
The same design also chose guided filtering over the original soft-matting refinement. Soft matting is higher ceremony and more expensive for this use case; guided filtering gives the edge-aware transmission cleanup the algorithm needs while staying O(N) and much easier to implement consistently on CPU and GPU.
AgX also keeps the later performance work separate from the image model. Dehaze had become the main CPU bottleneck at large resolutions, so the implementation parallelizes the row and column passes of the separable min and box filters and the embarrassingly parallel pixel loops. The important point for this explanation is that those throughput changes do not change the math: they only change how the same dark-channel, guided-filter, and recovery steps are scheduled.
Parameters and constants
The user-facing control is DehazeParams.amount. Everything below is
fixed in code.
| Constant | Value | Role | Sensitivity |
|---|---|---|---|
DEHAZE_AMOUNT_MIN | -100.0 | Lowest accepted slider value | Schema bound; widening it would require retuning the strength mapping. |
DEHAZE_AMOUNT_MAX | 100.0 | Highest accepted slider value | Same — ±100 already saturates omega to 1.0. |
| Neutral amount | 0.0 | Skips the pass entirely via is_neutral() | Hard zero; any non-zero value runs the full pipeline. |
PATCH_SIZE | 15 | Dark-channel patch width and height | Smaller patches follow local detail tighter but produce noisier transmission; larger patches over-smooth and miss fine haze transitions. |
AIRLIGHT_PERCENTILE | 0.001 | Top 0.1% of dark-channel samples used for airlight candidates | Deliberately tiny so airlight comes from the haziest pixels, not ordinary bright surfaces. Raising it 10× picks sunlit objects; lowering it makes the estimate brittle on small images. |
GUIDED_FILTER_RADIUS | 40 | Radius of the guided filter box windows | Has to be much larger than the min-filter window to smooth its artifacts. Halving leaves visible patch texture in the transmission; doubling over-smooths and bleeds across edges. |
GUIDED_FILTER_EPSILON | 0.001 | Regularizer for the guided filter coefficients | Larger values flatten local contrast; smaller values hug edges tighter but preserve more noise. A 10× change is visibly different in haze-edge fidelity. |
| Airlight denominator floor | 0.01 | Minimum A component when normalizing I / A | Defensive — prevents division blowup on tiny airlight components. Raising it desaturates the recovered image; lowering it can cause speckle on near-black scenes. |
T_MIN | 0.1 | Minimum transmission during recovery | Caps recovery gain at 1 / T_MIN = 10×. Lower values restore more in dense haze but can overshoot to white; higher values leave dense haze visibly under-recovered. |
| Output clamp | [0.0, 1.0] | Keeps recovered pixels in valid linear RGB range | Hard clamp; not a tuning knob. |
omega / fog strength ceiling | 1.0 | Caps amount / 100 and -amount / 100 | Hard saturation at the slider extremes; not user-tunable. |
| Rayon chunk size | 1024 | Work scheduling chunk for parallel pixel loops | Affects only CPU thread scheduling — output is identical regardless. Tiny chunks add overhead; very large chunks reduce parallelism. |
Beyond the expected range: preset validation rejects amount
outside -100.0..=100.0, so out-of-range values never reach the
algorithm. The internal constants above are not user-addressable.
Preset-slider mapping
In preset TOML, dehaze is a single-field block:
[dehaze]
amount = 40.0
That serialized amount maps directly to DehazeParams.amount, with
validation at -100.0..=100.0 and a default of 0.0 when the field or
section is absent.
The slider semantics are intentionally simple:
0is neutral and skips the pass.- Positive values map linearly to
omega = amount / 100.0, so100means "use the full transmission estimate" and smaller values back the effect off proportionally. - Negative values map linearly to
strength = -amount / 100.0, but they do not run the positive recovery equation with a negative sign. They take the scene-aware airlight estimate and blend toward it, which is why negative dehaze feels like adding atmosphere instead of merely lowering contrast.
In other words, the slider is symmetric in range but asymmetric in behavior: positive values solve the haze model, negative values reuse the haze color estimate to synthesize fog.
Source
- CPU (Rust):
crates/agx/src/adjust/dehaze.rs - GPU (dehaze-specific WGSL kernels):
The Rust file above is the canonical CPU implementation. The WGSL list here is limited to the dehaze-specific kernels that implement the GPU side of the same stages; shared supporting shader infrastructure lives elsewhere in the render pipeline.
References
Kaiming He, Jian Sun, and Xiaoou Tang (2009). Single Image Haze Removal Using Dark Channel Prior. CVPR 2009. DOI: https://doi.org/10.1109/CVPR.2009.5206515 PDF: https://people.csail.mit.edu/kaiming/publications/cvpr09.pdf
Kaiming He, Jian Sun, and Xiaoou Tang (2013, online-first 2012). Guided Image Filtering. IEEE Trans. Pattern Anal. Mach. Intell. 35(6): 1397–1409. DOI: https://doi.org/10.1109/TPAMI.2012.213 PDF: https://people.csail.mit.edu/kaiming/publications/pami12guidedfilter.pdf
See also
- Concept references: Detail (dehaze entry)
- API references: dehaze
- Related explanations: Detail pass, Noise reduction
- How-tos: Write your own preset
Noise reduction
Pipeline
flowchart TD
    RGB[Linear RGB] --> Split["Y = 0.2126R + 0.7152G + 0.0722B<br/>Cb = B - Y, Cr = R - Y"]
    Split --> PerCh["For each channel (Y, Cb, Cr)"]
    PerCh --> Atrous["À trous decomposition<br/>5 levels, B3-spline kernel<br/>gap schedule: 1, 2, 4, 8, 16"]
    Atrous --> Bands["5 detail bands + residual"]
    Bands --> Sigma["Estimate sigma per channel<br/>MAD of finest band / 0.6745"]
    Sigma --> Thresh["Soft-threshold each level<br/>t = sigma * scale[k] * strength<br/>scale = [1.0, 1.0, 1.2, 1.5, 2.0]"]
    Thresh --> Recon["Reconstruct: residual + sum(bands)"]
    Recon --> Combine["Recombine Y, Cb, Cr -> RGB"]
    Combine --> Out["Clamp 0..1"]
The luminance, color, and detail sliders parameterize the threshold strengths: luminance and color map to a 0..3 multiplier on Y and on (Cb, Cr) respectively, while detail only protects the finest-scale luminance band by scaling its threshold down toward zero.
Noise reduction runs in linear RGB before the later gamma-space tone and detail work. AgX converts the image into one luminance channel and two chroma-difference channels, denoises each with a redundant à trous wavelet decomposition, soft-thresholds the wavelet detail bands, then reconstructs RGB.1 The redundant, non-decimated structure is the point: every wavelet level stays at full image resolution, so threshold decisions are translation-invariant and do not introduce the zippering or shift sensitivity that a decimated pyramid can produce.
How it works
The denoise pass has three user-facing controls:
luminance: how strongly to denoise the luminance branchcolor: how strongly to denoise the two chroma branchesdetail: how much of the finest luminance band to protect
All three parameters live in 0.0..=100.0. When they are all zero,
is_neutral() short-circuits the entire pass.
1. Split into luminance and chroma
AgX first rewrites linear RGB into one luminance-like channel and two chroma-difference channels:
Y  = 0.2126 R + 0.7152 G + 0.0722 B
Cb = B - Y
Cr = R - Y
That separation is important because luminance noise and chroma noise do not look equally bad. Chroma blotches are usually more objectionable than monochrome grain, so AgX lets the color channels be smoothed independently from the luma channel instead of driving all three RGB channels with one shared threshold.
2. Build a five-level à trous stack
Each channel is decomposed independently into five detail bands plus one final residual. Every level uses the same separable B3-spline low-pass kernel:
[1/16, 4/16, 6/16, 4/16, 1/16]
At level k, the tap spacing is 2^k, so the kernel footprint grows
without downsampling the image:
- Convolve horizontally with the strided B3-spline kernel.
- Convolve that result vertically with the same strided kernel.
- Subtract the smoothed approximation from the previous approximation to get the detail band for that level.
- Reuse the smoothed approximation as the input to the next level.
Boundary handling is mirror reflection at the image edges. The CPU and GPU paths share the same kernel weights, gap schedule, and mirror logic.
3. Estimate the noise floor from the finest band
After level 0, AgX estimates one global noise sigma per channel from the median absolute deviation of that finest detail band:
sigma = median(|detail_0|) / 0.6745
This is a robust estimate for approximately Gaussian noise and is cheap enough to reuse across all coarser bands. AgX does not currently model signal-dependent sensor noise or spatially varying noise; the threshold schedule is driven by this single per-channel sigma.
4. Soft-threshold each wavelet band
Each detail band is shrunk toward zero with soft thresholding:
soft(x, t) = sign(x) * max(|x| - t, 0)
The threshold for each level is:
threshold(level) = sigma * level_scale[level] * strength
with fixed per-level scale factors:
[1.0, 1.0, 1.2, 1.5, 2.0]
The user sliders are mapped as follows:
luminanceandcolormap linearly from0..100to0.0..3.0threshold multipliers.detailmaps todetail_factor = 1.0 - detail / 100.0.- That
detail_factoris applied only to the level-0 luminance threshold. Atdetail = 100, the finest luma band gets zero thresholding; atdetail = 0, it gets the full threshold.
That last point is deliberate. AgX protects the finest-scale luminance detail because that is where edge crispness and texture live. Chroma bands are not given a matching protection term, because the algorithm leans toward removing color speckling more aggressively than monochrome grain.
5. Reconstruct the channel
Once all five detail bands have been thresholded, the denoised channel is reconstructed as:
residual + detail_0 + detail_1 + detail_2 + detail_3 + detail_4
The CPU path keeps the detail bands and residual explicitly, then sums them at the end. The GPU path accumulates thresholded detail bands as it goes and adds the final residual in a last pass. Both produce the same wavelet reconstruction model.
6. Write the denoised channels back to RGB
After denoising, AgX converts the channels back into RGB. The CPU path
clamps once after reconstructing the full (Y, Cb, Cr) triplet, while
the GPU path clamps after each sequential channel write-back.
Conceptually the relationship is still:
R = Y + Cr
B = Y + Cb
G = (Y - 0.2126 R - 0.0722 B) / 0.7152
The CPU implementation reconstructs RGB from the full denoised
(Y, Cb, Cr) triplet in one step, then clamps the final pixel. The GPU
path writes the channels back sequentially: it rescales RGB for the Y
pass, then updates Cb, then Cr, clamping after each pass. The two
paths are meant to produce near-identical output, but they do not use
the exact same write-back mechanism.
Why we chose it
AgX uses à trous denoising because it matches the shape of the pipeline well:
- It is isotropic and translation-invariant, so it behaves predictably on photographic texture and edges.
- The same fixed B3-spline filter bank works on CPU and GPU with almost identical math.
- Per-subband thresholding makes the user model simple: one luma strength, one chroma strength, one finest-detail protection term.
- It fits AgX's adjustment pipeline cleanly as a linear-space full-image pass, alongside dehaze.
AgX intentionally keeps the implementation conservative. There is no learned noise model, no local variance estimation, and no cross-channel joint thresholding. The pass is a fixed five-level stationary wavelet shrinkage stage whose behavior is meant to be stable, portable, and easy to reason about from preset values.
Parameters and constants
| Constant | Value | Role |
|---|---|---|
NR_MIN | 0.0 | Lowest accepted slider value |
NR_MAX | 100.0 | Highest accepted slider value |
| Neutral state | all params 0.0 | Skip the pass entirely |
NUM_LEVELS | 5 | Number of à trous detail bands |
| B3 kernel | [1/16, 4/16, 6/16, 4/16, 1/16] | Separable low-pass filter at every level |
| Gap schedule | 1, 2, 4, 8, 16 | Tap spacing per level |
LEVEL_SCALE | [1.0, 1.0, 1.2, 1.5, 2.0] | Per-band threshold multiplier |
| Sigma constant | 0.6745 | MAD-to-sigma conversion factor |
| Output clamp | [0.0, 1.0] | Keep RGB in valid linear range |
One subtle but important implementation detail: detail by itself does
not add denoising. If luminance == 0 and color == 0, the channel
strengths stay at zero, so the output remains unchanged even if
detail > 0.
Beyond the expected range: preset validation rejects luminance,
color, and detail outside 0.0..=100.0. The internal constants
(filter taps, gap schedule, level scaling) are part of the algorithm
itself rather than tuning knobs — they are listed for transparency,
not exposed for tweaking.
Preset-slider mapping
In preset TOML, noise reduction is serialized as:
[noise_reduction]
luminance = 40.0
color = 25.0
detail = 50.0
Those values map directly to NoiseReductionParams. The semantics are:
luminance = 0disables denoising onY;100maps to a threshold multiplier of3.0.color = 0disables denoising on bothCbandCr;100likewise maps to3.0.detail = 0gives the finest luminance band its full threshold;detail = 100suppresses level-0 luminance thresholding entirely.
The mapping is linear and intentionally narrow. Presets stay portable because all deeper algorithm constants remain fixed in code.
Source
- CPU (Rust):
crates/agx/src/adjust/denoise.rs - GPU dispatcher:
crates/agx/src/engine/gpu/stages/denoise.rs - GPU WGSL kernels:
References
Albert Bijaoui, Jean-Luc Starck, and Fionn Murtagh (1994). Multiscale Image Restoration by the À Trous Algorithm / Restauration des images multi-échelles par l'algorithme à trous. PDF: https://gretsi.fr/data/ts/pdf/1994_11_3_1863_1.pdf
See also
- Concept references: Detail (noise reduction entry), Color models
- API references: noise reduction
- Related explanations: Detail pass, Dehaze, Grain
- How-tos: Write your own preset
Detail pass
The detail pass is AgX's three-slider neighborhood stage. It runs on the gamma Rec.2020 working-space buffer after the per-pixel tone, HSL, color grading, and LUT work, but before the final conversion back to linear RGB. The pass covers sharpening, clarity, and texture with one common idea: build a blurred version of the image, subtract it from the original to isolate a frequency band, then add some of that band back in. All three controls work on luminance only, so the code can change local detail without pulling color channels apart and creating colored halos.
How it works
The shared machinery is a separable Gaussian blur plus a luminance-only unsharp mask:
- Convert each RGB pixel to luminance with the Rec. 709 weights stored
in the parent
adjustmodule asLUMA_R,LUMA_G, andLUMA_B(referenced assuper::LUMA_Retc. insidedetail.rs). - Build a 1D Gaussian kernel whose half-width is
ceil(3 * sigma). - Blur horizontally, then vertically, clamping sample coordinates at the image edges.
- Compute
high_freq = luminance - blurred_luminance. - Add
strength * high_freqback into R, G, and B equally.
That shared structure is what keeps the three sliders consistent. The pass applies the controls sequentially to the evolving buffer in this order: texture, then clarity, then sharpening. That ordering matters: later sliders see the result of earlier ones instead of always sampling the original image. The only thing that changes between the three sub-passes is the blur scale and, for sharpening, the extra threshold/masking gates.
Texture
Texture targets fine detail. In the current implementation it uses a
fixed sigma of 3.0, so it reacts to the highest-frequency visible
structure in the image: pores, fabric weave, leaf edges, and other small
surface variation. Positive values add that fine-scale contrast back in;
negative values soften it.
Because texture is just the shared unsharp-mask pipeline with a small blur radius, it stays local. It does not try to infer semantic regions or preserve edges differently from texture. It simply works at the finest band the pass exposes.
Clarity
Clarity uses the same unsharp-mask math, but with a much broader fixed
sigma of 20.0. That moves the effect into the mid-frequency range:
larger local transitions, broad texture, and the kind of tonal
modulation that reads as "punch" rather than crisp edge sharpening.
Positive clarity strengthens that medium-scale contrast. Negative clarity softens it. The slider is therefore symmetric in sign but not in scale: it is a single frequency-band adjustment, not a separate contrast system.
Sharpening
Sharpening is the most controlled of the three. It uses the user-facing
radius slider as the Gaussian sigma, with a floor of 0.1 so the
kernel stays well-defined. That makes the control act on the lower end
of the fine-detail range: edge crispness, micro-contrast, and the
smallest recoverable structures.
Sharpening adds two gates on top of the basic unsharp mask:
thresholdremoves low-magnitude high-frequency differences before they get amplified. In code, the slider is converted withthreshold / 255.0, and pixels below that absolute luminance delta are left unchanged. Note the slider feels inverted relative to intuition: a higherthresholdvalue protects more pixels from sharpening (only strong edges pass through), so it suppresses sharpening; a lower value lets even subtle detail get sharpened.maskingcomputes a simple edge map from luminance gradients and usessmoothstep(a Hermite interpolation that smoothly transitions from0.0to1.0as the input crosses a band) to limit sharpening to stronger edges. The edge map is normalized with the fixedEDGE_SCALE = 4.0constant so the slider behaves consistently across images. GPU caveat: the GPU dispatcher currently hard-codesdetail_masking = 0.0, so this gate is CPU-only today (see Source below).
The result is a conventional sharpening control with a little more protection against noise and smooth-surface artifacts than a plain unsharp mask.
Why we chose it
AgX uses a multi-scale unsharp-mask model because it fits photo-editing expectations well: texture, clarity, and sharpening map cleanly to increasing spatial frequency bands, and the behavior is easy to reason about from preset values alone.
AgX also keeps the implementation conservative on purpose. Texture and clarity use fixed blur scales, while sharpening keeps only one user radius. That makes presets portable: a value means the same thing across images instead of depending on a learned model or per-photo tuning.
The neutral case is equally important. DetailParams::is_neutral()
checks only the active effect fields - sharpening amount, clarity, and
texture. Radius, threshold, and masking are ignored when sharpening
amount is zero, so the pass can short-circuit completely when the detail
panel is effectively off.
Parameters and constants
The public sliders live on DetailParams and SharpeningParams. The
rest of the numbers below are fixed in code.
| Control | Range | Default | Role |
|---|---|---|---|
sharpening.amount | 0.0..=100.0 | 0.0 | Sharpening strength |
sharpening.radius | 0.5..=3.0 | 1.0 | Sharpening blur sigma |
sharpening.threshold | 0.0..=100.0 | 25.0 | Hard cutoff for low-magnitude detail |
sharpening.masking | 0.0..=100.0 | 0.0 | Edge-aware sharpening gate (CPU-only — GPU path hard-codes 0.0) |
clarity | -100.0..=100.0 | 0.0 | Mid-frequency local contrast |
texture | -100.0..=100.0 | 0.0 | Fine-frequency local contrast |
| Constant | Value | Role | Sensitivity |
|---|---|---|---|
TEXTURE_SIGMA | 3.0 | Fixed blur scale for texture | Defines what "fine" means for the texture slider. Halving it makes texture target even finer detail (single-pixel structure); doubling pushes texture into the same band as clarity. |
CLARITY_SIGMA | 20.0 | Fixed blur scale for clarity | Defines what "mid-frequency" means. Smaller values make clarity behave like a stronger texture; larger values push it toward global tonal contrast. |
SHARPEN_RADIUS_DEFAULT | 1.0 | Default sharpening radius | Sets the "no radius specified" baseline. |
SHARPEN_THRESHOLD_DEFAULT | 25.0 | Default sharpening threshold | Sets the "no threshold specified" baseline. The chosen value is conservative enough that sharpening rarely amplifies smooth-area noise. |
SHARPEN_RADIUS_MIN / MAX | 0.5 / 3.0 | Sharpening radius bounds | Schema bounds; widening would let users pick blurs so wide the result reads as halos rather than crispness. |
SHARPEN_THRESHOLD_MIN / MAX | 0.0 / 100.0 | Sharpening threshold bounds | Schema bounds. |
SHARPEN_MASKING_MIN / MAX | 0.0 / 100.0 | Sharpening masking bounds | Schema bounds. |
DETAIL_SLIDER_MIN / MAX | -100.0 / 100.0 | Clarity and texture bounds | Schema bounds; the slider feel was calibrated against this range. |
EDGE_SCALE | 4.0 | Fixed gradient normalization for masking | Calibrates how the masking slider feels across images. Smaller values make masking gate harder (only the strongest edges sharpen); larger values let masking pass more of the image through. |
Beyond the expected range: preset validation rejects out-of-range
values for every public slider — sharpening.amount, threshold,
masking, and clarity / texture are all hard-clamped at
0.0..=100.0 (or ±100.0 for clarity / texture) before the algorithm
runs, and sharpening.radius is rejected outside 0.5..=3.0. The
internal constants are not user-addressable.
Preset-slider mapping
In preset TOML, the detail pass lives under one [detail] block, with
sharpening nested underneath:
[detail]
clarity = 30.0
texture = 15.0

[detail.sharpening]
amount = 40.0
radius = 1.0
threshold = 25.0
masking = 50.0
That maps directly to DetailParams and SharpeningParams. Missing
fields fall back to the defaults above, and an entirely absent [detail]
section materializes as a neutral detail pass.
Source
- CPU (Rust):
crates/agx/src/adjust/detail.rs - GPU dispatcher:
crates/agx/src/engine/gpu/stages/detail.rs - GPU WGSL shaders:
The CPU path implements the full threshold and masking behavior. The
current GPU dispatcher runs the same three sequential passes, but it
sets detail_masking = 0.0 today, so the masking gate is not yet part
of the GPU path.
References
No canonical external paper applies — the unsharp-mask construction is
the standard photo-editing formulation, and AgX's three-band split
plus the EDGE_SCALE = 4.0 calibration are AgX-specific design
choices recorded inline in the source.
See also
- Concept references: Detail (sharpening and clarity entries)
- API references: detail
- Related explanations: Dehaze, Noise reduction
- How-tos: Write your own preset